| Site News |
|---|
| Warning: This wiki contains spoilers. Read at your own risk! Social media: If you would like, please join our Discord server, and/or follow us on X (Twitter) or Tumblr! |
Garreg Mach Monastery: Difference between revisions
| (40 intermediate revisions by 4 users not shown) | |||
| Line 1: | Line 1: | ||
{{Location Infobox | {{Location Infobox | ||
|image=[[File:FETH Garreg Mach Monastery.jpg|200px]] | |image=[[File:FETH Garreg Mach Monastery.jpg|200px]] | ||
|caption=Artwork of the Garreg Mach Monastery. | |caption=Artwork of the Garreg Mach Monastery. | ||
|country=None | |country=None | ||
|appearances={{title|Three Houses}} | |appearances=*{{title|Three Houses}} | ||
*{{title|Warriors: Three Hopes}} | |||
*{{title|Engage}} <small>(Holy Tomb)</small> | |||
}} | }} | ||
The '''Garreg Mach Monastery''' (pronounced {{IPA|ˌgɛɹɛg ˈmɑk}}, Japanese: {{hl|ガルグ=マク大修道院|Garugu Maku dai Shūdō-in}} ''Garreg Mach Monastery'') is a large structure situated in the mountain range at the center of [[Fódlan]]. It houses a cathedral dedicated to the [[Church of Seiros]] and facilities for the Officers Academy. At the Officers Academy there are three houses, the [[Black Eagles]], [[Blue Lions]], and [[Golden Deer]]. Students from [[ | The '''Garreg Mach Monastery''' (pronounced {{IPA|ˌgɛɹɛg ˈmɑk}}, Japanese: {{hl|ガルグ=マク大修道院|Garugu Maku dai Shūdō-in}} ''Garreg Mach Monastery'') is a large structure situated in the mountain range at the center of [[Fódlan]]. It houses a cathedral dedicated to the [[Church of Seiros]] and facilities for the Officers Academy. At the Officers Academy there are three houses, the [[Black Eagles]], [[Blue Lions]], and [[Golden Deer]]. Students from the [[Adrestian Empire]], the [[Holy Kingdom of Faerghus]], and the [[Leicester Alliance]] attend the academy. It also acts as the hub for {{FE16}}. | ||
==History== | ==History== | ||
| Line 13: | Line 14: | ||
Garreg Mach Monastery was established on the 25th of Ethereal Moon in the year 185. In celebration of the monastery's completion, Saint [[Seiros]] held a ritual in an attempt to resurrect [[Sothis]]. This ritual would be known as the "Rite of Rising", and would involve the [[Four Apostles]] filling their blood—and thus their [[crest]]s—into the [[Chalice of Beginnings]]. The ritual failed, and the four apostles left the monastery. | Garreg Mach Monastery was established on the 25th of Ethereal Moon in the year 185. In celebration of the monastery's completion, Saint [[Seiros]] held a ritual in an attempt to resurrect [[Sothis]]. This ritual would be known as the "Rite of Rising", and would involve the [[Four Apostles]] filling their blood—and thus their [[crest]]s—into the [[Chalice of Beginnings]]. The ritual failed, and the four apostles left the monastery. | ||
The monastery would then become the base of the | The monastery would then become the base of the Central Church and Fódlan's primary religious institution. Politically, it is neutral territory in the center of Fódlan. Somewhere around 980, following an invasion by the forces of [[Almyra]], the officer's academy would be founded at Garreg Mach Monastery in an effort to train Fódlan's youth to resist future invasions. | ||
===''Fire Emblem: Three Houses''=== | ===''Fire Emblem: Three Houses''=== | ||
====Academy Phase==== | ====Academy Phase==== | ||
In the year 1180, when | In the year 1180, when ''Three Houses'' takes place, it is the residence of archbishop [[Rhea]]. [[Byleth]] and [[Jeralt]] are brought to the monastery after they are found by [[Alois]] and Byleth is offered a teaching position at the officer's academy. During [[The Goddess's Rite of Rebirth|Chapter 4]], the monastery is raided by soldiers of the Western Church, who Byleth and their class are encountered by at the Holy Mausoleum. After the battle, their leader finds the [[Sword of the Creator]] in the coffin dedicated to Saint Seiros. After his defeat, Byleth is given the sword. | ||
Two months later, during [[Rumors of a Reaper|Chapter 6]], [[Flayn]] is kidnapped. While searching for her, Byleth and their class find a hidden passage in [[Jeritza]]'s room that reveals an underground room complex. There, they find the [[Death Knight]] as well as Flayn and [[Kronya|Monica]]. They manage to drive off the Death Knight, but due to those events, [[Seteth]] considers leaving the monastery as he no longer thinks it is safe for him and his sister to stay there. Flayn and Byleth convince him that the knights and professors at the monastery are the safest environment for the two, and Flayn joins Byleth's class. For a short time, life at the monastery returns to normal, with the traditional | Two months later, during [[Rumors of a Reaper|Chapter 6]], [[Flayn]] is kidnapped. While searching for her, Byleth and their class find a hidden passage in [[Jeritza]]'s room that reveals an underground room complex. There, they find the [[Death Knight]] as well as Flayn and [[Kronya|Monica]]. They manage to drive off the Death Knight, but due to those events, [[Seteth]] considers leaving the monastery as he no longer thinks it is safe for him and his sister to stay there. Flayn and Byleth convince him that the knights and professors at the monastery are the safest environment for the two, and Flayn joins Byleth's class. For a short time, life at the monastery returns to normal, with the traditional Battle of the Eagle and Lion and the White Heron Cup alongside as well as a big ball being held as usual. | ||
During an attack by [[Demonic Beast]]s on the monastery, Monica kills Jeralt from behind. When giving chase to his murderer, Byleth is seperated from their class as [[Solon]] sends them off to [[Zahras]]. To escape, | During an attack by [[Demonic Beast]]s on the monastery, Monica kills Jeralt from behind. When giving chase to his murderer, Byleth is seperated from their class as [[Solon]] sends them off to [[Zahras]]. To escape, Sothis grants Byleth her power, changing their hair and eye colour and returning the true power of the Sword of the Creator in the process. Because of this, Rhea wishes for Byleth to sit on Sothis's throne at the Holy Mausoleum to receive a revelation from the goddess. | ||
As they try to hold ceremony, Rhea, Byleth, and their class are attacked by the imperial army led by the [[Flame Emperor]] and [[Metodey]] who attempt to steal as many [[Crest | As they try to hold ceremony, Rhea, Byleth, and their class are attacked by the imperial army led by the [[Flame Emperor]] and [[Metodey]] who attempt to steal as many [[Crest Stone]]s as possible from the Holy Mausoleum. Their attempt fails, but during the battle (or if the Black Eagles were chosen, before the battle), the Flame Emperor's identity is revealed to be Edelgard. As her identity is no longer a secret, she now openly declares war on the Church of Seiros and leads an attack on the monastery in the following month. Her attack succeeds, and the monastery is taken over by Adrestia. | ||
====Silver Snow==== | ====Silver Snow==== | ||
Five years later, the Black Eagles students meet at the monastery due to a promise they made to | Five years later, the Black Eagles students meet at the monastery due to a promise they made to Byleth. Byleth, who only just awakened after five years of unconsciousness, runs into [[Edelgard]] first. Edelgard attempts to persuade Byleth to join her cause once again, but they refuse. They briefly fight each other before Edelgard leaves to return to the Empire. Seteth, who returned to the monastery along with the [[Knights of Seiros]] after they failed to find Rhea, finds Byleth at the monastery. Together, they decide to fight back against the bandits who have been using the monastery as a hideout. During the battle, the remaining Black Eagles students – with the exception of [[Hubert]] – also arrive and assist them in driving back the bandits. | ||
Led by [[Randolph]], the imperial army attempts to take back the monastery, but when their attempt fails and Randolph dies, they are forced to give up the monastery. In the following months, the monastery becomes the newly founded Resistance army's base of operations and the students make an attempt to do some repair work at the monastery. | Led by [[Randolph]], the imperial army attempts to take back the monastery, but when their attempt fails and Randolph dies, they are forced to give up the monastery. In the following months, the monastery becomes the newly founded Resistance army's base of operations and the students make an attempt to do some repair work at the monastery. | ||
After the war with the | After the war with the Empire has ended and [[those who slither in the dark]] are defeated, Rhea can no longer control her anger and transforms into the Immaculate One. The monastery becomes the battlefield for the fight against her and the cardinals of the Church of Seiros who have accepted blood from Rhea. After she is defeated, she lands at the cathedral and transforms back into her human form. | ||
====Azure Moon==== | ====Azure Moon==== | ||
Like the Black Eagles in their route, the Blue Lions students meet at the monastery due to a promise they made to | Like the Black Eagles in their route, the Blue Lions students meet at the monastery due to a promise they made to Byleth. Byleth, who only just awakened after five years of unconsciousness, meets [[Dimitri]] at the monastery. Dimitri, now possessed by his hatred, immediately decides to hunt down the Bandits who have used the mastery as a hideout. Byleth accompanies him. During the battle, the remaining Blue Lions students – with the exception of [[Dedue]] – also arrive and assist them in driving back the bandits. | ||
Led by | Led by Randolph, the imperial army attempts to take back the monastery, but when their attempt fails and Randolph is killed by Byleth, they are forced to give up the monastery. In the following months, the monastery becomes the Kingdom army's new base of operations and the students make an attempt to do some repair work at the monastery. | ||
====Verdant Wind==== | ====Verdant Wind==== | ||
Like the other two houses, the Golden Deer students meet at the monastery due to a promise they made to | Like the other two houses, the Golden Deer students meet at the monastery due to a promise they made to Byleth. Byleth, who only just awakened after five years of unconsciousness, meets [[Claude]] at the monastery. Claude then decides to pass the time by hunting down the bandits who have been using the monastery as a hideout for the past five years. During the following battle, the remaining Golden Deer students arrive at the monastery and help Claude and Byleth to defeat [[Pallardó]] and his men. After the battle, the Knights of Seiros also arrive at the monastery after searching for the missing Archbishop Rhea for the past five years. Together, the Alliance army and the Knights of Seiros decide to resist against the monastery under the banner of a new resistance army, and choose to use the monastery as their base of operations due to it being neutral ground while Leicester is split between those who support the Empire and those who want to resist against it. | ||
Led by | Led by Randolph, the imperial army attempts to take back the monastery, but when their attempt fails and Randolph dies, they are forced to give up the monastery. In the following months, the monastery remains the Resistance army's base of operations and the students make an attempt to do some repair work at the monastery. | ||
====Crimson Flower==== | ====Crimson Flower==== | ||
Unlike in the other routes, in the Crimson Flower route, the Imperial army does not abandon Garreg Mach Monastery. Instead, | Unlike in the other routes, in the Crimson Flower route, the Imperial army does not abandon Garreg Mach Monastery. Instead, Edelgard and her former classmates – who are now united under the banner of the Black Eagle Strike Force – are at the monastery when Byleth reappears after going missing during the initial attack on the monastery five years prior. Following Byleth's reappearance, Adrestia makes progress towards Leicester, but while they are busy with subduing the Alliance, the Church of Seiros – who have fled to Faerghus – is preparing an attack on the monastery. Byleth, Edelgard, and their army return to the monastery in time, but they now have to defend it against a force led by Seteth. In the following battle, depending on player actions, Seteth and Flayn are either killed or forced to retreat and go into hiding. While Byleth and their army are fighting Seteth's forces, the rest of the Imperial army is defending the monastery against a force led by Rhea and [[Catherine]]. This force is also driven back, but notable commanders, including Randolph and [[Ladislava]], fall in battle. The monastery remains in the possession of the Imperial army for the remainder of the route. | ||
====Cindered Shadows==== | ====Cindered Shadows==== | ||
In the | In the Cindered Shadows side story, it is revealed that a secret underground city exists below the monastery. This city, known as [[Abyss]], is a refuge for those who have been shunned on the surface and is also home to an unofficial fourth house, known as the [[Ashen Wolves]] house. Byleth and their students decide to help the Ashen Wolves to defend against those who seek to destroy Abyss, and end up finding the Chalice of Beginnings hidden beneath the monastery. After they escape from its guardians, they find that [[Aelfric]]—the cardinal who has been responsible for Abyss—has been abducted. Byleth, the Ashen Wolves, and the remaining students attempt to rescue him, but after they defeat the bandits, [[Yuri]] steals the chalice from Byleth. Aelfric then reveals that he wishes to obtain the chalice as well as the blood of the Four Apostles to perform a ritual. He attempts to perform the ritual at the Holy Tomb, but it fails and he transforms into an [[Umbral Beast]]. Byleth and their students end up fighting the Umbral Beast at the cathedral, and after they succeed in taking it down, the Ashen Wolves house is officially disbanded by Rhea. However, she decides to keep Abyss as a refuge for those in need. | ||
===''Fire Emblem Warriors: Three Hopes''=== | ===''Fire Emblem Warriors: Three Hopes''=== | ||
Similar to | Similar to ''Three Houses'', in {{FEWA2}}, [[Shez]], the game's protagonist, is taken to the monastery after they assisted Edelgard, Dimitri and Claude to defend themselves against [[Kostas]] and his bandits. Shez is then allowed to join one of the three houses as a student, with Jeritza becoming their new professor. However, due to the ongoing conflicts in all three nations of Fódlan, Rhea decides to close the Officer's Academy, allowing the students to return to their homes. | ||
====Scarlet Blaze==== | ====Scarlet Blaze==== | ||
Two years later, | Two years later, Edelgard declares war on the Church of Seiros. The first step in this war is an attack on the monastery. The attack succeeds, and Rhea, Seteth, Flayn, and the Knights of Seiros are forced to abandon the monastery and escape to the Faerghus. Garreg Mach Monastery then becomes the new residence for [[Count Varley]], the bishop of the newly restored Southern Church. The monastery remains in the posession of the Imperial army for the rest of the war, and is sometimes used as a base for its military forces. However, the Central Church launches multiple attempts to retake the monastery. During [[A Path Forward|the final chapter]], the monastery is besieged by both the Central Church's forces and those who slither in the dark and the Imperial army has to fight against both armies at once to maintain their control over the monastery. It is possible for Count Varley to die during this battle, but if this happens, Hubert simply installs a new bishop in his place. At the end of the battle, Shez, Edelgard and their allies fight against both Rhea and [[Thales]], and, at the end of this battle, claim victory over both. Rhea and Thales die as the bridge that connects the Cathedral to the rest of the monastery collapses beneath them. After this battle, the monastery remains under control of Adrestia. | ||
====Azure Gleam==== | ====Azure Gleam==== | ||
Edelgard declares war on the Church of Seiros and attacks the monastery, forcing the Central Church to abandon it and escape to the Faerghus. Adrestia then installs the bishop of the southern church, Count Varley, in Garreg Mach Monastery. The monastery remains in possession of Adrestia for most of the war until the Kingdom, the Church of Seiros, and Leicester join forces against the Empire. In their [[The End of Tragedy|final mission]], they manage to kill Count Varley and Thales—who has seized control over the Empire after Edelgard's defeat at [[Arianrhod]]—and take back the monastery. | |||
====Golden Wildfire==== | ====Golden Wildfire==== | ||
Due to houses Gloucester and Phlegethon's support, Adrestia marches toward Garreg Mach Monastery and seizes of it. After taking the monastery, they continue their conquest into Leicester. The monastery remains in possession of Adrestia. After the Alliance and the Empire form a pact, the Faerghus and the Central Church attempt to take back the monastery. The Alliance forces aid Edelgard and her forces to defend against the attackers, forcing both Dimitri and Rhea to retreat. Dimitri retreats to [[Fhirdiad]], while Rhea attempts to make a last attempt to defeat the Alliance army at [[Tailtean Plains]]. The monastery remains under the control of Adrestia. | |||
== | ==Map== | ||
{| class="basic" style="padding: 3px; border-spacing: 4px; border-width: 2px; width: 50%" | {| class="basic" style="padding: 3px; border-spacing: 4px; border-width: 2px; width: 50%" | ||
| [[File:Cm fe16 garreg mach monastery.png|500px]] | | [[File:Cm fe16 garreg mach monastery.png|500px]] | ||
| Line 67: | Line 67: | ||
==Mechanics== | ==Mechanics== | ||
In ''Three Houses'', Garreg Mach Monastery acts as the game's hub. It can be explored freely, similar to later locations like the [[Base Camp]] from | In ''Three Houses'', Garreg Mach Monastery acts as the game's hub. It can be explored freely, similar to later locations like the [[Base Camp]] from ''Three Hopes'' or the [[Somniel]] from {{FE17}}. As game's structure is built around the monastery, it features many different mechanics. | ||
===Lessons=== | ===Lessons=== | ||
{{main|Lesson}} | {{main|Lesson}} | ||
Lessons take place on most Mondays. They allow the player to instruct their units in various different skills, including weapons, movement types, and [[authority]]. During Part I, lessons take place in the respective class's classroom, but during Part II, they will instead take place in the Cardinal's Room on the first floor of the monastery. | Lessons take place on most Mondays. They allow the player to instruct their units in various different skills, including weapons, movement types, and [[authority]]. During Part I, lessons take place in the respective class's classroom, but during Part II, they will instead take place in the Cardinal's Room on the first floor of the monastery. | ||
====Exams==== | ====Exams==== | ||
{{main|Class change/Nintendo Switch games#Fire Emblem: Three Houses{{!}}Class change/Nintendo Switch games § ''Fire Emblem: Three Houses''}} | {{main|Class change/Nintendo Switch games#Fire Emblem: Three Houses{{!}}Class change/Nintendo Switch games § ''Fire Emblem: Three Houses''}} | ||
On Byleth's free days or on a mission day, they can send their unit to take a class exam. If a unit passes that exam, they will unlock a new [[class]]. Each unit can only take one exam per day, regardless of whether they succeeded or not. | On Byleth's free days or on a mission day, they can send their unit to take a class exam. If a unit passes that exam, they will unlock a new [[class]]. Each unit can only take one exam per day, regardless of whether they succeeded or not. | ||
===Calendar=== | ===Calendar=== | ||
{{main|Calendar}} | {{main|Calendar}} | ||
The Calendar dictates life at the monastery. On certain days, special events – such as a character's [[birthday]] take place. On most Mondays, | |||
The Calendar dictates life at the monastery. On certain days, special events – such as a character's [[birthday]] take place. On most Mondays, Byleth will be able to [[Lesson|teach their students]]. On most Sundays, Byleth will have a free day and the player will be presented four choices: | |||
* Explore | * Explore | ||
| Line 86: | Line 89: | ||
* Rest | * Rest | ||
Choosing "Fight" will allow the player to attempt [[ | Choosing "Fight" will allow the player to attempt [[auxiliary battle]]s and [[paralogue]]s, while "Rest" will slightly restore all students' motivation as well as 5 points of [[durability]] on the Sword of the Creator. The Mechanics of "Explore" and "Seminar" are covered on this page. | ||
===Exploring=== | ===Exploring=== | ||
| Line 96: | Line 99: | ||
====Activity Points==== | ====Activity Points==== | ||
Most activities at the monastery will consume Activity points. The player will start out each exploration session with their current maximum amount of Activity points, with no way to increase the amount mid-exploration. The amount of activity points the player has is determined by Byleth's [[ | Most activities at the monastery will consume Activity points. The player will start out each exploration session with their current maximum amount of Activity points, with no way to increase the amount mid-exploration. The amount of activity points the player has is determined by Byleth's [[professor level]]. If Byleth's professor level increases during an exploration session, their maximum activity points will increase, however, they will not gain any additional activity points for the current session. | ||
The number of available activity points with each professor level is as listed below: | The number of available activity points with each professor level is as listed below: | ||
| Line 144: | Line 147: | ||
====Bulletin Board==== | ====Bulletin Board==== | ||
Bulletin Boards are found at different places at the monastery. They will inform the player about ongoing events or about new monastery features such as whether the Western and Eastern Merchants are unlocked. They also inform the player about available [[quest]]s at the | Bulletin Boards are found at different places at the monastery. They will inform the player about ongoing events or about new monastery features such as whether the Western and Eastern Merchants are unlocked. They also inform the player about available quests at the monastery. | ||
====Interacting with units==== | |||
If the player explores the monastery, they can find other units at the monastery. In addition to generic characters, in Part I, they will be able to talk to the students from all houses and to most of the Knights of Seiros, depending on chapter. During Part II, they will be limited to units from their own house as well as [[Anna/Three Houses|Anna]]. When interacting with characters, their dialogue will change between chapters, but not based on individual week days (with some exceptions such as the [[White Heron Cup]]. After this, they will be presented the following options (note that depending on the character, their recruitment status, and the player's game progress, not all options will be displayed at all times): | |||
=====Gifts===== | |||
{{main|Gift}} | |||
The player can give certain [[item]]s to other characters to increase [[support]] between that unit and Byleth. Each unit likes and dislikes specific gifts. If a unit especially likes a specific type of gift, the gained support points are doubled, while disliked gifts do not grant any support points. Gifts can be obtained from the [[#Travelling Merchants and Anna's Shop|travelling Merchants]], from the [[#Greenhouse|Greenhouse]], from certain quests, or from blue spots at the monastery. Notably, the [[Owl Feather]] is liked by every character in the game. The player cannot make gifts to units who are not recruitable into their army (e.g. they cannot make gifts to Edelgard unless they chose the Black Eagle House). However, although Rhea is not recruitable during any part of the game, the player can make gifts to her during Part I of any route. | |||
=====Lost items===== | |||
{{main|Lost items}} | |||
Lost items are unlocked by completing the [[Lost? Found!]] quest. Starting from Chapter 3, each month, certain items will appear at certain spots at the monastery. The player can return them to their owner to increase the owner's support with Byleth as well as to raise their motivation if they are in Byleth's class. The player can offer any Lost item to any unit, and presenting a Lost item to the wrong character does not remove the item from the storehouse or reduce support with that character. | |||
Lost items may be picked up and returned at any point during the game after their initial spawn, though to return an item during Part II, its owner needs to be recruited into the player's army. If the Black Eagles were chosen, [[Hilda]]'s Lost items cannot be returned to her until [[To War|Chapter 12]] and can only be returned if Byleth has sided with the Church of Seiros. Her Lost items will spawn during the previous chapters, but cannot be returned until this point – or at all if the player has chosen to side with Edelgard. | |||
By completing the [[Roster Retrieval]] DLC quest, the player will be shown the affiliation of the unit an item belongs to, making it easier to find out which item belongs to whom. | |||
When the game initially released, lost items stopped spawning at the start of Part II, though all of Jeritza's lost items as well as a lost item belonging to Anna that appear during Part II were later added through updates. | |||
====Quests==== | =====Quests===== | ||
{{main|List of quests in Fire Emblem: Three Houses{{!}}List of quests in ''Fire Emblem: Three Houses''}} | {{main|List of quests in Fire Emblem: Three Houses{{!}}List of quests in ''Fire Emblem: Three Houses''}} | ||
====Recruiting Characters==== | Sometimes, NPCs at the monastery will make specific requests. Usually, quests include obtaining an item and giving it to a certain unit. Depending on the quest, the player will be rewarded with items, [[gold]], or [[renown]]. The completion of certain quests is also required to unlock some monastery facilities. | ||
While exploring the monastery, it is possible to recruit characters from other houses as well as faculty members into | |||
=====Tea Time===== | |||
{{main|Tea Party}} | |||
After completing the [[Tea for Two]] quest from [[The Goddess's Rite of Rebirth|Chapter 4]] onward, the player can invite any unit from their house-or any unit they have achieved a C-level [[support]] with-to a tea party during exploration sessions in exchange for one Activity point. However, there is a chance that a character will reject the invitation, and the player may only attempt to invite a character to a tea party once per exploration session. Additionally, from this point onward, they will be granted the option to invite a character for tea time on their [[birthday]]. | |||
At the start of each tea party, the player is prompted to select a tea from their inventory. They may serve any tea, but every character has their own favourites and will react positively if their favourite tea is served. Then, during the tea party, the player will be prompted to select one of three possible conversation topics they will be offered. Out of these, each character has one or more they like, and will react positively if they enjoy the conversation topic. The player can repeat this up to three times, but if they choose bad conversation topics, the tea party may also end early. If the player has chosen good conversation topics three times in a row, they will be asked a question by the character they have invited. If they choose an answer that character likes, they will be granted the opportunity to watch that character while drinking tea. While viewing a character, they may also comment on their own appearance. The player may also make [[gift]]s to that unit at this point. | |||
Completing a tea party will increase [[Byleth]]'s support with chosen character, and has a chance to increase both participants' [[charm]] stat by up to 2 points if the player has chosen good responses. | |||
=====Recruiting Characters===== | |||
While exploring the monastery, it is possible to recruit characters from other houses as well as faculty members into Byleth's class. Not every character can be recruited at all times, as certain characters are restricted by route or only become available after a certain chapter. To recruit a character, Byleth has to ask them to join their house and fulfill that character's recruitment requirements: | |||
* Students from other houses require Byleth to be proficient in a specific skill level and meet a certain threshold in a specific stat. | * Students from other houses require Byleth to be proficient in a specific skill level and meet a certain threshold in a specific stat. | ||
* Faculty members require Byleth to meet a specific [[level]] threshold. They also require the player to have advanced enough in the story to recruit them. | * Faculty members require Byleth to meet a specific [[level]] threshold. They also require the player to have advanced enough in the story to recruit them. | ||
* | * Anna can be recruited at any point in the game if the player owns the [[Downloadable content in Fire Emblem: Three Houses|expansion pass]]. | ||
* The | * The Ashen Wolves can be recruited after the player has completed a certain chapter of the [[Cindered Shadows]] side story. | ||
Note that certain characters are unavailable on some routes (e.g. | Note that certain characters are unavailable on some routes (e.g. Edelgard cannot be recruited into the Blue Lion house). Additionally, with the exception of Anna, characters can only be recruited at the monastery during Part I of the game. | ||
===Professor level=== | ===Professor level=== | ||
{{main|Professor level}} | {{main|Professor level}} | ||
Professor level is a mechanic at the monastery that determines the amount of | |||
Professor level is a mechanic at the monastery that determines the amount of gold the player gets at the start of each month, the amount of Activity points they get per free day, how often they can teach their students, and more. Professor experience is gained by using various monastery activities, such as Fishing or the Greenhouse. | |||
==Faculty at the Garreg Mach Monastery== | ==Faculty at the Garreg Mach Monastery== | ||
| Line 170: | Line 203: | ||
Faculty Training becomes available in [[Mutiny in the Mist|Chapter 3]] after clearing the quest [[Learning from the Best]] as an option when exploring the Monastery. Undertaking Faculty Training allows Byleth to receive training in a select skill from any member of the church faculty; which skills are available depend on who is providing the training. A character can only provide faculty training once per free day. Byleth receives 20 points towards the selected skill, an additional 10 if they possess a boon in that skill, and an additional 2 if the relevant bonus from the saint statues has been unlocked. Receiving Faculty Training consumes one activity point. | Faculty Training becomes available in [[Mutiny in the Mist|Chapter 3]] after clearing the quest [[Learning from the Best]] as an option when exploring the Monastery. Undertaking Faculty Training allows Byleth to receive training in a select skill from any member of the church faculty; which skills are available depend on who is providing the training. A character can only provide faculty training once per free day. Byleth receives 20 points towards the selected skill, an additional 10 if they possess a boon in that skill, and an additional 2 if the relevant bonus from the saint statues has been unlocked. Receiving Faculty Training consumes one activity point. | ||
Seminars and Faculty Training are unavailable in [[Outset of a Power Struggle|Chapter 12]] if Byleth sided with | Seminars and Faculty Training are unavailable in [[Outset of a Power Struggle|Chapter 12]] if Byleth sided with Edelgard in [[Throne of Knowledge|Chapter 11]]. | ||
In Part II, Faculty Training changes to the name "Advanced Drills", and a unit must have been recruited in order to host seminars or Advanced Drills; additionally, students become able to host seminars and Advanced Drills. Students function identically to faculty for seminars, but to drill Byleth in a skill, the student must have a higher level in that skill than Byleth. | In Part II, Faculty Training changes to the name "Advanced Drills", and a unit must have been recruited in order to host seminars or Advanced Drills; additionally, students become able to host seminars and Advanced Drills. Students function identically to faculty for seminars, but to drill Byleth in a skill, the student must have a higher level in that skill than Byleth. | ||
| Line 177: | Line 210: | ||
<choose><option>{{#vardefine:A|m}}</option><option>{{#vardefine:A|f}}</option></choose> | <choose><option>{{#vardefine:A|m}}</option><option>{{#vardefine:A|f}}</option></choose> | ||
{| class="cellpadding-3 basic" style="width: 80%" | {| class="cellpadding-3 basic" style="width: 80%" | ||
!style="border-top-left-radius: 15px; width: 15%"|Faculty | ! style="border-top-left-radius: 15px; width: 15%" | Faculty | ||
!style="width: 20%"| Faculty Training / Advanced Drills | ! style="width: 20%" | Faculty Training / Advanced Drills | ||
!style="width: 40%"| Seminar | ! style="width: 40%" | Seminar | ||
!style="border-top-right-radius: 15px; width: 25%"| Notes | ! style="border-top-right-radius: 15px; width: 25%" | Notes | ||
|- | |- | ||
|[[File:Small portrait byleth {{#var:A}} fe16.png|64px]]<br>[[Byleth]] | | [[File:Small portrait byleth {{#var:A}} fe16.png|64px]]<br>[[Byleth]] | ||
| | | — | ||
|style="white-space: nowrap"| Begin a seminar on group tactics and Jeralt's<br>mercenary fighting style.<br>{{Sword16}} {{Authority16}} | | style="white-space: nowrap" | Begin a seminar on group tactics and Jeralt's<br>mercenary fighting style.<br>{{Sword16}} {{Authority16}} | ||
| | | — | ||
|- | |- | ||
|[[File:Small portrait seteth fe16.png|64px]]<br>[[Seteth]] | | [[File:Small portrait seteth fe16.png|64px]]<br>[[Seteth]] | ||
|{{Sword16}} {{Lance16}} {{Axe16}} {{Authority16}} {{Flying16}} | | {{Sword16}} {{Lance16}} {{Axe16}} {{Authority16}} {{Flying16}} | ||
|style="white-space: nowrap"| Begin a seminar on an ancient Fódlan fighting<br>style utilizing lance skills.<br>{{Lance16}} {{Authority16}} | | style="white-space: nowrap" | Begin a seminar on an ancient Fódlan fighting<br>style utilizing lance skills.<br>{{Lance16}} {{Authority16}} | ||
|Unavailable during [[Rumors of a Reaper|Chapter 6]]. | | Unavailable during [[Rumors of a Reaper|Chapter 6]]. | ||
|- | |- | ||
|[[File:Small portrait hanneman fe16.png|64px]]<br>[[Hanneman]] | | [[File:Small portrait hanneman fe16.png|64px]]<br>[[Hanneman]] | ||
|{{Bow16}} {{Reason16}} {{Riding16}} | | {{Bow16}} {{Reason16}} {{Riding16}} | ||
|style="white-space: nowrap"| Begin a seminar on both reason and bow skills<br>from an esteemed professor of the monastery<br>and the leading Crest scholar in Fódlan.<br>{{Bow16}} {{Reason16}} | | style="white-space: nowrap" | Begin a seminar on both reason and bow skills<br>from an esteemed professor of the monastery<br>and the leading Crest scholar in Fódlan.<br>{{Bow16}} {{Reason16}} | ||
| | | — | ||
|- | |- | ||
|[[File:Small portrait manuela fe16.png|64px]]<br>[[Manuela]] | | [[File:Small portrait manuela fe16.png|64px]]<br>[[Manuela]] | ||
|{{Sword16}} {{Faith16}} {{Flying16}} | | {{Sword16}} {{Faith16}} {{Flying16}} | ||
|style="white-space: nowrap"| Begin a seminar on both faith and sword skills<br>from a beloved professor of the monastery and<br>former songstress.<br>{{Sword16}} {{Faith16}} | | style="white-space: nowrap" | Begin a seminar on both faith and sword skills<br>from a beloved professor of the monastery and<br>former songstress.<br>{{Sword16}} {{Faith16}} | ||
|Unavailable during [[Rumors of a Reaper|Chapter 6]]. | | Unavailable during [[Rumors of a Reaper|Chapter 6]]. | ||
|- | |- | ||
|[[File:Small portrait gilbert fe16.png|64px]]<br>[[Gilbert]] | | [[File:Small portrait gilbert fe16.png|64px]]<br>[[Gilbert]] | ||
|{{Lance16}} {{Axe16}} {{Armor16}} {{Riding16}} | | {{Lance16}} {{Axe16}} {{Armor16}} {{Riding16}} | ||
|style="white-space: nowrap"| Begin a seminar on a fighting style developed<br>by the Knights of Seiros that utilizes lance and<br>axe skills.<br>{{Lance16}} {{Axe16}} | | style="white-space: nowrap" | Begin a seminar on a fighting style developed<br>by the Knights of Seiros that utilizes lance and<br>axe skills.<br>{{Lance16}} {{Axe16}} | ||
|Available from [[Tower of Black Winds|Chapter 5]] onwards.<br>Unavailable in [[Where the Goddess Dwells|Chapter 10]]. | | Available from [[Tower of Black Winds|Chapter 5]] onwards.<br>Unavailable in [[Where the Goddess Dwells|Chapter 10]]. | ||
|- | |- | ||
|[[File:Small portrait alois fe16.png|64px]]<br>[[Alois]] | | [[File:Small portrait alois fe16.png|64px]]<br>[[Alois]] | ||
|{{Axe16}} {{Brawling16}} {{Armor16}} | | {{Axe16}} {{Brawling16}} {{Armor16}} | ||
|style="white-space: nowrap"| Begin a seminar on a fighting style developed<br>by the Knights of Seiros that utilizes axes<br>and gauntlets.<br>{{Axe16}} {{Brawling16}} | | style="white-space: nowrap" | Begin a seminar on a fighting style developed<br>by the Knights of Seiros that utilizes axes<br>and gauntlets.<br>{{Axe16}} {{Brawling16}} | ||
|Unavailable in [[Where the Goddess Dwells|Chapter 10]]. | | Unavailable in [[Where the Goddess Dwells|Chapter 10]]. | ||
|- | |- | ||
|[[File:Small portrait catherine fe16.png|64px]]<br>[[Catherine]] | | [[File:Small portrait catherine fe16.png|64px]]<br>[[Catherine]] | ||
|{{Sword16}} {{Brawling16}} | | {{Sword16}} {{Brawling16}} | ||
|style="white-space: nowrap"| Begin a seminar on a fighting style in which<br>practitioners dominate their opponent using<br>improvised sword and melee techniques.<br>{{Sword16}} {{Brawling16}} | | style="white-space: nowrap" | Begin a seminar on a fighting style in which<br>practitioners dominate their opponent using<br>improvised sword and melee techniques.<br>{{Sword16}} {{Brawling16}} | ||
|Unavailable in [[Where the Goddess Dwells|Chapter 10]]. | | Unavailable in [[Where the Goddess Dwells|Chapter 10]]. | ||
|- | |- | ||
|[[File:Small portrait shamir fe16.png|64px]]<br>[[Shamir]] | | [[File:Small portrait shamir fe16.png|64px]]<br>[[Shamir]] | ||
|{{Lance16}} {{Bow16}} | | {{Lance16}} {{Bow16}} | ||
|style="white-space: nowrap"| Begin a seminar on fighting styles designed for<br>special situations, such as firing a bow from a<br>long distance or battling in the dark.<br>{{Lance16}} {{Bow16}} | | style="white-space: nowrap" | Begin a seminar on fighting styles designed for<br>special situations, such as firing a bow from a<br>long distance or battling in the dark.<br>{{Lance16}} {{Bow16}} | ||
|Unavailable in [[Where the Goddess Dwells|Chapter 10]]. | | Unavailable in [[Where the Goddess Dwells|Chapter 10]]. | ||
|- | |- | ||
|[[File:Small portrait jeralt fe16.png|64px]]<br>[[Jeralt]] | | [[File:Small portrait jeralt fe16.png|64px]]<br>[[Jeralt]] | ||
|{{Lance16}} {{Authority16}} {{Riding16}} | | {{Lance16}} {{Authority16}} {{Riding16}} | ||
|style="white-space: nowrap"| | | style="white-space: nowrap" | — | ||
|Available until [[The Cause of Sorrow|Chapter 9]]. | | Available until [[The Cause of Sorrow|Chapter 9]]. | ||
|- | |- | ||
|[[File:Small portrait rhea fe16.png|64px]]<br>[[Rhea]] | | [[File:Small portrait rhea fe16.png|64px]]<br>[[Rhea]] | ||
|{{Sword16}} {{Brawling16}} {{Reason16}} {{Faith16}} | | {{Sword16}} {{Brawling16}} {{Reason16}} {{Faith16}} | ||
|style="white-space: nowrap"| | | style="white-space: nowrap" | — | ||
|Available only during Part I. | | Available only during Part I. | ||
|- | |- | ||
|[[File:Small portrait jeritza fe16.png|64px]]<br>[[Jeritza]] | | [[File:Small portrait jeritza fe16.png|64px]]<br>[[Jeritza]] | ||
|{{Sword16}} {{Lance16}} {{Brawling16}} {{Riding16}} | | {{Sword16}} {{Lance16}} {{Brawling16}} {{Riding16}} | ||
|style="white-space: nowrap"| Begin a seminar on sword and lance<br>techniques that are considered the best<br>throughout the | | style="white-space: nowrap" | Begin a seminar on sword and lance<br>techniques that are considered the best<br>throughout the Empire. No talking permitted.<br>{{Sword16}} {{Lance16}} | ||
|Unavailable for seminars in Part I.<br>Only available before [[Rumors of a Reaper|Chapter 6]] and during Part II. | | Unavailable for seminars in Part I.<br>Only available before [[Rumors of a Reaper|Chapter 6]] and during Part II. | ||
|- | |- | ||
|style="border-bottom-left-radius: 15px"| [[File:Small portrait anna fe16.png|64px]]<br>[[Anna/Three Houses|Anna]] | | style="border-bottom-left-radius: 15px" | [[File:Small portrait anna fe16.png|64px]]<br>[[Anna/Three Houses|Anna]] | ||
|{{Sword16}} {{Axe16}} {{Bow16}} {{Faith16}} {{Flying16}} | | {{Sword16}} {{Axe16}} {{Bow16}} {{Faith16}} {{Flying16}} | ||
|style="white-space: nowrap"| Begin a seminar on sword and bow skills<br>learned through unavoidable confrontations in<br>the life of a business entrepeneur.<br>{{Sword16}} {{Bow16}} | | style="white-space: nowrap" | Begin a seminar on sword and bow skills<br>learned through unavoidable confrontations in<br>the life of a business entrepeneur.<br>{{Sword16}} {{Bow16}} | ||
|style="border-bottom-right-radius: 15px"| Available only through paid [[Downloadable content in Fire Emblem: Three Houses|DLC]]. | | style="border-bottom-right-radius: 15px" | Available only through paid [[Downloadable content in Fire Emblem: Three Houses|DLC]]. | ||
|} | |} | ||
====Students==== | ====Students==== | ||
{| class="cellpadding-3 basic" style="width: 80%" | {| class="cellpadding-3 basic" style="width: 80%" | ||
!style="border-top-left-radius: 15px; width: 15%"|Faculty | ! style="border-top-left-radius: 15px; width: 15%" | Faculty | ||
!style="width: 20%"| Advanced Drills | ! style="width: 20%" | Advanced Drills | ||
!style="width: 40%"| Seminar | ! style="width: 40%" | Seminar | ||
!style="border-top-right-radius: 15px; width: 25%"| Notes | ! style="border-top-right-radius: 15px; width: 25%" | Notes | ||
|- | |- | ||
|[[File:Small portrait edelgard 02 fe16.png|64px]]<br>[[Edelgard]] | | [[File:Small portrait edelgard 02 fe16.png|64px]]<br>[[Edelgard]] | ||
|{{Sword16}} {{Axe16}} {{Authority16}} {{Armor16}} | | {{Sword16}} {{Axe16}} {{Authority16}} {{Armor16}} | ||
|style="white-space: nowrap"| Begin a seminar on fighting styles utilizing<br>Heavy Armor units' axes, which the Imperial<br>army is known for.<br>{{Axe16}} {{Authority16}} | | style="white-space: nowrap" | Begin a seminar on fighting styles utilizing<br>Heavy Armor units' axes, which the Imperial<br>army is known for.<br>{{Axe16}} {{Authority16}} | ||
| | | — | ||
|- | |- | ||
|[[File:Small portrait dimitri 02 fe16.png|64px]]<br>[[Dimitri]] | | [[File:Small portrait dimitri 02 fe16.png|64px]]<br>[[Dimitri]] | ||
|{{Sword16}} {{Lance16}} {{Authority16}} | | {{Sword16}} {{Lance16}} {{Authority16}} | ||
|style="white-space: nowrap"| Begin a seminar on a fighting style utilizing<br>lance skills and group tactics, which was<br>developed by the Kingdom knights.<br>{{Lance16}} {{Authority16}} | | style="white-space: nowrap" | Begin a seminar on a fighting style utilizing<br>lance skills and group tactics, which was<br>developed by the Kingdom knights.<br>{{Lance16}} {{Authority16}} | ||
|Available from [[The King's Triumphant Return|Chapter 18]] onwards. | | Available from [[The King's Triumphant Return|Chapter 18]] onwards. | ||
|- | |- | ||
|[[File:Small portrait claude 02 fe16.png|64px]]<br>[[Claude]] | | [[File:Small portrait claude 02 fe16.png|64px]]<br>[[Claude]] | ||
|{{Sword16}} {{Bow16}} {{Authority16}} {{Riding16}} {{Flying16}} | | {{Sword16}} {{Bow16}} {{Authority16}} {{Riding16}} {{Flying16}} | ||
|style="white-space: nowrap"| Begin a seminar on utilizing archery for<br>surprise attacks and raids, an approach<br>cultivated in the Alliance territories.<br>{{Bow16}} {{Authority16}} | | style="white-space: nowrap" | Begin a seminar on utilizing archery for<br>surprise attacks and raids, an approach<br>cultivated in the Alliance territories.<br>{{Bow16}} {{Authority16}} | ||
| | | — | ||
|- | |- | ||
|[[File:Small portrait hubert 02 fe16.png|64px]]<br>[[Hubert]] | | [[File:Small portrait hubert 02 fe16.png|64px]]<br>[[Hubert]] | ||
|{{Bow16}} {{Reason16}} {{Authority16}} | | {{Bow16}} {{Reason16}} {{Authority16}} | ||
|style="white-space: nowrap"| Begin a seminar on a fighting style that<br>gradually weakens your enemy using bows<br>or magic.<br>{{Bow16}} {{Reason16}} | | style="white-space: nowrap" | Begin a seminar on a fighting style that<br>gradually weakens your enemy using bows<br>or magic.<br>{{Bow16}} {{Reason16}} | ||
| | | — | ||
|- | |- | ||
|[[File:Small portrait ferdinand 02 fe16.png|64px]]<br>[[Ferdinand]] | | [[File:Small portrait ferdinand 02 fe16.png|64px]]<br>[[Ferdinand]] | ||
|{{Sword16}} {{Lance16}} {{Axe16}} {{Riding16}} | | {{Sword16}} {{Lance16}} {{Axe16}} {{Riding16}} | ||
|style="white-space: nowrap"| Begin a seminar on a fighting style using sword<br>and lance skills that all nobles should be<br>adept in.<br>{{Sword16}} {{Lance16}} | | style="white-space: nowrap" | Begin a seminar on a fighting style using sword<br>and lance skills that all nobles should be<br>adept in.<br>{{Sword16}} {{Lance16}} | ||
| | | — | ||
|- | |- | ||
|[[File:Small portrait linhardt 02 fe16.png|64px]]<br>[[Linhardt]] | | [[File:Small portrait linhardt 02 fe16.png|64px]]<br>[[Linhardt]] | ||
|{{Reason16}} {{Faith16}} | | {{Reason16}} {{Faith16}} | ||
|style="white-space: nowrap"| Begin a seminar on the effects of Crests on<br>one's magic skills, as discovered from personal<br>and independent research.<br>{{Reason16}} {{Faith16}} | | style="white-space: nowrap" | Begin a seminar on the effects of Crests on<br>one's magic skills, as discovered from personal<br>and independent research.<br>{{Reason16}} {{Faith16}} | ||
| | | — | ||
|- | |- | ||
|[[File:Small portrait caspar 02 fe16.png|64px]]<br>[[Caspar]] | | [[File:Small portrait caspar 02 fe16.png|64px]]<br>[[Caspar]] | ||
|{{Axe16}} {{Brawling16}} | | {{Axe16}} {{Brawling16}} | ||
|style="white-space: nowrap"| Begin a seminar on how to win arguments and<br>gain the upper hand in one-on-one combat, or<br>how to give it your all on the battlefield.<br>{{Axe16}} {{Brawling16}} | | style="white-space: nowrap" | Begin a seminar on how to win arguments and<br>gain the upper hand in one-on-one combat, or<br>how to give it your all on the battlefield.<br>{{Axe16}} {{Brawling16}} | ||
| | | — | ||
|- | |- | ||
|[[File:Small portrait bernadetta 02 fe16.png|64px]]<br>[[Bernadetta]] | | [[File:Small portrait bernadetta 02 fe16.png|64px]]<br>[[Bernadetta]] | ||
|{{Lance16}} {{Bow16}} | | {{Lance16}} {{Bow16}} | ||
|style="white-space: nowrap"| Begin a seminar on a fighting style that takes<br>advantage of a weapon's range, with a strong<br>emphasis on personal safety.<br>{{Lance16}} {{Bow16}} | | style="white-space: nowrap" | Begin a seminar on a fighting style that takes<br>advantage of a weapon's range, with a strong<br>emphasis on personal safety.<br>{{Lance16}} {{Bow16}} | ||
|Bernadetta's seminar is only available on the Crimson Flower route.<br>Advanced Drills are available on any route. | | Bernadetta's seminar is only available on the Crimson Flower route.<br>Advanced Drills are available on any route. | ||
|- | |- | ||
|[[File:Small portrait dorothea 02 fe16.png|64px]]<br>[[Dorothea]] | | [[File:Small portrait dorothea 02 fe16.png|64px]]<br>[[Dorothea]] | ||
|{{Sword16}} {{Reason16}} | | {{Sword16}} {{Reason16}} | ||
|style="white-space: nowrap"| Begin a seminar on a fighting style focusing on<br>moving one's sword with the grace of a dancer<br>and casting magic with the poise of a diva.<br>{{Sword16}} {{Reason16}} | | style="white-space: nowrap" | Begin a seminar on a fighting style focusing on<br>moving one's sword with the grace of a dancer<br>and casting magic with the poise of a diva.<br>{{Sword16}} {{Reason16}} | ||
| | | — | ||
|- | |- | ||
|[[File:Small portrait petra 02 fe16.png|64px]]<br>[[Petra]] | | [[File:Small portrait petra 02 fe16.png|64px]]<br>[[Petra]] | ||
|{{Sword16}} {{Axe16}} {{Bow16}} {{Flying16}} | | {{Sword16}} {{Axe16}} {{Bow16}} {{Flying16}} | ||
|style="white-space: nowrap"| Begin a seminar on the daring and resolute<br>sword and axe fighting styles developed on the<br>Brigid archipelago.<br>{{Sword16}} {{Axe16}} | | style="white-space: nowrap" | Begin a seminar on the daring and resolute<br>sword and axe fighting styles developed on the<br>Brigid archipelago.<br>{{Sword16}} {{Axe16}} | ||
| | | — | ||
|- | |- | ||
|[[File:Small portrait dedue 02 fe16.png|64px]]<br>[[Dedue]] | | [[File:Small portrait dedue 02 fe16.png|64px]]<br>[[Dedue]] | ||
|{{Lance16}} {{Axe16}} {{Brawling16}} {{Armor16}} | | {{Lance16}} {{Axe16}} {{Brawling16}} {{Armor16}} | ||
|style="white-space: nowrap"| Begin a seminar on a fighting style in which<br>one can protect their assignment using nothing<br>but their body, an axe, and an iron will.<br>{{Axe16}} {{Brawling16}} | | style="white-space: nowrap" | Begin a seminar on a fighting style in which<br>one can protect their assignment using nothing<br>but their body, an axe, and an iron will.<br>{{Axe16}} {{Brawling16}} | ||
| | | — | ||
|- | |- | ||
|[[File:Small portrait felix 02 fe16.png|64px]]<br>[[Felix]] | | [[File:Small portrait felix 02 fe16.png|64px]]<br>[[Felix]] | ||
|{{Sword16}} {{Bow16}} {{Brawling16}} | | {{Sword16}} {{Bow16}} {{Brawling16}} | ||
|style="white-space: nowrap"| Begin a seminar on a self-taught fighting style<br>that combines sword and hand-to-hand skills.<br>{{Sword16}} {{Brawling16}} | | style="white-space: nowrap" | Begin a seminar on a self-taught fighting style<br>that combines sword and hand-to-hand skills.<br>{{Sword16}} {{Brawling16}} | ||
| | | — | ||
|- | |- | ||
|[[File:Small portrait ashe 02 fe16.png|64px]]<br>[[Ashe]] | | [[File:Small portrait ashe 02 fe16.png|64px]]<br>[[Ashe]] | ||
|{{Axe16}} {{Bow16}} | | {{Axe16}} {{Bow16}} | ||
|style="white-space: nowrap"| Begin a seminar on a fighting style that makes<br>use of close range weapons including the mini<br>bow or axe.<br>{{Axe16}} {{Bow16}} | | style="white-space: nowrap" | Begin a seminar on a fighting style that makes<br>use of close range weapons including the mini<br>bow or axe.<br>{{Axe16}} {{Bow16}} | ||
| | | — | ||
|- | |- | ||
|[[File:Small portrait sylvain 02 fe16.png|64px]]<br>[[Sylvain]] | | [[File:Small portrait sylvain 02 fe16.png|64px]]<br>[[Sylvain]] | ||
|{{Lance16}} {{Axe16}} {{Riding16}} | | {{Lance16}} {{Axe16}} {{Riding16}} | ||
|style="white-space: nowrap"| Begin a seminar on fighting style that<br>incorporates flashy techniques and evocative<br>poses and always draws attention.<br>{{Lance16}} {{Axe16}} | | style="white-space: nowrap" | Begin a seminar on fighting style that<br>incorporates flashy techniques and evocative<br>poses and always draws attention.<br>{{Lance16}} {{Axe16}} | ||
| | | — | ||
|- | |- | ||
|[[File:Small portrait mercedes 02 fe16.png|64px]]<br>[[Mercedes]] | | [[File:Small portrait mercedes 02 fe16.png|64px]]<br>[[Mercedes]] | ||
|{{Reason16}} {{Faith16}} | | {{Reason16}} {{Faith16}} | ||
|style="white-space: nowrap"| Begin a seminar on connecting with other<br>people and helping them explore how using<br>magic might best suit them personally.<br>{{Reason16}} {{Faith16}} | | style="white-space: nowrap" | Begin a seminar on connecting with other<br>people and helping them explore how using<br>magic might best suit them personally.<br>{{Reason16}} {{Faith16}} | ||
| | | — | ||
|- | |- | ||
|[[File:Small portrait annette 02 fe16.png|64px]]<br>[[Annette]] | | [[File:Small portrait annette 02 fe16.png|64px]]<br>[[Annette]] | ||
|{{Axe16}} {{Reason16}} {{Authority16}} | | {{Axe16}} {{Reason16}} {{Authority16}} | ||
|style="white-space: nowrap"| Begin a seminar that is designed to help with<br>magic and axe skills simply using the power<br>of suggestion.<br>{{Axe16}} {{Reason16}} | | style="white-space: nowrap" | Begin a seminar that is designed to help with<br>magic and axe skills simply using the power<br>of suggestion.<br>{{Axe16}} {{Reason16}} | ||
| | | — | ||
|- | |- | ||
|[[File:Small portrait ingrid 02 fe16.png|64px]]<br>[[Ingrid]] | | [[File:Small portrait ingrid 02 fe16.png|64px]]<br>[[Ingrid]] | ||
|{{Sword16}} {{Lance16}} {{Riding16}} {{Flying16}} | | {{Sword16}} {{Lance16}} {{Riding16}} {{Flying16}} | ||
|style="white-space: nowrap"| Begin a seminar on a fighting style that will<br>have one standing up to enemies as equals, no<br>matter how big or brutish they may be.<br>{{Sword16}} {{Lance16}} | | style="white-space: nowrap" | Begin a seminar on a fighting style that will<br>have one standing up to enemies as equals, no<br>matter how big or brutish they may be.<br>{{Sword16}} {{Lance16}} | ||
| | | — | ||
|- | |- | ||
|[[File:Small portrait lorenz 02 fe16.png|64px]]<br>[[Lorenz (Three Houses)|Lorenz]] | | [[File:Small portrait lorenz 02 fe16.png|64px]]<br>[[Lorenz (Three Houses)|Lorenz]] | ||
|{{Lance16}} {{Reason16}} {{Riding16}} | | {{Lance16}} {{Reason16}} {{Riding16}} | ||
|style="white-space: nowrap"| Begin a seminar on a fighting style that<br>incorporates and exemplifies the grace,<br>decorum, and strength of nobility.<br>{{Lance16}} {{Reason16}} | | style="white-space: nowrap" | Begin a seminar on a fighting style that<br>incorporates and exemplifies the grace,<br>decorum, and strength of nobility.<br>{{Lance16}} {{Reason16}} | ||
| | | — | ||
|- | |- | ||
|[[File:Small portrait raphael 02 fe16.png|64px]]<br>[[Raphael]] | | [[File:Small portrait raphael 02 fe16.png|64px]]<br>[[Raphael]] | ||
|{{Axe16}} {{Brawling16}} {{Armor16}} | | {{Axe16}} {{Brawling16}} {{Armor16}} | ||
|style="white-space: nowrap"| Begin a seminar on a fighting style that focuses<br>on dominating the enemy with pure, strong,<br>well-fed muscle.<br>{{Axe16}} {{Brawling16}} | | style="white-space: nowrap" | Begin a seminar on a fighting style that focuses<br>on dominating the enemy with pure, strong,<br>well-fed muscle.<br>{{Axe16}} {{Brawling16}} | ||
| | | — | ||
|- | |- | ||
|[[File:Small portrait ignatz 02 fe16.png|64px]]<br>[[Ignatz]] | | [[File:Small portrait ignatz 02 fe16.png|64px]]<br>[[Ignatz]] | ||
|{{Sword16}} {{Bow16}} {{Authority16}} | | {{Sword16}} {{Bow16}} {{Authority16}} | ||
|style="white-space: nowrap"| Begin a seminar focusing on honing combat<br>form through repeated motions, as outlined in<br>the assigned textbooks.<br>{{Sword16}} {{Bow16}} | | style="white-space: nowrap" | Begin a seminar focusing on honing combat<br>form through repeated motions, as outlined in<br>the assigned textbooks.<br>{{Sword16}} {{Bow16}} | ||
| | | — | ||
|- | |- | ||
|[[File:Small portrait lysithea 02 fe16.png|64px]]<br>[[Lysithea]] | | [[File:Small portrait lysithea 02 fe16.png|64px]]<br>[[Lysithea]] | ||
|{{Reason16}} {{Faith16}} {{Authority16}} | | {{Reason16}} {{Faith16}} {{Authority16}} | ||
|style="white-space: nowrap"| Begin a seminar worthy of a genius that will<br>have participants reconsidering everything<br>they ever thought they knew about magic.<br>{{Reason16}} {{Faith16}} | | style="white-space: nowrap" | Begin a seminar worthy of a genius that will<br>have participants reconsidering everything<br>they ever thought they knew about magic.<br>{{Reason16}} {{Faith16}} | ||
| | | — | ||
|- | |- | ||
|[[File:Small portrait marianne 02 fe16.png|64px]]<br>[[Marianne]] | | [[File:Small portrait marianne 02 fe16.png|64px]]<br>[[Marianne]] | ||
|{{Sword16}} {{Faith16}} {{Riding16}} {{Flying16}} | | {{Sword16}} {{Faith16}} {{Riding16}} {{Flying16}} | ||
|style="white-space: nowrap"| Begin a seminar on the use of magic as a<br>healing tool and swords as a means of defense.<br>{{Sword16}} {{Faith16}} | | style="white-space: nowrap" | Begin a seminar on the use of magic as a<br>healing tool and swords as a means of defense.<br>{{Sword16}} {{Faith16}} | ||
| | | — | ||
|- | |- | ||
|[[File:Small portrait hilda 02 fe16.png|64px]]<br>[[Hilda]] | | [[File:Small portrait hilda 02 fe16.png|64px]]<br>[[Hilda]] | ||
|{{Lance16}} {{Axe16}} | | {{Lance16}} {{Axe16}} | ||
|style="white-space: nowrap"| Begin a seminar on a free-form fighting style<br>that encourages participants to swing lances<br>and axes around any way they please.<br>{{Lance16}} {{Axe16}} | | style="white-space: nowrap" | Begin a seminar on a free-form fighting style<br>that encourages participants to swing lances<br>and axes around any way they please.<br>{{Lance16}} {{Axe16}} | ||
| | | — | ||
|- | |- | ||
|[[File:Small portrait leonie 02 fe16.png|64px]]<br>[[Leonie]] | | [[File:Small portrait leonie 02 fe16.png|64px]]<br>[[Leonie]] | ||
|{{Lance16}} {{Bow16}} {{Riding16}} | | {{Lance16}} {{Bow16}} {{Riding16}} | ||
|style="white-space: nowrap"| Begin a seminar on a fighting style that<br>combines bow skills with Jeralt's personal<br>lance technique.<br>{{Lance16}} {{Bow16}} | | style="white-space: nowrap" | Begin a seminar on a fighting style that<br>combines bow skills with Jeralt's personal<br>lance technique.<br>{{Lance16}} {{Bow16}} | ||
| | | — | ||
|- | |- | ||
|[[File:Small portrait flayn fe16.png|64px]]<br>[[Flayn]] | | [[File:Small portrait flayn fe16.png|64px]]<br>[[Flayn]] | ||
|{{Lance16}} {{Faith16}} | | {{Lance16}} {{Faith16}} | ||
|style="white-space: nowrap"| Begin a seminar on a fighting style that utilizes<br>lances and white magic while chatting and<br>discovering the folklore of Saint Cethleann.<br>{{Lance16}} {{Faith16}} | | style="white-space: nowrap" | Begin a seminar on a fighting style that utilizes<br>lances and white magic while chatting and<br>discovering the folklore of Saint Cethleann.<br>{{Lance16}} {{Faith16}} | ||
| | | — | ||
|- | |- | ||
|[[File:Small portrait cyril 02 fe16.png|64px]]<br>[[Cyril]] | | [[File:Small portrait cyril 02 fe16.png|64px]]<br>[[Cyril]] | ||
|{{Lance16}} {{Axe16}} {{Bow16}} {{Riding16}} {{Flying16}} | | {{Lance16}} {{Axe16}} {{Bow16}} {{Riding16}} {{Flying16}} | ||
|style="white-space: nowrap"| Begin a seminar on a fighting style developed<br>over many years of training that utilizes axes<br>and bows.<br>{{Axe16}} {{Bow16}} | | style="white-space: nowrap" | Begin a seminar on a fighting style developed<br>over many years of training that utilizes axes<br>and bows.<br>{{Axe16}} {{Bow16}} | ||
| | | — | ||
|- | |- | ||
|[[File:Small portrait yuri 02 fe16.png|64px]]<br>[[Yuri]] | | [[File:Small portrait yuri 02 fe16.png|64px]]<br>[[Yuri]] | ||
|{{Sword16}} {{Reason16}} {{Faith16}} {{Authority16}} | | {{Sword16}} {{Reason16}} {{Faith16}} {{Authority16}} | ||
|style="white-space: nowrap"| Begin a seminar on authority gained from<br>experience leading thieves and using white<br>magic to administer aid on the battlefield.<br>{{Faith16}} {{Authority16}} | | style="white-space: nowrap" | Begin a seminar on authority gained from<br>experience leading thieves and using white<br>magic to administer aid on the battlefield.<br>{{Faith16}} {{Authority16}} | ||
|Available only through paid [[Downloadable content in Fire Emblem: Three Houses|DLC]]. | | Available only through paid [[Downloadable content in Fire Emblem: Three Houses|DLC]]. | ||
|- | |- | ||
|[[File:Small portrait balthus 02 fe16.png|64px]]<br>[[Balthus]] | | [[File:Small portrait balthus 02 fe16.png|64px]]<br>[[Balthus]] | ||
|{{Sword16}} {{Brawling16}} {{Armor16}} | | {{Sword16}} {{Brawling16}} {{Armor16}} | ||
|style="white-space: nowrap"| Begin a seminar on a fighting style born from<br>countless duels and the raw strength needed<br>to wear heavy armor.<br>{{Brawling16}} {{Armor16}} | | style="white-space: nowrap" | Begin a seminar on a fighting style born from<br>countless duels and the raw strength needed<br>to wear heavy armor.<br>{{Brawling16}} {{Armor16}} | ||
|Available only through paid [[Downloadable content in Fire Emblem: Three Houses|DLC]]. | | Available only through paid [[Downloadable content in Fire Emblem: Three Houses|DLC]]. | ||
|- | |- | ||
|[[File:Small portrait constance 03 fe16.png|64px]]<br>[[Constance]] | | [[File:Small portrait constance 03 fe16.png|64px]]<br>[[Constance]] | ||
|{{Sword16}} {{Reason16}} {{Authority16}} {{Flying16}} | | {{Sword16}} {{Reason16}} {{Authority16}} {{Flying16}} | ||
|style="white-space: nowrap"| Begin a seminar on the art of airborne magical<br>combat, a skill passed down through the<br>generations within House Nuvelle.<br>{{Reason16}} {{Flying16}} | | style="white-space: nowrap" | Begin a seminar on the art of airborne magical<br>combat, a skill passed down through the<br>generations within House Nuvelle.<br>{{Reason16}} {{Flying16}} | ||
|Available only through paid [[Downloadable content in Fire Emblem: Three Houses|DLC]]. | | Available only through paid [[Downloadable content in Fire Emblem: Three Houses|DLC]]. | ||
|- | |- | ||
|style="border-bottom-left-radius: 15px"|[[File:Small portrait hapi 02 fe16.png|64px]]<br>[[Hapi]] | | style="border-bottom-left-radius: 15px" | [[File:Small portrait hapi 02 fe16.png|64px]]<br>[[Hapi]] | ||
|{{Reason16}} {{Riding16}} {{Flying16}} | | {{Reason16}} {{Riding16}} {{Flying16}} | ||
|style="white-space: nowrap"| Begin a seminar on magic born from life<br>experiences and animal husbandry enriched<br>through the love of wild animals.<br>{{Reason16}} {{Riding16}} | | style="white-space: nowrap" | Begin a seminar on magic born from life<br>experiences and animal husbandry enriched<br>through the love of wild animals.<br>{{Reason16}} {{Riding16}} | ||
|style="border-bottom-right-radius: 15px"|Available only through paid [[Downloadable content in Fire Emblem: Three Houses|DLC]]. | | style="border-bottom-right-radius: 15px" | Available only through paid [[Downloadable content in Fire Emblem: Three Houses|DLC]]. | ||
|} | |} | ||
==Facilities | ==Facilities== | ||
===Cathedral=== | |||
=== | ====Choir Practice==== | ||
At the cathedral, the player can choose up to two of their units to participate in choir practice with. Doing so will consume an activity point, but will also increase both Byleth's and the students' [[faith]] level as well as Byleth's authority level. On certain days, such as Saint Cichol Day, the player will also be asked if they want to participate in choir practice. Doing so does not consume any resources, but the player will also be unable to choose which students they will participate in choir practice with. | |||
====Counselor==== | |||
{{main|Garreg Mach Monastery/Counselor}} | |||
Byleth can give advice to students that place anonymous notes in the advice box. They will be shown a page displaying a silhouette of the character who asked the question alongside a brief description of their problem. They will then be asked to pick one of three possible answers. After doing so, the character who asked the question will be revealed and, if the player picked the correct option, their support points with that student will increase. | |||
====Saint Statues==== | |||
{{Main|Saint Statues}} | |||
Upon completing the [[Tending to the Saints]] quest from [[Tower of Black Winds|Chapter 5]] onwards, the player is granted the ability to spend their renown in exchange for specific rewards at the Saint Statues. To do so, they will need to speak to the Saint Statue artisan who is found next to the statues. Each statue has its own set of rewards, though the player needs to buy cheaper rewards to be allowed to purchase more expensive ones. The player can offer up to 10,000 renown to each of the Saint Statues. The rewards carry over through [[New Game +]] and do not need to be repurchased. | |||
{| class="basic" style=" | {| class="cellpadding-3 basic" style="width: 70%; padding: 4px" | ||
!style="border-top-left-radius: | ! style="background: none" colspan="5" | Rewards from the Saint Statues | ||
!style="border-top-right-radius: | |- | ||
! style="border-top-left-radius: 15px" colspan="4" | Rewards | |||
! style="border-top-right-radius: 15px; width: 12%" rowspan="2" | Renown cost | |||
|- | |- | ||
| | ! style="width: 22%" | Cethleann statue | ||
| | ! style="width: 22%" | Cichol statue | ||
! style="width: 22%" | Macuil statue | |||
! style="width: 22%" | Indech statue | |||
|- | |- | ||
| | | Lance +1 | ||
| | | Axe +1 | ||
| Sword +1 | |||
| Bow +1 | |||
| 200 | |||
|- | |- | ||
| | | Faith +1 | ||
| | | Authority +1 | ||
| Reason +1 | |||
| Brawling +1 | |||
| 500 | |||
|- | |- | ||
| [[ | | [[Experience]] +5% | ||
| | | Experience +5% | ||
| Experience +5% | |||
| Experience +5% | |||
| 1,000 | |||
|- | |- | ||
| | | Class Mastery gain +1 | ||
| | | Flying +2 | ||
| Riding +2 | |||
| Heavy Armor +2 | |||
| 2,000 | |||
|- | |- | ||
| [[ | | [[Divine Pulse]] charge +1 | ||
| | | Divine Pulse charge +1 | ||
| Divine Pulse charge +1 | |||
| Divine Pulse charge +1 | |||
| 3,000 | |||
|- | |- | ||
| | | Lance +2 | ||
| | | Axe +2 | ||
| Sword +2 | |||
| Bow +2 | |||
| 4,000 | |||
|- | |- | ||
| | | Faith +2 | ||
| | | Authority +2 | ||
| Reason +2 | |||
| Brawling +2 | |||
| 5,000 | |||
|- | |- | ||
| | | Experience +10% | ||
| | | Experience +10% | ||
| Experience +10% | |||
| Experience +10% | |||
| 7,500 | |||
|- | |- | ||
| [[ | | class="roundbl" | [[Luck]] and [[Charm (stat)|charm]] cap +5 | ||
| | | [[Strength]] and [[speed]] cap +5 | ||
| | | [[Magic (stat)|Magic]] and [[dexterity]] cap +5 | ||
| | | [[Defense]] and [[resistance]] cap +5 | ||
| | | class="roundbr" | 10,000 | ||
|} | |} | ||
===Dining Hall=== | ===Dining Hall=== | ||
====Share A Meal==== | ====Share A Meal==== | ||
Byleth can invite two additional characters to have meals together. If possible, this increases the units' | Byleth can invite two additional characters to have meals together. If possible, this increases the units' support with each other. Additionally, if the units are in the player's army, they will gain some motivation. Each free day, there is one daily special that can be used once. Unlike other meals, it does not consume ingredients from the player's inventory. However, when this is used, the support gain is halved. Either way, Share A Meal consumes an activity point. | ||
Additionally, during certain weekends, the effects of a specific category of meals will be boosted. The following table shows which categories are boosted by which event. Which meals belong to which category can be seen in the list of dishes below: | Additionally, during certain weekends, the effects of a specific category of meals will be boosted. The following table shows which categories are boosted by which event. Which meals belong to which category can be seen in the list of dishes below: | ||
| Line 482: | Line 542: | ||
| Spicy | | Spicy | ||
|- | |- | ||
| Bitter Eats | | class="roundbl" | Bitter Eats | ||
| class="roundbr" | Bitter | | class="roundbr" | Bitter | ||
|} | |} | ||
If a unit likes a meal, the | If a unit likes a meal, the support point gain is increased. Additionally, the student will gain more motivation. The following table shows how much motivation a student gains for liked, neutral, and disliked meals: | ||
{{Tab | {{Tab | ||
| Line 547: | Line 607: | ||
| Well-roasted Fódlan pheasant drizzled with a berry reduction sauce. | | Well-roasted Fódlan pheasant drizzled with a berry reduction sauce. | ||
| Poultry (×1)<br>Albinean Berries (×1) | | Poultry (×1)<br>Albinean Berries (×1) | ||
| [[Claude]] • [[Ferdinand]] • [[Linhardt]] • [[Ashe]] • [[Sylvain]] • [[Mercedes]] • [[Annette]] • [[Ingrid]] • [[Raphael]] • [[Lysithea]] • [[Flayn]] • [[Alois]] • [[Shamir]] • [[Cyril]] • [[Jeritza]] • [[Anna]] • [[Yuri]] • [[Balthus]] • [[Constance]] • [[Hapi]] | | [[Claude]] • [[Ferdinand]] • [[Linhardt]] • [[Ashe]] • [[Sylvain]] • [[Mercedes]] • [[Annette]] • [[Ingrid]] • [[Raphael]] • [[Lysithea]] • [[Flayn]] • [[Alois]] • [[Shamir]] • [[Cyril]] • [[Jeritza]] • [[Anna/Three Houses|Anna]] • [[Yuri]] • [[Balthus]] • [[Constance]] • [[Hapi]] | ||
| [[Hubert]] • [[Petra]] • [[Hanneman]] • [[Catherine]] | | [[Hubert]] • [[Petra]] • [[Hanneman]] • [[Catherine]] | ||
| Sweets | | Sweets | ||
| Line 554: | Line 614: | ||
| A sorbet made with thin slices of magically frozen peach, dusted with bean flour. | | A sorbet made with thin slices of magically frozen peach, dusted with bean flour. | ||
| Peach Currant (×1)<br>Chickpeas (×1) | | Peach Currant (×1)<br>Chickpeas (×1) | ||
| [[Edelgard]] • [[Linhardt]] • [[Bernadetta]] • [[Dorothea]] • [[Ashe]] • [[Mercedes]] • [[Annette]] • [[Lysithea]] • [[Marianne]] • [[Hilda]] • [[Flayn]] • [[Hanneman]] • [[Alois]] • [[Shamir]] • [[Jeritza]] • [[Anna]] • [[Yuri]] • [[Constance]] | | [[Edelgard]] • [[Linhardt]] • [[Bernadetta]] • [[Dorothea]] • [[Ashe]] • [[Mercedes]] • [[Annette]] • [[Lysithea]] • [[Marianne]] • [[Hilda]] • [[Flayn]] • [[Hanneman]] • [[Alois]] • [[Shamir]] • [[Jeritza]] • [[Anna/Three Houses|Anna]] • [[Yuri]] • [[Constance]] | ||
| [[Dimitri]] • [[Hubert]] • [[Petra]] • [[Felix]] • [[Leonie]] • [[Seteth]] • [[Manuela]] • [[Gilbert]] • [[Catherine]] • [[Balthus]] | | [[Dimitri]] • [[Hubert]] • [[Petra]] • [[Felix]] • [[Leonie]] • [[Seteth]] • [[Manuela]] • [[Gilbert]] • [[Catherine]] • [[Balthus]] | ||
| Sweets | | Sweets | ||
| Line 561: | Line 621: | ||
| A dish that tastes like the wilderness. Thick slices of meat covered with Noa fruit and grilled on a hotplate. | | A dish that tastes like the wilderness. Thick slices of meat covered with Noa fruit and grilled on a hotplate. | ||
| Wild Game (×1)<br>Noa Fruit (×1) | | Wild Game (×1)<br>Noa Fruit (×1) | ||
| [[Claude]] • [[Caspar]] • [[Petra]] • [[Felix]] • [[Ingrid]] • [[Raphael]] • [[Leonie]] • [[Manuela]] • [[Gilbert]] • [[Catherine]] • [[Shamir]] • [[Cyril]] • [[Anna]] • [[Balthus]] • [[Hapi]] | | [[Claude]] • [[Caspar]] • [[Petra]] • [[Felix]] • [[Ingrid]] • [[Raphael]] • [[Leonie]] • [[Manuela]] • [[Gilbert]] • [[Catherine]] • [[Shamir]] • [[Cyril]] • [[Anna/Three Houses|Anna]] • [[Balthus]] • [[Hapi]] | ||
| [[Edelgard]] • [[Hubert]] • [[Linhardt]] • [[Bernadetta]] • [[Sylvain]] • [[Mercedes]] • [[Annette]] • [[Lorenz (Three Houses)|Lorenz]] • [[Marianne]] • [[Hanneman]] • [[Jeritza]] | | [[Edelgard]] • [[Hubert]] • [[Linhardt]] • [[Bernadetta]] • [[Sylvain]] • [[Mercedes]] • [[Annette]] • [[Lorenz (Three Houses)|Lorenz]] • [[Marianne]] • [[Hanneman]] • [[Jeritza]] | ||
| Meat | | Meat | ||
| Line 568: | Line 628: | ||
| Hunks of rabbit meat are pickled in bacchus, skewered, and roasted over an open flame to create this flavorful dish. | | Hunks of rabbit meat are pickled in bacchus, skewered, and roasted over an open flame to create this flavorful dish. | ||
| Wild Game (×1)<br>Carrot (×1) | | Wild Game (×1)<br>Carrot (×1) | ||
| [[Claude]] • [[Caspar]] • [[Petra]] • [[Felix]] • [[Ingrid]] • [[Raphael]] • [[Lysithea]] • [[Manuela]] • [[Gilbert]] • [[Catherine]] • [[Shamir]] • [[Cyril]] • [[Anna]] • [[Yuri]] • [[Balthus]] • [[Hapi]] | | [[Claude]] • [[Caspar]] • [[Petra]] • [[Felix]] • [[Ingrid]] • [[Raphael]] • [[Lysithea]] • [[Manuela]] • [[Gilbert]] • [[Catherine]] • [[Shamir]] • [[Cyril]] • [[Anna/Three Houses|Anna]] • [[Yuri]] • [[Balthus]] • [[Hapi]] | ||
| [[Edelgard]] • [[Hubert]] • [[Linhardt]] • [[Bernadetta]] • [[Mercedes]] • [[Annette]] • [[Lorenz (Three Houses)|Lorenz]] • [[Marianne]] • [[Hanneman]] • [[Jeritza]] • [[Constance]] | | [[Edelgard]] • [[Hubert]] • [[Linhardt]] • [[Bernadetta]] • [[Mercedes]] • [[Annette]] • [[Lorenz (Three Houses)|Lorenz]] • [[Marianne]] • [[Hanneman]] • [[Jeritza]] • [[Constance]] | ||
| Meat | | Meat | ||
| Line 576: | Line 636: | ||
| Poultry (×1)<br>Onion (×1) | | Poultry (×1)<br>Onion (×1) | ||
| [[Claude]] • [[Ferdinand]] • [[Linhardt]] • [[Caspar]] • [[Petra]] • [[Dedue]] • [[Felix]] • [[Ingrid]] • [[Lorenz (Three Houses)|Lorenz]] • [[Raphael]] • [[Leonie]] • [[Seteth]] • [[Manuela]] • [[Shamir]] • [[Cyril]] • [[Yuri]] • [[Balthus]] • [[Hapi]] | | [[Claude]] • [[Ferdinand]] • [[Linhardt]] • [[Caspar]] • [[Petra]] • [[Dedue]] • [[Felix]] • [[Ingrid]] • [[Lorenz (Three Houses)|Lorenz]] • [[Raphael]] • [[Leonie]] • [[Seteth]] • [[Manuela]] • [[Shamir]] • [[Cyril]] • [[Yuri]] • [[Balthus]] • [[Hapi]] | ||
| [[Hubert]] • [[Mercedes]] • [[Anna]] | | [[Hubert]] • [[Mercedes]] • [[Anna/Three Houses|Anna]] | ||
| Meat | | Meat | ||
|- | |- | ||
| Line 589: | Line 649: | ||
| Pheasant meat is pounded flat and fried. Can be served as a sort of sandwich, with cheese between two strips of meat. | | Pheasant meat is pounded flat and fried. Can be served as a sort of sandwich, with cheese between two strips of meat. | ||
| Poultry (×1)<br>Carrot (×1) | | Poultry (×1)<br>Carrot (×1) | ||
| [[Claude]] • [[Caspar]] • [[Bernadetta]] • [[Felix]] • [[Ingrid]] • [[Raphael]] • [[Lysithea]] • [[Hilda]] • [[Leonie]] • [[Seteth]] • [[Hanneman]] • [[Manuela]] • [[Gilbert]] • [[Catherine]] • [[Cyril]] • [[Anna]] • [[Balthus]] • [[Hapi]] | | [[Claude]] • [[Caspar]] • [[Bernadetta]] • [[Felix]] • [[Ingrid]] • [[Raphael]] • [[Lysithea]] • [[Hilda]] • [[Leonie]] • [[Seteth]] • [[Hanneman]] • [[Manuela]] • [[Gilbert]] • [[Catherine]] • [[Cyril]] • [[Anna/Three Houses|Anna]] • [[Balthus]] • [[Hapi]] | ||
| [[Hubert]] • [[Petra]] • [[Ashe]] • [[Shamir]] | | [[Hubert]] • [[Petra]] • [[Ashe]] • [[Shamir]] | ||
| Meat | | Meat | ||
| Line 596: | Line 656: | ||
| Pasta with a blend of fresh vegetables from various regions of Fódlan. This popular dish sells out almost instantly. | | Pasta with a blend of fresh vegetables from various regions of Fódlan. This popular dish sells out almost instantly. | ||
| Cabbage (×1)<br>Onion (×1)<br>Carrot (×1) | | Cabbage (×1)<br>Onion (×1)<br>Carrot (×1) | ||
| [[Edelgard]] • [[Ferdinand]] • [[Caspar]] • [[Bernadetta]] • [[Dorothea]] • [[Ashe]] • [[Mercedes]] • [[Annette]] • [[Ingrid]] • [[Ignatz]] • [[Marianne]] • [[Seteth]] • [[Hanneman]] • [[Gilbert]] • [[Shamir]] • [[Cyril]] • [[Anna]] • [[Constance]] | | [[Edelgard]] • [[Ferdinand]] • [[Caspar]] • [[Bernadetta]] • [[Dorothea]] • [[Ashe]] • [[Mercedes]] • [[Annette]] • [[Ingrid]] • [[Ignatz]] • [[Marianne]] • [[Seteth]] • [[Hanneman]] • [[Gilbert]] • [[Shamir]] • [[Cyril]] • [[Anna/Three Houses|Anna]] • [[Constance]] | ||
| [[Hubert]] • [[Felix]] • [[Raphael]] • [[Lysithea]] • [[Jeritza]] • [[Balthus]] | | [[Hubert]] • [[Felix]] • [[Raphael]] • [[Lysithea]] • [[Jeritza]] • [[Balthus]] | ||
| Vegetables | | Vegetables | ||
| Line 611: | Line 671: | ||
| Verona (×1)<br>Turnip (×1) | | Verona (×1)<br>Turnip (×1) | ||
| [[Claude]] • [[Caspar]] • [[Bernadetta]] • [[Petra]] • [[Raphael]] • [[Hilda]] • [[Flayn]] • [[Gilbert]] • [[Catherine]] • [[Shamir]] • [[Yuri]] • [[Hapi]] | | [[Claude]] • [[Caspar]] • [[Bernadetta]] • [[Petra]] • [[Raphael]] • [[Hilda]] • [[Flayn]] • [[Gilbert]] • [[Catherine]] • [[Shamir]] • [[Yuri]] • [[Hapi]] | ||
| [[Felix]] • [[Lysithea]] • [[Manuela]] • [[Anna]] • [[Balthus]] | | [[Felix]] • [[Lysithea]] • [[Manuela]] • [[Anna/Three Houses|Anna]] • [[Balthus]] | ||
| Vegetables | | Vegetables | ||
|- | |- | ||
| Line 618: | Line 678: | ||
| Tomato (×1)<br>Chickpeas (×1)<br>Cabbage (×1) | | Tomato (×1)<br>Chickpeas (×1)<br>Cabbage (×1) | ||
| [[Edelgard]] • [[Claude]] • [[Ferdinand]] • [[Caspar]] • [[Bernadetta]] • [[Dorothea]] • [[Petra]] • [[Dedue]] • [[Annette]] • [[Ignatz]] • [[Marianne]] • [[Leonie]] • [[Manuela]] • [[Gilbert]] • [[Shamir]] • [[Cyril]] • [[Yuri]] • [[Hapi]] | | [[Edelgard]] • [[Claude]] • [[Ferdinand]] • [[Caspar]] • [[Bernadetta]] • [[Dorothea]] • [[Petra]] • [[Dedue]] • [[Annette]] • [[Ignatz]] • [[Marianne]] • [[Leonie]] • [[Manuela]] • [[Gilbert]] • [[Shamir]] • [[Cyril]] • [[Yuri]] • [[Hapi]] | ||
| [[Linhardt]] • [[Felix]] • [[Raphael]] • [[Lysithea]] • [[Flayn]] • [[Hanneman]] • [[Alois]] • [[Jeritza]] • [[Anna]] • [[Balthus]] | | [[Linhardt]] • [[Felix]] • [[Raphael]] • [[Lysithea]] • [[Flayn]] • [[Hanneman]] • [[Alois]] • [[Jeritza]] • [[Anna/Three Houses|Anna]] • [[Balthus]] | ||
| Vegetables | | Vegetables | ||
|- | |- | ||
| Line 625: | Line 685: | ||
| Albinean Herring (×1)<br>Turnip (×1) | | Albinean Herring (×1)<br>Turnip (×1) | ||
| [[Ferdinand]] • [[Petra]] • [[Dedue]] • [[Mercedes]] • [[Annette]] • [[Ingrid]] • [[Leonie]] • [[Seteth]] • [[Flayn]] • [[Gilbert]] • [[Alois]] • [[Catherine]] • [[Jeritza]] • [[Yuri]] | | [[Ferdinand]] • [[Petra]] • [[Dedue]] • [[Mercedes]] • [[Annette]] • [[Ingrid]] • [[Leonie]] • [[Seteth]] • [[Flayn]] • [[Gilbert]] • [[Alois]] • [[Catherine]] • [[Jeritza]] • [[Yuri]] | ||
| [[Hubert]] • [[Linhardt]] • [[Caspar]] • [[Dorothea]] • [[Lysithea]] • [[Shamir]] • [[Anna]] | | [[Hubert]] • [[Linhardt]] • [[Caspar]] • [[Dorothea]] • [[Lysithea]] • [[Shamir]] • [[Anna/Three Houses|Anna]] | ||
| Fish | | Fish | ||
|- | |- | ||
| Line 639: | Line 699: | ||
| Albinean Herring (×1)<br>Noa Fruit (×1) | | Albinean Herring (×1)<br>Noa Fruit (×1) | ||
| [[Ferdinand]] • [[Bernadetta]] • [[Dedue]] • [[Sylvain]] • [[Mercedes]] • [[Annette]] • [[Ingrid]] • [[Lorenz (Three Houses)|Lorenz]] • [[Ignatz]] • [[Marianne]] • [[Leonie]] • [[Seteth]] • [[Flayn]] • [[Alois]] • [[Catherine]] • [[Constance]] | | [[Ferdinand]] • [[Bernadetta]] • [[Dedue]] • [[Sylvain]] • [[Mercedes]] • [[Annette]] • [[Ingrid]] • [[Lorenz (Three Houses)|Lorenz]] • [[Ignatz]] • [[Marianne]] • [[Leonie]] • [[Seteth]] • [[Flayn]] • [[Alois]] • [[Catherine]] • [[Constance]] | ||
| [[Caspar]] • [[Dorothea]] • [[Lysithea]] • [[Shamir]] • [[Anna]] • [[Hapi]] | | [[Caspar]] • [[Dorothea]] • [[Lysithea]] • [[Shamir]] • [[Anna/Three Houses|Anna]] • [[Hapi]] | ||
| Fish | | Fish | ||
|- | |- | ||
| Line 646: | Line 706: | ||
| Albinean Herring (×1)<br>Turnip (×1) | | Albinean Herring (×1)<br>Turnip (×1) | ||
| [[Ferdinand]] • [[Petra]] • [[Dedue]] • [[Mercedes]] • [[Annette]] • [[Ingrid]] • [[Leonie]] • [[Seteth]] • [[Flayn]] • [[Gilbert]] • [[Alois]] • [[Catherine]] • [[Jeritza]] • [[Yuri]] | | [[Ferdinand]] • [[Petra]] • [[Dedue]] • [[Mercedes]] • [[Annette]] • [[Ingrid]] • [[Leonie]] • [[Seteth]] • [[Flayn]] • [[Gilbert]] • [[Alois]] • [[Catherine]] • [[Jeritza]] • [[Yuri]] | ||
| [[Hubert]] • [[Linhardt]] • [[Caspar]] • [[Dorothea]] • [[Lysithea]] • [[Shamir]] • [[Anna]] | | [[Hubert]] • [[Linhardt]] • [[Caspar]] • [[Dorothea]] • [[Lysithea]] • [[Shamir]] • [[Anna/Three Houses|Anna]] | ||
| Fish | | Fish | ||
|- | |- | ||
| Line 660: | Line 720: | ||
| Airmid Pike (×1)<br>Cabbage (×1) | | Airmid Pike (×1)<br>Cabbage (×1) | ||
| [[Edelgard]] • [[Ferdinand]] • [[Petra]] • [[Dedue]] • [[Ashe]] • [[Sylvain]] • [[Ingrid]] • [[Raphael]] • [[Leonie]] • [[Seteth]] • [[Flayn]] • [[Manuela]] • [[Gilbert]] • [[Alois]] • [[Catherine]] • [[Yuri]] • [[Hapi]] | | [[Edelgard]] • [[Ferdinand]] • [[Petra]] • [[Dedue]] • [[Ashe]] • [[Sylvain]] • [[Ingrid]] • [[Raphael]] • [[Leonie]] • [[Seteth]] • [[Flayn]] • [[Manuela]] • [[Gilbert]] • [[Alois]] • [[Catherine]] • [[Yuri]] • [[Hapi]] | ||
| [[Caspar]] • [[Bernadetta]] • [[Dorothea]] • [[Mercedes]] • [[Lysithea]] • [[Hanneman]] • [[Jeritza]] • [[Anna]] • [[Balthus]] | | [[Caspar]] • [[Bernadetta]] • [[Dorothea]] • [[Mercedes]] • [[Lysithea]] • [[Hanneman]] • [[Jeritza]] • [[Anna/Three Houses|Anna]] • [[Balthus]] | ||
| Fish | | Fish | ||
|- | |- | ||
| Line 673: | Line 733: | ||
| A gourmet fish dish with Airmid pike, vegetables, and a sprinkle of expensive spices. Popular among nobles. | | A gourmet fish dish with Airmid pike, vegetables, and a sprinkle of expensive spices. Popular among nobles. | ||
| Airmid Pike (×1)<br>Carrot (×1) | | Airmid Pike (×1)<br>Carrot (×1) | ||
| [[Claude]] • [[Ferdinand]] • [[Bernadetta]] • [[Dedue]] • [[Lorenz (Three Houses)|Lorenz]] • [[Ignatz]] • [[Marianne]] • [[Leonie]] • [[Seteth]] • [[Flayn]] • [[Hanneman]] • [[Manuela]] • [[Alois]] • [[Catherine]] • [[Anna]] • [[Constance]] | | [[Claude]] • [[Ferdinand]] • [[Bernadetta]] • [[Dedue]] • [[Lorenz (Three Houses)|Lorenz]] • [[Ignatz]] • [[Marianne]] • [[Leonie]] • [[Seteth]] • [[Flayn]] • [[Hanneman]] • [[Manuela]] • [[Alois]] • [[Catherine]] • [[Anna/Three Houses|Anna]] • [[Constance]] | ||
| [[Caspar]] • [[Lysithea]] • [[Shamir]] • [[Yuri]] • [[Hapi]] | | [[Caspar]] • [[Lysithea]] • [[Shamir]] • [[Yuri]] • [[Hapi]] | ||
| Fish | | Fish | ||
| Line 680: | Line 740: | ||
| Jerky aged in the monastery and sautéed for a delightfully salty flavor. A perfect snack to go with your favorite drink. | | Jerky aged in the monastery and sautéed for a delightfully salty flavor. A perfect snack to go with your favorite drink. | ||
| Poultry (×1)<br>Chickpeas (×1) | | Poultry (×1)<br>Chickpeas (×1) | ||
| [[Dimitri]] • [[Claude]] • [[Hubert]] • [[Caspar]] • [[Petra]] • [[Dedue]] • [[Felix]] • [[Raphael]] • [[Manuela]] • [[Shamir]] • [[Cyril]] • [[Anna]] • [[Yuri]] • [[Balthus]] • [[Hapi]] | | [[Dimitri]] • [[Claude]] • [[Hubert]] • [[Caspar]] • [[Petra]] • [[Dedue]] • [[Felix]] • [[Raphael]] • [[Manuela]] • [[Shamir]] • [[Cyril]] • [[Anna/Three Houses|Anna]] • [[Yuri]] • [[Balthus]] • [[Hapi]] | ||
| [[Linhardt]] • [[Bernadetta]] • [[Mercedes]] • [[Lysithea]] • [[Flayn]] • [[Alois]] • [[Jeritza]] • [[Constance]] | | [[Linhardt]] • [[Bernadetta]] • [[Mercedes]] • [[Lysithea]] • [[Flayn]] • [[Alois]] • [[Jeritza]] • [[Constance]] | ||
| Spicy | | Spicy | ||
| Line 687: | Line 747: | ||
| Spicy stew made with Teutates loach and turnips. The monastery's unique recipe features spices from Dagda. | | Spicy stew made with Teutates loach and turnips. The monastery's unique recipe features spices from Dagda. | ||
| Teutates Loach (×1)<br>Turnip (×1) | | Teutates Loach (×1)<br>Turnip (×1) | ||
| [[Hubert]] • [[Petra]] • [[Dedue]] • [[Felix]] • [[Ashe]] • [[Sylvain]] • [[Annette]] • [[Ingrid]] • [[Leonie]] • [[Seteth]] • [[Manuela]] • [[Gilbert]] • [[Anna]] • [[Balthus]] • [[Hapi]] | | [[Hubert]] • [[Petra]] • [[Dedue]] • [[Felix]] • [[Ashe]] • [[Sylvain]] • [[Annette]] • [[Ingrid]] • [[Leonie]] • [[Seteth]] • [[Manuela]] • [[Gilbert]] • [[Anna/Three Houses|Anna]] • [[Balthus]] • [[Hapi]] | ||
| [[Linhardt]] • [[Caspar]] • [[Bernadetta]] • [[Dorothea]] • [[Mercedes]] • [[Lorenz (Three Houses)|Lorenz]] • [[Ignatz]] • [[Lysithea]] • [[Hanneman]] • [[Alois]] • [[Jeritza]] • [[Yuri]] • [[Constance]] | | [[Linhardt]] • [[Caspar]] • [[Bernadetta]] • [[Dorothea]] • [[Mercedes]] • [[Lorenz (Three Houses)|Lorenz]] • [[Ignatz]] • [[Lysithea]] • [[Hanneman]] • [[Alois]] • [[Jeritza]] • [[Yuri]] • [[Constance]] | ||
| Spicy | | Spicy | ||
| Line 694: | Line 754: | ||
| Whitefish is coated in spices and sautéed with dried tomatoes to bring out an addictive salty-sweet flavor. | | Whitefish is coated in spices and sautéed with dried tomatoes to bring out an addictive salty-sweet flavor. | ||
| Teutates Loach (×1)<br>Tomato (×1) | | Teutates Loach (×1)<br>Tomato (×1) | ||
| [[Hubert]] • [[Dedue]] • [[Felix]] • [[Ashe]] • [[Sylvain]] • [[Annette]] • [[Ingrid]] • [[Leonie]] • [[Seteth]] • [[Manuela]] • [[Gilbert]] • [[Anna]] • [[Balthus]] • [[Hapi]] | | [[Hubert]] • [[Dedue]] • [[Felix]] • [[Ashe]] • [[Sylvain]] • [[Annette]] • [[Ingrid]] • [[Leonie]] • [[Seteth]] • [[Manuela]] • [[Gilbert]] • [[Anna/Three Houses|Anna]] • [[Balthus]] • [[Hapi]] | ||
| [[Linhardt]] • [[Caspar]] • [[Bernadetta]] • [[Dorothea]] • [[Petra]] • [[Mercedes]] • [[Lorenz (Three Houses)|Lorenz]] • [[Lysithea]] • [[Hanneman]] • [[Jeritza]] | | [[Linhardt]] • [[Caspar]] • [[Bernadetta]] • [[Dorothea]] • [[Petra]] • [[Mercedes]] • [[Lorenz (Three Houses)|Lorenz]] • [[Lysithea]] • [[Hanneman]] • [[Jeritza]] | ||
| Spicy | | Spicy | ||
| Line 708: | Line 768: | ||
| Thin slices of bird meat and shredded cabbage, mixed with scrambled eggs and sautéed with spices. Invention of a certain noble. | | Thin slices of bird meat and shredded cabbage, mixed with scrambled eggs and sautéed with spices. Invention of a certain noble. | ||
| Poultry (×1)<br>Cabbage (×1) | | Poultry (×1)<br>Cabbage (×1) | ||
| [[Edelgard]] • [[Claude]] • [[Hubert]] • [[Ferdinand]] • [[Caspar]] • [[Felix]] • [[Sylvain]] • [[Raphael]] • [[Ignatz]] • [[Marianne]] • [[Seteth]] • [[Manuela]] • [[Gilbert]] • [[Shamir]] • [[Cyril]] • [[Anna]] • [[Constance]] • [[Hapi]] | | [[Edelgard]] • [[Claude]] • [[Hubert]] • [[Ferdinand]] • [[Caspar]] • [[Felix]] • [[Sylvain]] • [[Raphael]] • [[Ignatz]] • [[Marianne]] • [[Seteth]] • [[Manuela]] • [[Gilbert]] • [[Shamir]] • [[Cyril]] • [[Anna/Three Houses|Anna]] • [[Constance]] • [[Hapi]] | ||
| [[Linhardt]] • [[Bernadetta]] • [[Mercedes]] • [[Lorenz (Three Houses)|Lorenz]] • [[Lysithea]] • [[Flayn]] • [[Alois]] • [[Jeritza]] • [[Yuri]] | | [[Linhardt]] • [[Bernadetta]] • [[Mercedes]] • [[Lorenz (Three Houses)|Lorenz]] • [[Lysithea]] • [[Flayn]] • [[Alois]] • [[Jeritza]] • [[Yuri]] | ||
| Spicy | | Spicy | ||
| Line 729: | Line 789: | ||
| A Dagdan dish of raw fish and turnips pickled in a vinegar-based seasoning liquid. Rarely eaten in Fódlan. | | A Dagdan dish of raw fish and turnips pickled in a vinegar-based seasoning liquid. Rarely eaten in Fódlan. | ||
| Caledonian Gar (×1)<br>Turnip (×1) | | Caledonian Gar (×1)<br>Turnip (×1) | ||
| [[Hubert]] • [[Petra]] • [[Dedue]] • [[Annette]] • [[Raphael]] • [[Leonie]] • [[Seteth]] • [[Flayn]] • [[Hanneman]] • [[Gilbert]] • [[Alois]] • [[Catherine]] • [[Anna]] • [[Hapi]] | | [[Hubert]] • [[Petra]] • [[Dedue]] • [[Annette]] • [[Raphael]] • [[Leonie]] • [[Seteth]] • [[Flayn]] • [[Hanneman]] • [[Gilbert]] • [[Alois]] • [[Catherine]] • [[Anna/Three Houses|Anna]] • [[Hapi]] | ||
| [[Ferdinand]] • [[Caspar]] • [[Ingrid]] • [[Ignatz]] • [[Lysithea]] • [[Hilda]] • [[Manuela]] • [[Cyril]] • [[Balthus]] | | [[Ferdinand]] • [[Caspar]] • [[Ingrid]] • [[Ignatz]] • [[Lysithea]] • [[Hilda]] • [[Manuela]] • [[Cyril]] • [[Balthus]] | ||
| Bitter | | Bitter | ||
| Line 737: | Line 797: | ||
| Poultry (×1)<br>Noa Fruit (×1) | | Poultry (×1)<br>Noa Fruit (×1) | ||
| [[Dimitri]] • [[Claude]] • [[Hubert]] • [[Linhardt]] • [[Dorothea]] • [[Felix]] • [[Raphael]] • [[Hilda]] • [[Hanneman]] • [[Catherine]] • [[Balthus]] | | [[Dimitri]] • [[Claude]] • [[Hubert]] • [[Linhardt]] • [[Dorothea]] • [[Felix]] • [[Raphael]] • [[Hilda]] • [[Hanneman]] • [[Catherine]] • [[Balthus]] | ||
| [[Edelgard]] • [[Ferdinand]] • [[Caspar]] • [[Petra]] • [[Dedue]] • [[Ashe]] • [[Mercedes]] • [[Annette]] • [[Ignatz]] • [[Marianne]] • [[Flayn]] • [[Manuela]] • [[Shamir]] • [[Anna]] • [[Yuri]] • [[Constance]] | | [[Edelgard]] • [[Ferdinand]] • [[Caspar]] • [[Petra]] • [[Dedue]] • [[Ashe]] • [[Mercedes]] • [[Annette]] • [[Ignatz]] • [[Marianne]] • [[Flayn]] • [[Manuela]] • [[Shamir]] • [[Anna/Three Houses|Anna]] • [[Yuri]] • [[Constance]] | ||
| Bitter | | Bitter | ||
|- | |- | ||
| Line 752: | Line 812: | ||
| [[Jeritza]] • [[Hapi]] | | [[Jeritza]] • [[Hapi]] | ||
| [[Hubert]] • [[Linhardt]] • [[Caspar]] • [[Dorothea]] • [[Petra]] • [[Felix]] • [[Sylvain]] • [[Ingrid]] • [[Lorenz (Three Houses)|Lorenz]] • [[Lysithea]] • [[Leonie]] • [[Hanneman]] • [[Manuela]] • [[Catherine]] • [[Shamir]] • [[Cyril]] | | [[Hubert]] • [[Linhardt]] • [[Caspar]] • [[Dorothea]] • [[Petra]] • [[Felix]] • [[Sylvain]] • [[Ingrid]] • [[Lorenz (Three Houses)|Lorenz]] • [[Lysithea]] • [[Leonie]] • [[Hanneman]] • [[Manuela]] • [[Catherine]] • [[Shamir]] • [[Cyril]] | ||
| | | — | ||
|- | |- | ||
| class="roundbl" | Fried Crayfish | | class="roundbl" | Fried Crayfish | ||
| Fried and breaded Caledonian crayfish. Looks much tastier than it actually is. | | Fried and breaded Caledonian crayfish. Looks much tastier than it actually is. | ||
| Caledonian Crayfish (×3) | | Caledonian Crayfish (×3) | ||
| [[Jeritza]] • [[Anna]] • [[Hapi]] | | [[Jeritza]] • [[Anna/Three Houses|Anna]] • [[Hapi]] | ||
| [[Claude]] • [[Hubert]] • [[Linhardt]] • [[Caspar]] • [[Dorothea]] • [[Petra]] • [[Felix]] • [[Ashe]] • [[Sylvain]] • [[Raphael]] • [[Lysithea]] • [[Seteth]] • [[Manuela]] • [[Gilbert]] • [[Catherine]] • [[Shamir]] • [[Cyril]] • [[Balthus]] | | [[Claude]] • [[Hubert]] • [[Linhardt]] • [[Caspar]] • [[Dorothea]] • [[Petra]] • [[Felix]] • [[Ashe]] • [[Sylvain]] • [[Raphael]] • [[Lysithea]] • [[Seteth]] • [[Manuela]] • [[Gilbert]] • [[Catherine]] • [[Shamir]] • [[Cyril]] • [[Balthus]] | ||
| class="roundbr" | | | class="roundbr" | — | ||
|} | |} | ||
=====Dining Hall Events===== | =====Dining Hall Events===== | ||
Occasionally, there will be special events at the dining hall which will be marked on the calendar. On these days, specific units specified in the event description will receive increased bonuses. For these events, the shared meal is set, and the player will not have to provide their own ingredients. The following table lists all events at the Dining Hall: | Occasionally, there will be special events at the dining hall which will be marked on the calendar. On these days, specific units specified in the event description will receive increased bonuses. For these events, the shared meal is set, and the player will not have to provide their own ingredients. The following table lists all events at the Dining Hall: | ||
| Line 782: | Line 841: | ||
| Saghert and Cream | | Saghert and Cream | ||
| A special menu to bring professors and students together. Effects are enhanced when dining with students from your own house. | | A special menu to bring professors and students together. Effects are enhanced when dining with students from your own house. | ||
| Units from | | Units from Byleth's house | ||
|- | |- | ||
| Sweet-Tooth Week | | Sweet-Tooth Week | ||
| Peach Sorbet | | Peach Sorbet | ||
| During this joyous week, dine on scrumptious sweets imported from all across Fodlan. Effects are enhanced for those who love sweets. | | During this joyous week, dine on scrumptious sweets imported from all across Fodlan. Effects are enhanced for those who love sweets. | ||
| | | [[Edelgard]] • [[Linhardt]] • [[Bernadetta]] • [[Dorothea]] • [[Ashe]] • [[Mercedes]] • [[Annette]] • [[Lysithea]] • [[Marianne]] • [[Hilda]] • [[Flayn]] • [[Hanneman]] • [[Alois]] • [[Shamir]] • [[Jeritza]] • [[Anna/Three Houses|Anna]] • [[Yuri]] • [[Constance]] | ||
|- | |- | ||
| Fish Bounty Festival | | Fish Bounty Festival | ||
| Fish Sandwich | | Fish Sandwich | ||
| A festival in the dining hall with plenty of fresh fish for all to enjoy. Effects are enhanced when dining a fish enthusiast. | | A festival in the dining hall with plenty of fresh fish for all to enjoy. Effects are enhanced when dining a fish enthusiast. | ||
| | | [[Edelgard]] • [[Ferdinand]] • [[Petra]] • [[Dedue]] • [[Ashe]] • [[Sylvain]] • [[Ingrid]] • [[Raphael]] • [[Leonie]] • [[Seteth]] • [[Flayn]] • [[Manuela]] • [[Gilbert]] • [[Alois]] • [[Catherine]] • [[Yuri]] • [[Hapi]] | ||
|- | |- | ||
| Hunting Festival | | Hunting Festival | ||
| Derdriu-Style Fried Pheasant | | Derdriu-Style Fried Pheasant | ||
| A festival in the dining hall featuring meats from practically every region. Effects are enhanced when dining with a meat enthusiast. | | A festival in the dining hall featuring meats from practically every region. Effects are enhanced when dining with a meat enthusiast. | ||
| | | [[Claude]] • [[Caspar]] • [[Bernadetta]] • [[Felix]] • [[Ingrid]] • [[Raphael]] • [[Lysithea]] • [[Hilda]] • [[Leonie]] • [[Seteth]] • [[Hanneman]] • [[Manuela]] • [[Gilbert]] • [[Catherine]] • [[Cyril]] • [[Anna/Three Houses|Anna]] • [[Balthus]] • [[Hapi]] | ||
|- | |- | ||
| class="roundbl" | Head Chef Challenge | | class="roundbl" | Head Chef Challenge | ||
| Line 806: | Line 865: | ||
====Cooking Together==== | ====Cooking Together==== | ||
'''Cooking Together''' is unlocked after completing the [[Creative Cuisines]] quest, available from | '''Cooking Together''' is unlocked after completing the [[Creative Cuisines]] quest, available from Chapter 2. It allows the player to choose one other unit to cook a meal together. In Part I, that character does not have to be recruited into the player's army, though they have to be at the monastery at that time (e.g. Catherine will not be available during [[Where the Goddess Dwells|Chapter 10]]). In Part II, the character has to be recruited into the player's army. They will then be prompted to choose a dish to cook. Cooking Together consumes one activity point and can only be done once per free day. | ||
Cooking Together will increase | Cooking Together will increase Byleth's support points with the other student, and will also provide a small stat boost for the rest of the chapter (including auxiliary battles), with the stat boost being determined by the chosen dish. The stat boosts can stack with each other. The player will also need to provide the ingredients themself. Ingredients can be obtained through monastery quests, auxiliary battles, gardening or fishing. | ||
Some characters are better at cooking than others. Wether a character is good at cooking or not is shown through two arrows that either point up or down when selecting them. If the character Byleth is cooking with is good at cooking, the support points gained from cooking are doubled. If they are bad at cooking, the support points gained are halved. The stat gains from cooking are not affected by cooking prowess. | Some characters are better at cooking than others. Wether a character is good at cooking or not is shown through two arrows that either point up or down when selecting them. If the character Byleth is cooking with is good at cooking, the support points gained from cooking are doubled. If they are bad at cooking, the support points gained are halved. The stat gains from cooking are not affected by cooking prowess. | ||
| Line 819: | Line 878: | ||
! class="roundtr" | Bad | ! class="roundtr" | Bad | ||
|- | |- | ||
| class="roundbl" | [[Bernadetta]] • [[Dedue]] • [[Ashe]] • [[Mercedes]] • [[Manuela]] • [[Gilbert]] • [[Yuri]] • [[Anna]] | | class="roundbl" | [[Bernadetta]] • [[Dedue]] • [[Ashe]] • [[Mercedes]] • [[Manuela]] • [[Gilbert]] • [[Yuri]] • [[Anna/Three Houses|Anna]] | ||
| [[Edelgard]] • [[Dimitri]] • [[Claude]] • [[Hubert]] • [[Linhardt]] • [[Dorothea]] • [[Petra]] • [[Felix]] • [[Sylvain]] • [[Ingrid]] • [[Annette]] • [[Hilda]] • [[Lorenz (Three Houses)|Lorenz]] • [[Ignatz]] • [[Lysithea]] • [[Marianne]] • [[Leonie]] • [[Seteth]] • [[Alois]] • [[Catherine]] • [[Shamir]] • [[Cyril]] • [[Balthus]] | | [[Edelgard]] • [[Dimitri]] • [[Claude]] • [[Hubert]] • [[Linhardt]] • [[Dorothea]] • [[Petra]] • [[Felix]] • [[Sylvain]] • [[Ingrid]] • [[Annette]] • [[Hilda]] • [[Lorenz (Three Houses)|Lorenz]] • [[Ignatz]] • [[Lysithea]] • [[Marianne]] • [[Leonie]] • [[Seteth]] • [[Alois]] • [[Catherine]] • [[Shamir]] • [[Cyril]] • [[Balthus]] | ||
| class="roundbr" | [[Caspar]] • [[Raphael]] • [[Flayn]] • [[Hanneman]] • [[Constance]] • [[Hapi]] | | class="roundbr" | [[Caspar]] • [[Raphael]] • [[Flayn]] • [[Hanneman]] • [[Constance]] • [[Hapi]] | ||
| Line 886: | Line 945: | ||
===Dormitory=== | ===Dormitory=== | ||
The dormitory is devided in two seperate floors. The dormitory does not house any faculty, but will allow the player to visit the individual students' rooms. Notably, [[Bernadetta]]'s room will be locked for most of the game, only being open for specific chapters. Although Seteth claims that the second floor is reserved for the nobles, some nobles—such as | The dormitory is devided in two seperate floors. The dormitory does not house any faculty, but will allow the player to visit the individual students' rooms. Notably, [[Bernadetta]]'s room will be locked for most of the game, only being open for specific chapters. Although Seteth claims that the second floor is reserved for the nobles, some nobles—such as Bernadetta or [[Lysithea]] have their room in the first floor. The northernmost room of the first floor is Byleth's room. | ||
====Byleth's Room==== | ====Byleth's Room==== | ||
| Line 892: | Line 951: | ||
=====Journal===== | =====Journal===== | ||
Byleth's journal is available at their room. It grants the player access to a variety of features, though most of them are only available through | Byleth's journal is available at their room. It grants the player access to a variety of features, though most of them are only available through New Game +. | ||
======Unit Appearance====== | ======Unit Appearance====== | ||
The ''Unit Appearance'' submenu is the only one that is available to the player on a non-New Game + playthrough. It allows them to change the appearance of their units both at the monastery and on the battlefield. As of version 1.2.0, it can also be accessed by pressing the L button on the activity selection screen. | The '''Unit Appearance''' submenu is the only one that is available to the player on a non-New Game + playthrough. It allows them to change the appearance of their units both at the monastery and on the battlefield. As of version 1.2.0, it can also be accessed by pressing the L button on the activity selection screen. | ||
As part of the | As part of the Expansion Pass, new costumes were added to the game. However, most of them are only available to Byleth and their students. Flayn and [[Cyril]] are treated as students for the purposes of choosing their outfits. | ||
At the monastery, the following outfits are available: | At the monastery, the following outfits are available: | ||
| Line 909: | Line 968: | ||
|- | |- | ||
| War Attire | | War Attire | ||
| [[Byleth]] • [[Seteth]] • [[Flayn]] • [[Hanneman]] • [[Manuela]] • [[Alois]] • [[Catherine]] • [[Shamir]] • [[Gilbert]] • [[Anna]] | | [[Byleth]] • [[Seteth]] • [[Flayn]] • [[Hanneman]] • [[Manuela]] • [[Alois]] • [[Catherine]] • [[Shamir]] • [[Gilbert]] • [[Anna/Three Houses|Anna]] | ||
| Unlocked by default. | | Unlocked by default. | ||
| Default outfit. | | Default outfit. | ||
| Line 941: | Line 1,000: | ||
| [[Byleth]] | | [[Byleth]] | ||
| Included in Wave 2 of the Expansion Pass.<br>Requires at least version 1.0.2. | | Included in Wave 2 of the Expansion Pass.<br>Requires at least version 1.0.2. | ||
| | | — | ||
|- | |- | ||
| Summer Wear | | Summer Wear | ||
| Line 956: | Line 1,015: | ||
| [[Byleth]], all students | | [[Byleth]], all students | ||
| Included in Wave 3 of the Expansion Pass.<br>Requires at least version 1.1.0. | | Included in Wave 3 of the Expansion Pass.<br>Requires at least version 1.1.0. | ||
| Outfit changes based on unit's gender.<br>Available in both a "Classic" and a "Custom" variation. | | Outfit changes based on unit's gender.<br>Available in both a "Classic" and a "Custom" variation. Classic uses a black color scheme, while Custom uses a color scheme based on the unit.<br>Different outfits are available for Parts I and II. | ||
|- | |- | ||
| Sothis Regalia | | Sothis Regalia | ||
| [[Byleth]] | | [[Byleth]] | ||
| Part of the Expansion Pass.<br>Added in an update on December 19th, 2019. | | Part of the Expansion Pass.<br>Added in an update on December 19th, 2019. | ||
| | | — | ||
|- | |- | ||
| Dancer Attire | | Dancer Attire | ||
| [[Byleth]] | | [[Byleth]] | ||
| Included in Wave 4 of the Expansion Pass.<br>Requires at least version 1.2.0. | | Included in Wave 4 of the Expansion Pass.<br>Requires at least version 1.2.0. | ||
| | | — | ||
|- | |- | ||
| Tricky Merchant | | class="roundbl" | Tricky Merchant | ||
| [[Anna]] | | [[Anna/Three Houses|Anna]] | ||
| Included in Wave 4 of the Expansion Pass.<br>Requires at least version 1.2.0. | | Included in Wave 4 of the Expansion Pass.<br>Requires at least version 1.2.0. | ||
| | | class="roundbr" | — | ||
|} | |} | ||
| Line 980: | Line 1,039: | ||
======New Game + features====== | ======New Game + features====== | ||
{{also|New Game +#Fire Emblem: Three Houses{{!}}New Game + § ''Fire Emblem: Three Houses''}} | {{also|New Game +#Fire Emblem: Three Houses{{!}}New Game + § ''Fire Emblem: Three Houses''}} | ||
[[File:Ss fe16 ng+ support menu.jpg|The Support Level menu, accessed through Byleth's journal.|thumb|left|250px]] | [[File:Ss fe16 ng+ support menu.jpg|The Support Level menu, accessed through Byleth's journal.|thumb|left|250px]] | ||
Through | |||
Through New Game +, the following options become available to the player: | |||
;Professor Level | ;Professor Level | ||
:This option allows the player to instantly raise | :This option allows the player to instantly raise Byleth's professor level by spending renown. It can be increased up until the highest professor level that was achieved on the same New Game + file. Each level costs 500 renown to obtain, with the total price being determined by the difference between Byleth's current professor level and the level the player is purchasing. | ||
;Support Levels | ;Support Levels | ||
:This option allows to player to instantly increase Byleth's | :This option allows to player to instantly increase Byleth's support levels with other units by spending renown. Since recruitment requirements vary based on support level, this allows the player to recruit units from other houses much faster. Each support level costs 400 renown to purchase ("+" supports do not cost extra). Support ranks can only be increased up until the highest rank that was achieved on the same New Game + file, though it is possible to obtain S supports that haven't been unlocked yet [[Glitch#Unlocking S supports in New Game + that have not been unlocked|due to an oversight]]. | ||
:Notably, this is the only way to obtain multiple S support levels on one playthrough, and also the only way to make use of the benefits of an S support in battle as otherwise, S supports are only obtained after the final battle. However, it is only possible to buy S support levels with characters that can S support the current version of Byleth (e.g. male Byleth cannot buy an S support with | :Notably, this is the only way to obtain multiple S support levels on one playthrough, and also the only way to make use of the benefits of an S support in battle as otherwise, S supports are only obtained after the final battle. However, it is only possible to buy S support levels with characters that can S support the current version of Byleth (e.g. male Byleth cannot buy an S support with Dimitri). | ||
:Support levels between other units cannot be bought in this way. | :Support levels between other units cannot be bought in this way. | ||
;Skill Levels | ;Skill Levels | ||
:This option allows the player to instantly increase the skill ranks of any unit in their current army by spending renown. It can be increased up until the highest skill level that was achieved on the same New Game + file. Each level costs 500 renown to obtain, with the total price being determined by the difference between the unit's current skill level and the level the player is purchasing. | :This option allows the player to instantly increase the skill ranks of any unit in their current army by spending renown. It can be increased up until the highest skill level that was achieved on the same New Game + file. Each level costs 500 renown to obtain, with the total price being determined by the difference between the unit's current skill level and the level the player is purchasing. | ||
;Class Abilities | ;Class Abilities | ||
:This option allows the player to purchase class abilities that were unlocked on a previous playthrough using the same New Game + file. The player can buy these abilities regardless of | :This option allows the player to purchase class abilities that were unlocked on a previous playthrough using the same New Game + file. The player can buy these abilities regardless of whether they would be able to certify for the corresponding class, so even if a unit's level or skill level is not sufficient, this option can grant them those classes' mastery abilities. The corresponding class will be marked as mastered. | ||
:Notably, this allows the player to transfer gender-exclusive skills such as [[Quick Riposte]] to a | :Notably, this allows the player to transfer gender-exclusive skills such as [[Quick Riposte]] to a Byleth whose gender would otherwise prohibit them from obtaining those skills. | ||
;Crest Items | ;Crest Items | ||
:This option allows the player to purchase [[ | :This option allows the player to purchase [[crest item]]s that allow them to use crest abilities a unit would not be able to use otherwise. However, the crest abilities are weaker than even a minor crest, with the exclusive [[combat art]]s from [[Heroes' Relics]] now costing 5 durability instead of 4 for a minor crest or 3 for a major one. Additionally, the crest's trigger rate is reduced, with the amount being dependent on the specific crest. A unit who bears the corresponding crest can also use the crest items to increase the odds of their crests activating during combat. | ||
:Depending on the route the player has finished last using that same New Game + file, certain crest items will be stored in their [[convoy]] automatically and do not have to be purchased again. The following table lists the crest items and which routes they are available on: | :Depending on the route the player has finished last using that same New Game + file, certain crest items will be stored in their [[convoy]] automatically and do not have to be purchased again. The following table lists the crest items and which routes they are available on: | ||
{| class="cellpadding-2 | {| class="cellpadding-2 basic" style="width: 50%; border-width: 2px" | ||
! style="background: none" colspan="6" | Crest items | ! style="background: none" colspan="6" | Crest items | ||
|- | |- | ||
| Line 1,149: | Line 1,210: | ||
| {{y}} | | {{y}} | ||
|- | |- | ||
| {{Item|16|Aegis Dragon Sign}} | | class="roundbl" | {{Item|16|Aegis Dragon Sign}} | ||
| Lamine | | Lamine | ||
| {{y}} | | {{y}} | ||
| {{n}} | | {{n}} | ||
| {{y}} | | {{y}} | ||
| {{n}} | | class="roundbr" | {{n}} | ||
|} | |} | ||
| Line 1,163: | Line 1,222: | ||
;Sacred Items Set | ;Sacred Items Set | ||
:If the player has purchased the Season Pass, they will have access to the following items. They can be picked up at any time, though they can only be picked up once per playthrough ( | :If the player has purchased the Season Pass, they will have access to the following items. They can be picked up at any time, though they can only be picked up once per playthrough (New Game + counts as a new playthrough) and only as a set. | ||
{| class="cellpadding-1 basic" style="padding: 3px; border-spacing: 4px; border-width: 2px; width: 50%" | {| class="cellpadding-1 basic" style="padding: 3px; border-spacing: 4px; border-width: 2px; width: 50%" | ||
| Line 1,184: | Line 1,243: | ||
| Permanently increases [[speed]] by 3. | | Permanently increases [[speed]] by 3. | ||
|- | |- | ||
| [[File:Is ns01 stat booster.png|20px]] | | class="roundbl" | [[File:Is ns01 stat booster.png|20px]] | ||
| [[Sacred Galewind Shoes]] | | [[Sacred Galewind Shoes]] | ||
| | | class="roundbr" | Permanently increases [[movement]] by 2. | ||
|} | |} | ||
;Cindered Shadows Reward | ;Cindered Shadows Reward | ||
:Additionally, the | :Additionally, the Cindered Shadows Reward can be obtained by completing [[Wolf Pack|Chapter 7]] of the Cindered Shadows side story. Like the Sacred Items set, it can only be obtained only once, at any point in a playthrough. It can be collected separately from the Sacred Items Set, though like the Sacred Items Set, the contents are not obtainable separately. | ||
{| class="cellpadding-1 basic" style="padding: 3px; border-spacing: 4px; border-width: 2px; width: 50%" | {| class="cellpadding-1 basic" style="padding: 3px; border-spacing: 4px; border-width: 2px; width: 50%" | ||
| Line 1,203: | Line 1,262: | ||
| Negates all [[Bonus damage]] against the bearer.<br>Grants [[Counterattack]] to the bearer. | | Negates all [[Bonus damage]] against the bearer.<br>Grants [[Counterattack]] to the bearer. | ||
|- | |- | ||
| | | class="roundbl" | — | ||
| 10,000 | | 10,000 renown | ||
| | | class="roundbr" | Increases renown by 10,000 points. | ||
|} | |} | ||
| Line 1,268: | Line 1,327: | ||
| 25% | | 25% | ||
| 5% | | 5% | ||
| | | — | ||
|- | |- | ||
| Fish of Mystery | | Fish of Mystery | ||
| Line 1,282: | Line 1,341: | ||
| 20% | | 20% | ||
| 10% | | 10% | ||
| | | — | ||
|- | |- | ||
| Lots of Large Fish | | class="roundbl" | Lots of Large Fish | ||
| 15% | | 15% | ||
| 40% | | 40% | ||
| 40% | | 40% | ||
| 5% | | 5% | ||
| class="roundbr" | | | class="roundbr" | — | ||
|} | |} | ||
If the player presses the A button, Byleth will attempt to pull the fish in. To do so, the player must complete a minigame where they have to press the A button at the correct time in a rhytm-style minigame. In this minigame, circles will appear and the player has to press the button when the circle fits exactly within a specific area. If the player manages to press the button at the right time, they will be given a rating of "Excellent!". | If the player presses the A button, Byleth will attempt to pull the fish in. To do so, the player must complete a minigame where they have to press the A button at the correct time in a rhytm-style minigame. In this minigame, circles will appear and the player has to press the button when the circle fits exactly within a specific area. If the player manages to press the button at the right time, they will be given a rating of "Excellent!". | ||
With each button press, both Byleth's and the fish's stamina – which is displayed at the bottom of the screen – will decrease. An Excellent rating will both decrease the stamina cost for Byleth and increase the stamina cost for the fish. If the fish's stamina runs out before Byleth's, the minigame is won and the fish will be caught, rewarding the player with a fish and some professor experience. If Byleth's stamina runs out before the fish's, the bait will be lost and Byleth will be rewarded a smaller amount of professor experience. Byleth's stamina increases with their | With each button press, both Byleth's and the fish's stamina – which is displayed at the bottom of the screen – will decrease. An Excellent rating will both decrease the stamina cost for Byleth and increase the stamina cost for the fish. If the fish's stamina runs out before Byleth's, the minigame is won and the fish will be caught, rewarding the player with a fish and some professor experience. If Byleth's stamina runs out before the fish's, the bait will be lost and Byleth will be rewarded a smaller amount of professor experience. Byleth's stamina increases with their professor level. | ||
The reward for fishing depends on three factors: | The reward for fishing depends on three factors: | ||
| Line 1,302: | Line 1,361: | ||
====Possible Rewards==== | ====Possible Rewards==== | ||
The rewards the player obtains are based on both the fish silhouette they caught and the bait they used. Each bait and silhouette combination has its own set of three possible rewards, with the reward the player obtains being determined randomly. Better rewards can be obtained by using bait of higher quality and by obtaining a | The rewards the player obtains are based on both the fish silhouette they caught and the bait they used. Each bait and silhouette combination has its own set of three possible rewards, with the reward the player obtains being determined randomly. Better rewards can be obtained by using bait of higher quality and by obtaining a Perfect rating.<ref>{{cite web|url=https://serenesforest.net/three-houses/monastery/fishing/|title=Fishing|site=Serenes Forest|retrieved=May 9, 2024}}</ref> | ||
{| class="cellpadding-3 basic" style="width: 70%; padding: 4px" | {| class="cellpadding-3 basic" style="width: 70%; padding: 4px" | ||
| Line 1,342: | Line 1,401: | ||
| [[Regular Fódlan Carp]] | | [[Regular Fódlan Carp]] | ||
|- | |- | ||
| [[Flayn's Bait]] | | class="roundbl" | [[Flayn's Bait]] | ||
| [[Carassius]] | | [[Carassius]] | ||
| [[Carassius]] | | [[Carassius]] | ||
| Line 1,386: | Line 1,445: | ||
| [[Teutates Loach]] | | [[Teutates Loach]] | ||
|- | |- | ||
| [[Flayn's Bait]] | | class="roundbl" | [[Flayn's Bait]] | ||
| [[Carassius]] | | [[Carassius]] | ||
| [[Carassius]] | | [[Carassius]] | ||
| Line 1,430: | Line 1,489: | ||
| [[Teutates Herring]] | | [[Teutates Herring]] | ||
|- | |- | ||
| [[Flayn's Bait]] | | class="roundbl" | [[Flayn's Bait]] | ||
| [[Carassius]] | | [[Carassius]] | ||
| [[Carassius]] | | [[Carassius]] | ||
| Line 1,474: | Line 1,533: | ||
| [[Teutates Herring]] | | [[Teutates Herring]] | ||
|- | |- | ||
| [[Flayn's Bait]] | | class="roundbl" | [[Flayn's Bait]] | ||
| [[Carassius]] | | [[Carassius]] | ||
| [[Carassius]] | | [[Carassius]] | ||
| Line 1,518: | Line 1,577: | ||
| [[Teutates Herring]] | | [[Teutates Herring]] | ||
|- | |- | ||
| [[Flayn's Bait]] | | class="roundbl" | [[Flayn's Bait]] | ||
| [[Carassius]] | | [[Carassius]] | ||
| [[Carassius]] | | [[Carassius]] | ||
| Line 1,562: | Line 1,621: | ||
| [[Teutates Herring]] | | [[Teutates Herring]] | ||
|- | |- | ||
| [[Flayn's Bait]] | | class="roundbl" | [[Flayn's Bait]] | ||
| [[Carassius]] | | [[Carassius]] | ||
| [[Carassius]] | | [[Carassius]] | ||
| Line 1,569: | Line 1,628: | ||
=====Odds of obtaining Rewards===== | =====Odds of obtaining Rewards===== | ||
Grades are mostly determined by the quality rating of the bait used. For a | Grades are mostly determined by the quality rating of the bait used. For a Perfect rating in the fishing minigame, the final grade is increased by 2. | ||
{| class="cellpadding-3 basic" style="width: 70%; padding: 4px" | {| class="cellpadding-3 basic" style="width: 70%; padding: 4px" | ||
| Line 1,609: | Line 1,668: | ||
| 100% | | 100% | ||
|- | |- | ||
| 7 | | class="roundbl" | 7 | ||
| 0% | | 0% | ||
| 0% | | 0% | ||
| Line 1,653: | Line 1,712: | ||
| 60% | | 60% | ||
|- | |- | ||
| 7 | | class="roundbl" | 7 | ||
| 0% | | 0% | ||
| 0% | | 0% | ||
| Line 1,697: | Line 1,756: | ||
| 52% | | 52% | ||
|- | |- | ||
| 7 | | class="roundbl" | 7 | ||
| 0% | | 0% | ||
| 0% | | 0% | ||
| Line 1,741: | Line 1,800: | ||
| 60% | | 60% | ||
|- | |- | ||
| 7 | | class="roundbl" | 7 | ||
| 0% | | 0% | ||
| 0% | | 0% | ||
| Line 1,787: | Line 1,846: | ||
| 50% | | 50% | ||
|- | |- | ||
| 7 | | class="roundbl" | 7 | ||
| 0% | | 0% | ||
| 0% | | 0% | ||
| Line 1,831: | Line 1,890: | ||
| 50% | | 50% | ||
|- | |- | ||
| 7 | | class="roundbl" | 7 | ||
| 0% | | 0% | ||
| 0% | | 0% | ||
| Line 1,838: | Line 1,897: | ||
===Greenhouse=== | ===Greenhouse=== | ||
The greenhouse allows the player to plant their seed-type items in one exploration session and then obtain new items the next time they explore the monastery. This can include [[stat booster]]s, [[gift]]s, and new seeds. Using the greenhouse does not consume activity points, but the greenhouse can only be used once per free day. | |||
=== | The player can only plant a limited amount of seeds per free day, with the specific amount being determined by their professor level: | ||
{|class="cellpadding-3 basic" style="width: 50%; padding: 4px" | |||
! style="background: none" colspan="2" | Available seeds | |||
|- style="color: #fff" | |||
! class="roundtl" | Professor level | |||
! class="roundtr" | Available seeds | |||
|- | |||
| E, E+ | |||
| 1 | |||
|- | |||
| D, D+ | |||
| 2 | |||
|- | |||
| C, C+ | |||
| 3 | |||
|- | |||
| B, B+ | |||
| 4 | |||
|- | |||
| class="roundbl" | A, A+ | |||
| class="roundbr" | 5 | |||
|} | |||
They may also choose to cultivate their seeds by spending some gold in exchange for better rewards. The available cultivation methods increase based on Byleth's professor level. More expensive cultivation methods may yield better rewards. | |||
The | |||
{|class="cellpadding-3 basic" style="width: 50%; padding: 4px" | |||
! style="background: none" colspan="3" | Available seeds | |||
|- style="color: #fff" | |||
! class="roundtl" | Professor level | |||
! Cultivation Method | |||
! class="roundtr" | Price | |||
|- | |||
| E | |||
| Infuse with magic | |||
| Free | |||
|- | |||
| E+ | |||
| Airmid water | |||
| 300G | |||
|- | |||
| D | |||
| Prune | |||
| 500G | |||
|- | |||
| C | |||
| Scatter Bonemeal | |||
| 1,000G | |||
|- | |||
| B | |||
| Caledonian soil | |||
| 1,500G | |||
|- | |||
| class="roundbl" | A | |||
| Pegasus Blessings | |||
| class="roundbr" | 2,000G | |||
|} | |||
The game will display a predicted quality of the yield by displaying one to three stalks, with more stalks meaning better quality. Predicted yield does not affect the amount of the rewards, but it does affect the types of items the player will be rewarded with. The game also assigns each yield a quality that can be either "good" or "bad", though this is not shown to the player. | |||
The resulting items are determined by the quality of the yield and the seeds used. The following table lists the possible items for each sead and quality combination: | |||
====Possible Yields==== | |||
{{Tab | {{Tab | ||
|tab1=One stalk | |||
|tab2=Two stalks | |||
|tab1= | |tab3=Three stalks | ||
|tab2= | |content1={{tablebegin}} class="basic" style="border-width: 2px; width: 90%" | ||
|tab3= | ! class="roundtl" style="width: 30%" {{!}} Seed | ||
|content1={{tablebegin}} class=" | ! style="width: 40%" {{!}} Good Yield | ||
!style=" | ! class="roundtr" style="width: 40%" {{!}} Bad Yield | ||
!style="width: | |||
! | |||
{{!-}} | {{!-}} | ||
{{!}} [[ | {{!}} [[Mixed Herb Seeds]] | ||
{{!}} [[ | {{!}} [[Mixed Herb Seeds]] • [[Turnip]] • [[Cabbage]] • [[Peach Currant]] | ||
{{!}} | {{!}} [[Weeds]] • [[Onion]] • [[Mixed Herb Seeds]] | ||
{{!-}} | {{!-}} | ||
{{!}} [[ | {{!}} [[Western Fódlan Seeds]] | ||
{{!}} [[ | {{!}} [[Western Fódlan Seeds]] • [[Noa Fruit]] • [[Chickpeas]] • [[Cabbage]] • [[Root Vegetable Seeds]] | ||
{{!}} | {{!}} [[Zanado Fruit]] • [[Carrot]] • [[Western Fódlan Seeds]] | ||
{{!-}} | {{!-}} | ||
{{!}} [[ | {{!}} [[Root Vegetable Seeds]] | ||
{{!}} [[ | {{!}} [[Root Vegetable Seeds]] • [[Albinean Berries]] • [[Tomato]] • [[Cabbage]] | ||
{{!}} | {{!}} [[Weeds]] • [[Chickpeas]] • [[Root Vegetable Seeds]] | ||
{{!-}} | {{!-}} | ||
{{!}} [[ | {{!}} [[Vegetable Seeds]] | ||
{{!}} [[ | {{!}} [[Dried Vegetables]] • [[Chickpeas]] • [[Onion]] • [[Peach Currant]] • [[Turnip]] | ||
{{!}} | {{!}} [[Dried Vegetables]] • [[Chickpeas]] • [[Vegetable Seeds]] | ||
{{!-}} | {{!-}} | ||
{{!}} [[ | {{!}} [[Northern Fódlan Seeds]] | ||
{{!}} [[ | {{!}} [[Northern Fódlan Seeds]] • [[Tomato]] • [[Chickpeas]] • [[Mixed Fruit Seeds]] | ||
{{!}} | {{!}} [[Dried Vegetables]] • [[Onion]] • [[Northern Fódlan Seeds]] | ||
{{!-}} | {{!-}} | ||
{{!}} [[ | {{!}} [[Morfis-Plum Seeds]] | ||
{{!}} [[ | {{!}} [[Zanado Fruit]] • [[Morfis-Plum Seeds]] • [[Morfis Plum]] • [[Peach Currant]] | ||
{{!}} [[Zanado Fruit]] • [[Peach Currant]] • [[Noa Fruit]] • [[Morfis-Plum Seeds]] | |||
{{!}} | |||
{{!-}} | {{!-}} | ||
{{!}} [[ | {{!}} [[Southern Fódlan Seeds]] | ||
{{!}} [[ | {{!}} [[Southern Fódlan Seeds]] • [[Turnip]] • [[Peach Currant]] • [[Cabbage]] • [[Western Fódlan Seeds]] | ||
{{!}} | {{!}} [[Weeds]] • [[Carrot]] • [[Southern Fódlan Seeds]] | ||
{{!-}} | {{!-}} | ||
{{!}} [[ | {{!}} [[Morfis Seeds]] | ||
{{!}} [[ | {{!}} [[Morfis Seeds]] • [[Carrot]] • [[Turnip]] • [[Mixed Fruit Seeds]] | ||
{{!}} | {{!}} [[Weeds]] • [[Turnip]] • [[Morfis Seeds]] | ||
{{!-}} | {{!-}} | ||
{{!}} [[ | {{!}} [[Nordsalat Seeds]] | ||
{{!}} [[ | {{!}} [[Dried Vegetables]] • [[Nordsalat Seeds]] • [[Chickpeas]] • [[Nordsalat]] | ||
{{!}} | {{!}} [[Dried Vegetables]] • [[Verona]] • [[Carrot]] • [[Nordsalat Seeds]] | ||
{{!-}} | {{!-}} | ||
{{!}} [[ | {{!}} [[Boa-Fruit Seeds]] | ||
{{!}} [[ | {{!}} [[Weeds]] • [[Boa-Fruit Seeds]] • [[Boa Fruit]] | ||
{{!}} [[Weeds]] • [[Peach Currant]] • [[Boa-Fruit Seeds]] | |||
{{!}} | |||
{{!-}} | {{!-}} | ||
{{!}} [[ | {{!}} [[Albinean Seeds]] | ||
{{!}} [[ | {{!}} [[Albinean Seeds]] • [[Chickpeas]] • [[Peach Currant]] • [[Albinean Berries]] • [[Mixed Fruit Seeds]] | ||
{{!}} | {{!}} [[Zanado Fruit]] • [[Peach Currant]] • [[Albinean Seeds]] | ||
{{!-}} | {{!-}} | ||
{{!}} [[ | {{!}} [[Eastern Fódlan Seeds]] | ||
{{!}} [[ | {{!}} [[Eastern Fódlan Seeds]] • [[Verona]] • [[Onion]] • [[Peach Currant]] | ||
{{!}} | {{!}} [[Weeds]] • [[Tomato]] • [[Eastern Fódlan Seeds]] | ||
{{!-}} | {{!-}} | ||
{{!}} [[ | {{!}} [[Angelica Seeds]] | ||
{{!}} [[ | {{!}} [[Weeds]] • [[Angelica Seeds]] • [[Angelica]] • [[Nordsalat]] | ||
{{!}} | {{!}} [[Weeds]] • [[Tomato]] • [[Angelica Seeds]] | ||
{{!-}} | {{!-}} | ||
{{!}} [[ | {{!}} [[Mixed Fruit Seeds]] | ||
{{!}} [[ | {{!}} [[Mixed Fruit Seeds]] • [[Northern Fódlan Seeds]] • [[Peach Currant]] • [[Root Vegetable Seeds]] | ||
{{!}} | {{!}} [[Zanado Fruit]] • [[Peach Currant]] • [[Mixed Fruit Seeds]] | ||
{{!-}} | {{!-}} | ||
{{!}} [[ | {{!}} [[Red Flower Seeds]] | ||
{{!}} [[ | {{!}} [[Weeds]] • [[Red Flower Seeds]] • [[Yellow Flower Seeds]] • [[Rose]] • [[Carnation]] | ||
{{!}} | {{!}} [[Weeds]] • [[Carnation]] • [[Red Flower Seeds]] | ||
{{!}} | {{!-}} | ||
{{!}} [[White Flower Seeds]] | |||
{{!}} [[Weeds]] • [[White Flower Seeds]] • [[Green Flower Seeds]] • [[Daffodil]] • [[Baby's Breath]] | |||
{{!}} [[Weeds]] • [[Baby's Breath]] • [[White Flower Seeds]] | |||
{{!-}} | |||
{{!}} [[Blue Flower Seeds]] | |||
{{!}} [[Weeds]] • [[Blue Flower Seeds]] • [[Pale-Blue Flower Seeds]] • [[Anemone]] • [[Forget-me-nots]] | |||
{{!}} [[Weeds]] • [[Forget-me-nots]] • [[Blue Flower Seeds]] | |||
{{!-}} | {{!-}} | ||
{{!}} [[ | {{!}} [[Purple Flower Seeds]] | ||
{{!}} [[ | {{!}} [[Weeds]] • [[Purple Flower Seeds]] • [[Red Flower Seeds]] • [[Violet]] • [[Lavender]] | ||
{{!}} | {{!}} [[Weeds]] • [[Lavender]] • [[Purple Flower Seeds]] | ||
{{!-}} | {{!-}} | ||
{{!}} [[ | {{!}} [[Yellow Flower Seeds]] | ||
{{!}} [[ | {{!}} [[Weeds]] • [[Yellow Flower Seeds]] • [[White Flower Seeds]] • [[Sunflower]] | ||
{{!}} | {{!}} [[Weeds]] • [[Sunflower]] • [[Yellow Flower Seeds]] | ||
{{!-}} | {{!-}} | ||
{{!}} [[ | {{!}} [[Green Flower Seeds]] | ||
{{!}} [[ | {{!}} [[Weeds]] • [[Green Flower Seeds]] • [[Blue Flower Seeds]] • [[Pitcher Plant]] | ||
{{!}} | {{!}} [[Weed]] • [[Pitcher Plant]] • [[Green Flower Seeds]] | ||
{{!-}} | {{!-}} | ||
{{!}} | {{!}} class="roundbl" {{!}} [[Pale-Blue Flower Seeds]] | ||
{{!}} [[ | {{!}} [[Weeds]] • [[Pale-Blue Flower Seeds]] • [[Purple Flower Seeds]] • [[Carnation]] | ||
{{!}} | {{!}} class="roundbr" {{!}} [[Weeds]] • [[Carnation]] • [[Pale-Blue Flower Seeds]] | ||
{{tableend}} | {{tableend}} | ||
|content2={{tablebegin}} class=" | |content2={{tablebegin}} class="basic" style="border-width: 2px; width: 90%" | ||
!style=" | ! class="roundtl" style="width: 30%" {{!}} Seed | ||
!style="width: | ! style="width: 40%" {{!}} Good Yield | ||
! | ! class="roundtr" style="width: 40%" {{!}} Bad Yield | ||
{{!-}} | {{!-}} | ||
{{!}} [[ | {{!}} [[Mixed Herb Seeds]] | ||
{{!}} [[ | {{!}} [[Mixed Herb Seeds]] • [[Peach Currant]] • [[Turnip]] • [[Yellow Flower Seeds]] • [[Mixed Fruit Seeds]] | ||
{{!}} | {{!}} [[Mixed Herb Seeds]] • [[Albinean Berries]] • [[Turnip]] • [[Mixed Fruit Seeds]] | ||
{{!-}} | {{!-}} | ||
{{!}} [[ | {{!}} [[Western Fódlan Seeds]] | ||
{{!}} [[ | {{!}} [[Western Fódlan Seeds]] • [[Noa Fruit]] • [[Tomato]] • [[Green Flower Seeds]] • [[Albinean Berries]] | ||
{{!}} | {{!}} [[Western Fódlan Seeds]] • [[Noa Fruit]] • [[Peach Currant]] • [[Vegetable Seeds]] | ||
{{!-}} | {{!-}} | ||
{{!}} [[ | {{!}} [[Root Vegetable Seeds]] | ||
{{!}} [[ | {{!}} [[Root Vegetable Seeds]] • [[Noa Fruit]] • [[Cabbage]] • [[Pale-Blue Flower Seeds]] • [[Northern Fódlan Seeds]] | ||
{{!}} [[Root Vegetable Seeds]] • [[Carrot]] • [[Cabbage]] • [[Peach Currant]] • [[Northern Fódlan Seeds]] | |||
{{!}} | |||
{{!-}} | {{!-}} | ||
{{!}} [[ | {{!}} [[Vegetable Seeds]] | ||
{{!}} [[ | {{!}} [[Vegetable Seeds]] • [[Peach Currant]] • [[Onion]] • [[Purple Flower Seeds]] • [[Noa Fruit]] | ||
{{!}} | {{!}} [[Vegetable Seeds]] • [[Onion]] • [[Tomato]] • [[Turnip]] • [[Mixed Herb Seeds]] | ||
{{!-}} | {{!-}} | ||
{{!}} [[ | {{!}} [[Northern Fódlan Seeds]] | ||
{{!}} [[ | {{!}} [[Northern Fódlan Seeds]] • [[Peach Currant]] • [[Noa Fruit]] • [[Yellow Flower Seeds]] • [[Albinean Berries]] | ||
{{!}} | {{!}} [[Northern Fódlan Seeds]] • [[Carrot]] • [[Noa Fruit]] • [[Mixed Fruit Seeds]] • [[Root Vegetable Seeds]] | ||
{{!-}} | {{!-}} | ||
{{!}} [[ | {{!}} [[Morfis-Plum Seeds]] | ||
{{!}} [[ | {{!}} [[Morfis-Plum Seeds]] • [[Tomato]] • [[Morfis Plum]] • [[Albinean Seeds]] | ||
{{!}} | {{!}} [[Morfis-Plum Seeds]] • [[Peach Currant]] • [[Noa Fruit]] • [[Morfis Plum]] | ||
{{!-}} | {{!-}} | ||
{{!}} [[ | {{!}} [[Southern Fódlan Seeds]] | ||
{{!}} [[ | {{!}} [[Southern Fódlan Seeds]] • [[Turnip]] • [[Verona]] • [[Red Flower Seeds]] • [[Magdred Kirsch]] | ||
{{!}} | {{!}} [[Southern Fódlan Seeds]] • [[Turnip]] • [[Cabbage]] • [[Peach Currant]] • [[Northern Fódlan Seeds]] | ||
{{!-}} | {{!-}} | ||
{{!}} [[ | {{!}} [[Morfis Seeds]] | ||
{{!}} [[ | {{!}} [[Morfis Seeds]] • [[Carrot]] • [[Turnip]] • [[White Flower Seeds]] • [[Vegetable Seeds]] | ||
{{!}} | {{!}} [[Morfis Seeds]] • [[Peach Currant]] • [[Chickpeas]] • [[Vegetable Seeds]] | ||
{{!-}} | {{!-}} | ||
{{!}} [[ | {{!}} [[Nordsalat Seeds]] | ||
{{!}} [[ | {{!}} [[Nordsalat Seeds]] • [[Nordsalat]] • [[Magdred Kirsch]] • [[Verona]] • [[Albinean Berries]] | ||
{{!}} | {{!}} [[Nordsalat Seeds]] • [[Carrot]] • [[Nordsalat]] | ||
{{!-}} | {{!-}} | ||
{{!}} [[ | {{!}} [[Boa-Fruit Seeds]] | ||
{{!}} [[ | {{!}} [[Boa-Fruit Seeds]] • [[Boa-Fruit]] • [[Angelica Seeds]] | ||
{{!}} | {{!}} [[Boa-Fruit Seeds]] • [[Peach Currant]] • [[Boa-Fruit]] | ||
{{!-}} | {{!-}} | ||
{{!}} [[ | {{!}} [[Albinean Seeds]] | ||
{{!}} [[ | {{!}} [[Albinean Seeds]] • [[Carrot]] • [[Peach Currant]] • [[Yellow Flower Seeds]] • [[Root Vegetable Seeds]] | ||
{{!}} | {{!}} [[Albinean Seeds]] • [[Peach Currant]] • [[Albinean Berries]] • [[Root Vegetable Seeds]] | ||
{{!-}} | {{!-}} | ||
{{!}} [[ | {{!}} [[Eastern Fódlan Seeds]] | ||
{{!}} [[ | {{!}} [[Eastern Fódlan Seeds]] • [[Peach Currant]] • [[Onion]] • [[Green Flower Seeds]] • [[Morfis Seeds]] | ||
{{!}} | {{!}} [[Eastern Fódlan Seeds]] • [[Onion]] • [[Morfis Seeds]] | ||
{{!-}} | {{!-}} | ||
{{!}} [[ | {{!}} [[Angelica Seeds]] | ||
{{!}} [[ | {{!}} [[Angelica Seeds]] • [[Angelica]] • [[Morfis-Plum Seeds]] | ||
{{!}} [[Angelica Seeds]] • [[Angelica]] • [[Magdred Kirsch]] | |||
{{!}} | |||
{{!-}} | {{!-}} | ||
{{!}} [[ | {{!}} [[Mixed Fruit Seeds]] | ||
{{!}} [[ | {{!}} [[Mixed Fruit Seeds]] • [[Northern Fódlan Seeds]] • [[Peach Currant]] • [[White Flower Seeds]] • [[Morfis Plum]] | ||
{{!}} | {{!}} [[Mixed Fruit Seeds]] • [[Northern Fódlan Seeds]] • [[Peach Currant]] • [[Albinean Berries]] • [[Root Vegetable Seeds]] | ||
{{!}} | {{!-}} | ||
{{!}} [[Red Flower Seeds]] | |||
{{!}} [[Daffodil]] • [[Lavender]] • [[Yellow Flower Seeds]] • [[Purple Flower Seeds]] • [[Blue Flower Seeds]] | |||
{{!}} [[Rose]] • [[Carnation]] • [[Lily]] • [[Lily of the Valley]] • [[Blue Flower Seeds]] | |||
{{!-}} | {{!-}} | ||
{{!}} [[ | {{!}} [[White Flower Seeds]] | ||
{{!}} [[ | {{!}} [[Sunflower]] • [[Anemone]] • [[Green Flower Seeds]] • [[Yellow Flower Seeds]] • [[Purple Flower Seeds]] | ||
{{!}} | {{!}} [[Daffodil]] • [[Baby's Breath]] • [[Lily]] • [[Lily of the Valley]] • [[Blue Flower Seeds]] | ||
{{!-}} | {{!-}} | ||
{{!}} [[ | {{!}} [[Blue Flower Seeds]] | ||
{{!}} [[ | {{!}} [[Violet]] • [[Lily of the Valley]] • [[Pale-Blue Flower Seeds]] • [[Green Flower Seeds]] • [[Yellow Flower Seeds]] | ||
{{!}} | {{!}} [[Forget-me-nots]] • [[Anemone]] • [[Rose]] • [[Purple Flower Seeds]] | ||
{{!-}} | {{!-}} | ||
{{!}} [[ | {{!}} [[Purple Flower Seeds]] | ||
{{!}} [[ | {{!}} [[Pitcher Plant]] • [[Baby's Breath]] • [[Red Flower Seeds]] • [[Pale-Blue Flower Seeds]] • [[Green Flower Seeds]] | ||
{{!}} | {{!}} [[Violet]] • [[Rose]] • [[Lavender]] • [[Forget-me-nots]] • [[Yellow Flower Seeds]] | ||
{{!-}} | {{!-}} | ||
{{!}} [[ | {{!}} [[Yellow Flower Seeds]] | ||
{{!}} [[ | {{!}} [[Carnation]] • [[Rose]] • [[White Flower Seeds]] • [[Red Flower Seeds]] • [[Pale-Blue Flower Seeds]] | ||
{{!}} [[Sunflower]] • [[Anemone]] • [[Dafodil]] • [[Lily]] • [[Green Flower Seeds]] | |||
{{!}} | |||
{{!-}} | {{!-}} | ||
{{!}} [[ | {{!}} [[Green Flower Seeds]] | ||
{{!}} [[ | {{!}} [[Lily]] • [[Violet]] • [[Blue Flower Seeds]] • [[White Flower Seeds]] • [[Red Flower Seeds]] | ||
{{!}} | {{!}} [[Pitcher Plant]] • [[Rose]] • [[Pale-Blue Flower Seeds]] | ||
{{!-}} | {{!-}} | ||
{{!}} [[ | {{!}} class="roundbl" {{!}} [[Pale-Blue Flower Seeds]] | ||
{{!}} [[ | {{!}} [[Lily of the Valley]] • [[Pitcher Plant]] • [[Purple Flower Seeds]] • [[Blue Flower Seeds]] • [[White Flower Seeds]] | ||
{{!}} style=" | {{!}} class="roundbr" {{!}} [[Anemone]] • [[Forget-me-nots]] • [[Rose]] • [[Red Flower Seeds]] | ||
{{!}} style=" | {{tableend}} | ||
|content3={{tablebegin}} class="basic" style="border-width: 2px; width: 90%" | |||
! class="roundtl" style="width: 30%" {{!}} Seed | |||
! style="width: 40%" {{!}} Good Yield | |||
! class="roundtr" style="width: 40%" {{!}} Bad Yield | |||
{{!-}} | {{!-}} | ||
{{!}} [[ | {{!}} [[Mixed Herb Seeds]] | ||
{{!}} [[ | {{!}} [[Western Fódlan Seeds]] • [[Tomato]] • [[Northern Fódlan Seeds]] • [[Daffodil]] • [[Chickpeas]] | ||
{{!}} | {{!}} [[Mixed Herb Seeds]] • [[Carrot]] • [[Northern Fódlan Seeds]] • [[Chickpeas]] • [[Cabbage]] | ||
{{!-}} | {{!-}} | ||
{{!}} [[ | {{!}} [[Western Fódlan Seeds]] | ||
{{!}} [[ | {{!}} [[Root Vegetable Seeds]] • [[Noa Fruit]] • [[Southern Fódlan Seeds]] • [[Sunflower]] • [[Onion]] | ||
{{!}} | {{!}} [[Western Fódlan Seeds]] • [[Noa Fruit]] • [[Southern Fódlan Seeds]] • [[Blue Flower Seeds]] • [[Carrot]] | ||
{{!-}} | {{!-}} | ||
{{!}} [[ | {{!}} [[Root Vegetable Seeds]] | ||
{{!}} [[ | {{!}} [[Blue Flower Seeds]] • [[Peach Currant]] • [[Morfis Seeds]] • [[Violet]] • [[Turnip]] | ||
{{!}} | {{!}} [[Root Vegetable Seeds]] • [[Tomato]] • [[Morfis Seeds]] • [[Purple Flower Seeds]] • [[Chickpeas]] | ||
{{!-}} | {{!-}} | ||
{{!}} [[ | {{!}} [[Vegetable Seeds]] | ||
{{!}} [[ | {{!}} [[Nordsalat Seeds]] • [[Verona]] • [[Albinean Seeds]] • [[Lily of the Valley]] • [[Onion]] | ||
{{!}} | {{!}} [[Noa Fruit]] • [[Onion]] • [[Albinean Seeds]] • [[Magdred Kirsch]] • [[Carrot]] | ||
{{!-}} | {{!-}} | ||
{{!}} [[ | {{!}} [[Northern Fódlan Seeds]] | ||
{{!}} [[ | {{!}} [[Southern Fódlan Seeds]] • [[Chickpeas]] • [[Morfis Seeds]] • [[Rose]] • [[Turnip]] | ||
{{!}} | {{!}} [[Northern Fódlan Seeds]] • [[Morfis Plum]] • [[Morfis Seeds]] • [[White Flower Seeds]] • [[Chickpeas]] | ||
{{!-}} | {{!-}} | ||
{{!}} [[ | {{!}} [[Morfis-Plum Seeds]] | ||
{{!}} [[ | {{!}} [[Nordsalat Seeds]] • [[Magdred Kirsch]] • [[Eastern Fódlan Seeds]] • [[Forget-me-nots]] • [[Zanado Treasure Fruit]] | ||
{{!}} [[Morfis Plum]] • [[Eastern Fódlan Seeds]] • [[Purple Flower Seeds]] • [[Turnip]] | |||
{{!}} | |||
{{!-}} | {{!-}} | ||
{{!}} [[ | {{!}} [[Southern Fódlan Seeds]] | ||
{{!}} [[ | {{!}} [[Verona]] • [[Peach Currant]] • [[Morfis Plum]] • [[Baby's Breath]] • [[Chickpeas]] | ||
{{!}} | {{!}} [[Southern Fódlan Seeds]] • [[Turnip]] • [[Morfis Plum]] • [[Yellow Flower Seeds]] • [[Magdred Kirsch]] | ||
{{!-}} | {{!-}} | ||
{{!}} [[ | {{!}} [[Morfis Seeds]] | ||
{{!}} [[ | {{!}} [[Magdred Kirsch]] • [[Carrot]] • [[Tomato]] • [[Anemone]] • [[Onion]] | ||
{{!}} | {{!}} [[Morfis Seeds]] • [[Albinean Berries]] • [[Tomato]] • [[Green Flower Seeds]] • [[Peach Currant]] | ||
{{!-}} | {{!-}} | ||
{{!}} [[ | {{!}} [[Nordsalat Seeds]] | ||
{{!}} [[ | {{!}} [[Aillel Grass]] • [[Angelica]] • [[Angelica Seeds]] • [[Daffodil]] • [[Turnip]] | ||
{{!}} | {{!}} [[Nordsalat]] • [[Angelica Seeds]] • [[Pale-Blue Flower Seeds]] • [[Magdred Kirsch]] | ||
{{!-}} | {{!-}} | ||
{{!}} [[ | {{!}} [[Boa-Fruit Seeds]] | ||
{{!}} [[ | {{!}} [[Angelica Seeds]] • [[Zanado Treasure Fruit]] • [[Mixed Herb Seeds]] • [[Sunflower]] • [[Cabbage]] | ||
{{!}} | {{!}} [[Boa Fruit]] • [[Zanado Treasure Fruit]] • [[Red Flower Seeds]] • [[Onion]] | ||
{{!-}} | {{!-}} | ||
{{!}} [[ | {{!}} [[Albinean Seeds]] | ||
{{!}} [[ | {{!}} [[Albinean Berries]] • [[Chickpeas]] • [[Tomato]] • [[Violet]] • [[Carrot]] | ||
{{!}} | {{!}} [[Albinean Seeds]] • [[Carrot]] • [[Tomato]] • [[White Flower Seeds]] • [[Turnip]] | ||
{{!-}} | {{!-}} | ||
{{!}} [[Eastern Fódlan Seeds]] | |||
{{!}} [[ | {{!}} [[Albinean Berries]] • [[Verona]] • [[Nordsalat]] • [[Picher Plant]] • [[Chickpeas]] | ||
{{!}} | {{!}} [[Eastern Fódlan Seeds]] • [[Tomato]] • [[Nordsalat Seeds]] • [[Blue Flower Seeds]] • [[Cabbage]] | ||
{{!-}} | {{!-}} | ||
{{!}} [[ | {{!}} [[Angelica Seeds]] | ||
{{!}} [[ | {{!}} [[Boa-Fruit Seeds]] • [[Aillel Grass]] • [[Western Fódlan Seeds]] • [[Lily]] • [[Turnip]] | ||
{{!}} | {{!}} [[Angelica]] • [[Aillel Grass]] • [[Yellow Flower Seeds]] • [[Chickpeas]] | ||
{{!-}} | {{!-}} | ||
{{!}} [[ | {{!}} [[Mixed Fruit Seeds]] | ||
{{!}} [[ | {{!}} [[Northern Fódlan Seeds]] • [[Noa Fruit]] • [[Eastern Fódlan Seeds]] • [[Lily of the Valley]] • [[Cabbage]] | ||
{{!}} | {{!}} [[Mixed Fruit Seeds]] • [[Northern Fódlan Seeds]] • [[Eastern Fódlan Seeds]] • [[Green Flower Seeds]] • [[Onion]] | ||
{{!-}} | {{!-}} | ||
{{!}} [[ | {{!}} [[Red Flower Seeds]] | ||
{{!}} [[ | {{!}} [[Rose]] • [[Mixed Herb Seeds]] • [[Albinean Seeds]] • [[Nordsalat]] • [[Magdred Kirsch]] | ||
{{!}} | {{!}} [[Daffodil]] • [[Onion]] • [[Blue Flower Seeds]] • [[Albinean Seeds]] • [[Rose]] | ||
{{!-}} | {{!-}} | ||
{{!}} [[ | {{!}} [[White Flower Seeds]] | ||
{{!}} [[ | {{!}} [[Daffodil]] • [[Vegetable Seeds]] • [[Western Fódlan Seeds]] • [[Morfis-Plum Seeds]] • [[Boa Fruit]] | ||
{{!}} [[Sunflower]] • [[Southern Fódlan Seeds]] • [[Purple Flower Seeds]] • [[Tunrip]] • [[Daffodil]] | |||
{{!}} | |||
{{!-}} | {{!-}} | ||
{{!}} [[ | {{!}} [[Blue Flower Seeds]] | ||
{{!}} [[ | {{!}} [[Forget-me-nots]] • [[Root Vegetable Seeds]] • [[Eastern Fódlan Seeds]] • [[Morfis-Plum Seeds]] • [[Nordsalat]] | ||
{{!}} | {{!}} [[Violet]] • [[Chickpeas]] • [[Yellow Flower Seeds]] • [[Eastern Fódlan Seeds]] • [[Forget-me-nots]] | ||
{{!-}} | {{!-}} | ||
{{!}} [[ | {{!}} [[Purple Flower Seeds]] | ||
{{!}} [[ | {{!}} [[Lavender]] • [[Western Fódlan Seeds]] • [[Morfis Seeds]] • [[Eastern Fódlan Seeds]] • [[Albinean Berries]] | ||
{{!}} | {{!}} [[Pitcher Plant]] • [[Cabbage]] • [[Green Flower Seeds]] • [[Mixed Herb Seeds]] • [[Violet]] | ||
{{!-}} | {{!-}} | ||
{{!}} [[ | {{!}} [[Yellow Flower Seeds]] | ||
{{!}} [[ | {{!}} [[Sunflower]] • [[Northern Fódlan Seeds]] • [[Southern Fódlan Seeds]] • [[Boa-Fruit Seeds]] • [[Mixed Fruit Seeds]] | ||
{{!}} [[Carnation]] • [[Morfis Seeds]] • [[Pale-Blue Flower Seeds]] • [[Onion]] • [[Sunflower]] | |||
{{!}} | |||
{{!-}} | {{!-}} | ||
{{!}} [[ | {{!}} [[Green Flower Seeds]] | ||
{{!}} [[ | {{!}} [[Pitcher Plant]] • [[Root Vegetable Seeds]] • [[Eastern Fódlan Seeds]] • [[Tomato]] • [[Morfis Plum]] | ||
{{!}} | {{!}} [[Lily]] • [[Zanado Fruit]] • [[Red Flower Seeds]] • [[Cabbage]] • [[Pitcher Plant]] | ||
{{!-}} | {{!-}} | ||
{{!}} | {{!}} class="roundbl" {{!}} [[Pale-Blue Flower Seeds]] | ||
{{!}} [[ | {{!}} [[Forget-me-nots]] • [[Mixed Fruit Seeds]] • [[Northern Fódlan Seeds]] • [[Tomato]] • [[Verona]] | ||
{{!}} | {{!}} class="roundbr" {{!}} [[Lily of the Valley]] • [[Northern Fódlan Seeds]] • [[White Flower Seeds]] • [[Turnip]] • [[Anemone]] | ||
{{!}} | {{tableend}} | ||
}} | |||
{{!}} [[ | |||
Additionally, certain seeds have a chance of yielding a stat booster. Unlike regular yields which are determined when the player harvests their seeds, wether the player obtains a stat booster is determined upon planting the seeds and will not change if the player starts the harvesting day again. | |||
{{ | |||
{|class="cellpadding-3 basic" style="width: 70%; padding: 4px" | |||
! style="background: none" colspan="3" | Possible stat boosters | |||
|- style="color: #fff" | |||
! class="roundtl" | Stat booster | |||
! Effect | |||
! class="roundtr" | Seeds | |||
|- | |||
| [[Fruit of Life]] | |||
| [[HP]] +1 | |||
| [[Western Fódlan Seeds]] • [[Blue Flower Seeds]] | |||
|- | |||
| [[Rocky Burdock]] | |||
| [[Str]] +1 | |||
| [[Mixed Herb Seeds]] • [[Angelica Seeds]] • [[Purple Flower Seeds]] | |||
|- | |||
| [[Premium Magic Herbs]] | |||
| [[Mag]] +1 | |||
| [[Southern Fódlan Seeds]] • [[Yellow Flower Seeds]] | |||
|- | |||
| [[Ailell Pomegranate]] | |||
| [[Dex]] +1 | |||
| [[Morfis-Plum Seeds]] • [[Morfis Seeds]] • [[Green Flower Seeds]] | |||
|- | |||
| [[Speed Carrot]] | |||
| [[Spd]] +1 | |||
| [[Nordsalat Seeds]] • [[Pale-Blue Flower Seeds]] | |||
|- | |||
| [[Miracle Bean]] | |||
| [[Lck]] +1 | |||
| [[Boa-Fruit Seeds]] • [[Mixed Fruit Seeds]] | |||
|- | |||
| [[Ambrosia]] | |||
| [[Def]] +1 | |||
| [[Root Vegetable Seeds]] • [[Eastern Fódlan Seeds]] | |||
|- | |||
| [[White Verona]] | |||
| [[Res]] +1 | |||
| [[Vegetable Seeds]] • [[Red Flower Seeds]] | |||
{ | |- | ||
| class="roundbl" | [[Golden Apple]] | |||
| [[Cha]] +1 | |||
| class="roundbr" | [[Northern Fódlan Seeds]] • [[Albinean Seeds]] • [[White Flower Seeds]] | |||
|} | |||
====Calculations==== | |||
The items the player receives from gardening are determined as follows:<ref>{{cite web|url=https://serenesforest.net/three-houses/monastery/greenhouse/|title=Greenhouse|site=Serenes Forest|retrieved=May 1, 2024}}</ref> | |||
Each seed has a hidden rank stat that is seperate from its displayed grade: | |||
{| class="cellpadding-3 basic" style="width: 50%; padding: 4px" | |||
! style="background: none" colspan="2" | Ranks by seed | |||
|- style="color: #fff" | |||
! class="roundtl" | Seed | |||
! class="roundtr" | Rank | |||
|- | |||
| [[Mixed Herb Seeds]] | |||
| 27 | |||
|- | |||
| [[Western Fódlan Seeds]] | |||
| 9 | |||
|- | |||
| [[Root Vegetable Seeds]] | |||
| 49 | |||
|- | |||
| [[Vegetable Seeds]] | |||
| 33 | |||
|- | |||
| [[Northern Fódlan Seeds]] | |||
| 53 | |||
|- | |||
| [[Morfis-Plum Seeds]] | |||
| 18 | |||
|- | |||
| [[Southern Fódlan Seeds]] | |||
| 37 | |||
|- | |||
{ | | [[Morfis Seeds]] | ||
| 23 | |||
|- | |||
| [[Nordsalat Seeds]] | |||
| 3 | |||
|- | |||
| [[Boa-Fruit Seeds]] | |||
| 31 | |||
|- | |||
| [[Albinean Seeds]] | |||
| 20 | |||
|- | |||
| [[Eastern Fódlan Seeds]] | |||
| 42 | |||
|- | |||
| [[Angelica Seeds]] | |||
| 34 | |||
|- | |||
| [[Mixed Fruit Seeds]] | |||
| 44 | |||
|- | |||
| [[Red Flower Seeds]] | |||
| 24 | |||
|- | |||
| [[White Flower Seeds]] | |||
| 5 | |||
|- | |||
| [[Blue Flower Seeds]] | |||
| 38 | |||
|- | |||
| [[Purple Flower Seeds]] | |||
| 16 | |||
|- | |||
| [[Yellow Flower Seeds]] | |||
| 55 | |||
|- | |||
| [[Green Flower Seeds]] | |||
| 10 | |||
|- | |||
| class="roundbl" | [[Pale-Blue Flower Seeds]] | |||
{{ | | class="roundbr" | 1 | ||
|} | |||
{{ | Additionally, as mentioned before, each yield has a chance to be a "good" or a "bad" yield. The odds of getting a good or bad yield are based on the displayed Yield Level. The odds of receiving a higher quality yield are determined by a hidden score value that is calculated as follows: | ||
{{ | |||
A+B+C | |||
{{ | |||
{{ | :A = (12 − [combined Rank of all seeds % 12]) × 5<br> | ||
{{ | :B = (Combined Grade of all seeds / 5) × 4 <small>(rounded down)</small> | ||
{{ | :C = (Cultivation Tier + 4 ) × 2 | ||
{{ | ::The cultivation tier increases by 1 per price tier, with "Infuse with magic" having a value of 1. | ||
{{ | |||
{{ | Finally, the odds of receiving a certain type of yield are determined as follows: | ||
{| class="cellpadding-3 basic" style="width: 50%; padding: 4px" | |||
! style="background: none" colspan="2" | Dining Hall Events | |||
|- style="color: #fff" | |||
! class="roundtl" | Score | |||
! Displayed Yield | |||
! Quality Ratio | |||
! class="roundtr" | Stat Booster coefficient | |||
|- | |||
The | | 0–20 | ||
| 1 | |||
| 7:3 | |||
| 1 | |||
|- | |||
| 21–40 | |||
| 1 | |||
| 2:8 | |||
| 3 | |||
|- | |||
| 41–60 | |||
| 2 | |||
| 7:3 | |||
| 5 | |||
|- | |||
| 61–80 | |||
| 2 | |||
| 4:6 | |||
| 10 | |||
|- | |||
| 81–90 | |||
| 3 | |||
| 8:2 | |||
| 15 | |||
|- | |||
| class="roundbl" | 91–100 | |||
| 3 | |||
| 3:7 | |||
| class="roundbr" | 20 | |||
|} | |||
:"Quality Ratio" refers to the ratio of lower-quality items to higher-quality ones. | |||
The odds of obtaining a stat booster are calculated as follows:<br> | |||
Chance = Stat-booster co-efficient + ([Grade − 1 ] of specific seed × 5) + (number of all seeds × 6) + (cultivation Tier × 5) | |||
===Training Grounds=== | |||
From Chapter 4 onwards, the player can participate in monthly tournaments at the monastery. There, they can choose any unit from their current roster—with the exception of Byleth—to participate in a tournament in exchange for one activity point. They will be put up against a series of five opponents whose level and fighting prowess increase with each level. The enemies the player encounters mostly consist of generic units, but during Part I, they can also include unrecruited units from other houses. | |||
After each round, the player is given the opportunity to quit or to heal their unit for 30 [[HP]]. However, they can only heal their unit up to two times per attempt. During combat, units will use their normal combat stats and current equipment, and can miss or land [[critical hit]]s like in normal battles. Additionally, battles at the Training Grounds are always treated as though the player had initiated the combat, and therefore skills like [[Darting Blow]] or [[Duelist's Blow]] are active. Units will not have any [[battalion]]s equipped at the Training Grounds, removing any potential stat gains from battalions and activating skills such as [[Felix]]'s [[Lone Wolf]]. | |||
Each month, a different tournament will be held at the monastery. Each tournament focuses on a different weapon type, and only that weapon type can be used at the training grounds. Playable units will always use the most basic weapons of that weapon type. For most weapons, this means they will use the training weapon associated with that weapon type (e.g. a [[Training Sword]] or a [[Training Axe]]), while for magic, it means a unit will use their lowest-ranked spell (e.g. [[Constance]] will use [[Fire]] while [[Annette]] will use [[Wind]]). As spells need to be learned by raising a unit's skill levels, units who have not yet learned any spells yet cannot participate. Similarly, units need to be in a class that can use magic to participate in magic tournaments. Likewise, units in classes that cannot use [[gauntlet]]s cannot participate in Brawling tournaments. Classes that can only use Gauntlets while dismounted—such as [[Paladin]]—cannot be used, as mounted units cannot dismount at the Training Grounds. As they do not learn any Black Magic spells, Lysithea, Hubert, and [[Hapi]] cannot participate in the Black Magic tournaments, however, as the [[Mage]] class grants the [[Fire (ability)|Fire]] ability, changing into it will allow them to partake. | |||
The player will earn more gold the further their unit has made it. Additionally, winning a tournament for the first time (if multiple months have the same tournament, each month counts as a separate tournament) will grant the player a special reward – usually a promotion item or a forged weapon of the type that was used during the tournament. They can repeat tournaments as long as their Activity points allow for it, but the reward can only be obtained once. Repeated tournaments will simply reward the player with additional gold. | |||
====List of tournaments==== | |||
{| class="cellpadding-3 basic" style="width: 70%; padding: 4px" | |||
|+ Part I: White Clouds {{White Clouds}} | |||
|- style="color: #fff" | |||
! class="roundtl" | Chapter | |||
! Name | |||
! Weapon | |||
! class="roundtr" | Reward | |||
|- | |||
| [[The Goddess's Rite of Rebirth|Chapter 4]] | |||
| Beginner Sword Tournament | |||
| {{Sword16}} Sword | |||
| {{Item|16|Steel Sword+|image=sword}}<br>300G | |||
|- | |||
| [[Tower of Black Winds|Chapter 5]] | |||
| House vs. House Lance Tournament | |||
| {{Lance16}} Lance | |||
| {{Item|16|Intermediate Seal|image=seal}}<br>300G | |||
|- | |||
| [[Rumors of a Reaper|Chapter 6]] | |||
| Intermediate Axe Tournament | |||
| {{Axe16}} Axe | |||
| {{Item|16|Steel Axe+|image=axe}}<br>500G | |||
|- | |||
| [[Field of the Eagle and Lion|Chapter 7]] | |||
| House vs. House Sword Tournament | |||
| {{Sword16}} Sword | |||
| {{Item|16|Intermediate Seal|image=seal}}<br>500G | |||
|- | |||
| [[The Flame in the Darkness|Chapter 8]] | |||
| Intermediate Brawling Tournament | |||
| {{Brawling16}} Brawling | |||
| {{Item|16|Steel Gauntlets+|image=brawling}}<br>750G | |||
|- | |||
| [[The Cause of Sorrow|Chapter 9]] | |||
| Intermediate Black Magic Tournament | |||
| {{Reason16}} {{hover|Black Magic|Excludes all Dark Magic}} | |||
| {{Item|16|Silver Shield|image=shield}}<br>750G | |||
|- | |||
| [[Where the Goddess Dwells|Chapter 10]] | |||
| House vs. House Bow Tournament | |||
| {{Bow16}} Bow | |||
| {{Item|16|Advanced Seal|image=seal}}<br>1,000G | |||
|- | |||
| [[Throne of Knowledge|Chapter 11]] | |||
| House vs. House Magic Tournament | |||
| {{Reason16}} {{hover|Black Magic|Excludes all Dark Magic}} | |||
| {{Item|16|Advanced Seal|image=seal}}<br>1,000G | |||
|- | |||
| class="roundbl" | [[To War|Chapter 12]] {{Silver Snow}} {{Azure Gleam}} {{Verdant Wind}} | |||
| Intermediate Lance Tournament | |||
| {{Lance16}} Lance | |||
| class="roundbr" | {{Item|16|Silver Lance|image=lance}}<br>1,000G | |||
|} | |||
{| class="cellpadding-3 basic" style="width: 70%; padding: 4px" | |||
|+ Part II: Silver Snow {{Silver Snow}} | |||
|- style="color: #fff" | |||
! class="roundtl" | Chapter | |||
! Name | |||
! Weapon | |||
! class="roundtr" | Reward | |||
|- | |||
| [[A King Without a Kingdom|Chapter 14]] | |||
| Advanced Sword Tournament | |||
| {{Sword16}} Sword | |||
| {{Item|16|Silver Sword+|image=sword}}<br>1,250G | |||
|- | |||
| [[Valley of Torment|Chapter 15]] | |||
| Advanced Lance Tournament | |||
| {{Lance16}} Lance | |||
| {{Item|16|Silver Lance+|image=lance}}<br>1,250G | |||
|- | |||
| [[The Rose-Colored River|Chapter 16]] | |||
| Advanced Bow Tournament | |||
| {{Bow16}} Bow | |||
| {{Item|16|Silver Bow+|image=bow}}<br>1,250G | |||
|- | |||
| [[The Impregnable Fortress|Chapter 17]] | |||
| Black Magic Tournament | |||
| {{Reason16}} {{hover|Black Magic|Excludes all Dark Magic}} | |||
| {{Item|16|Magic Staff|image=staff}}<br>1,500G | |||
|- | |||
| [[The Chaos of War|Chapter 18]] | |||
| Advanced Axe Tournament | |||
| {{Axe16}} Axe | |||
| {{Item|16|Silver Axe+|image=axe}}<br>1,500G | |||
|- | |||
| [[The City Without Light|Chapter 20]] | |||
| Advanced Brawling Tournament | |||
| {{Brawling16}} Brawling | |||
| {{Item|16|Silver Gauntlets+|image=brawling}}<br>1,500G | |||
|- | |||
| class="roundbl" | [[Following a Dream|Chapter 21]] | |||
| Ultimate Sword Tournament | |||
| {{Sword16}} Sword | |||
| class="roundbr" | {{Item|16|Master Seal|image=seal}}<br>2,000G | |||
|} | |||
{| class="cellpadding-3 basic" style="width: 70%; padding: 4px" | |||
|+ Part II: Azure Moon {{Azure Moon}} | |||
|- style="color: #fff" | |||
! class="roundtl" | Chapter | |||
! Name | |||
! Weapon | |||
! class="roundtr" | Reward | |||
|- | |||
| [[The Delusional Prince|Chapter 14]] | |||
| Advanced Sword Tournament | |||
| {{Sword16}} Sword | |||
| {{Item|16|Silver Sword+|image=sword}}<br>1,250G | |||
|- | |||
| [[Valley of Torment|Chapter 15]] | |||
| Advanced Lance Tournament | |||
| {{Lance16}} Lance | |||
| {{Item|16|Silver Lance+|image=lance}}<br>1,250G | |||
|- | |||
| [[The Rose-Colored River|Chapter 16]] | |||
| Advanced Bow Tournament | |||
| {{Bow16}} Bow | |||
| {{Item|16|Silver Bow+|image=bow}}<br>1,250G | |||
|- | |||
| [[Blood of the Eagle and Lion|Chapter 17]] | |||
| Black Magic Tournament | |||
| {{Reason16}} {{hover|Black Magic|Excludes all Dark Magic}} | |||
| {{Item|16|Magic Staff|image=staff}}<br>1,500G | |||
|- | |||
| [[The King's Triumphant Return|Chapter 18]] | |||
| Advanced Axe Tournament | |||
| {{Axe16}} Axe | |||
| {{Item|16|Silver Axe+|image=axe}}<br>1,500G | |||
|- | |||
| [[The Golden Deer's Plea|Chapter 19]] | |||
| Advanced Brawling Tournament | |||
| {{Brawling16}} Brawling | |||
| {{Item|16|Silver Gauntlets+|image=brawling}}<br>1,500G | |||
|- | |||
| [[The Impregnable Fortress|Chapter 20]] | |||
| Ultimate Sword Tournament | |||
| {{Sword16}} Sword | |||
| {{Item|16|Master Seal|image=seal}}<br>2,000G | |||
|- | |||
| class="roundbl" | [[Our Chosen Paths|Chapter 21]] | |||
| Ultimate Sword Tournament | |||
| {{Sword16}} Sword | |||
| class="roundbr" | {{Item|16|Master Seal|image=seal}}<br>2,000G | |||
|} | |||
{| class="cellpadding-3 basic" style="width: 70%; padding: 4px" | |||
|+ Part II: Verdant Wind {{Verdant Wind}} | |||
|- style="color: #fff" | |||
! class="roundtl" | Chapter | |||
! Name | |||
! Weapon | |||
! class="roundtr" | Reward | |||
|- | |||
| [[The Alliance Leader's Ambitions|Chapter 14]] | |||
| Advanced Sword Tournament | |||
| {{Sword16}} Sword | |||
| {{Item|16|Silver Sword+|image=sword}}<br>1,250G | |||
|- | |||
| [[Valley of Torment|Chapter 15]] | |||
| Advanced Lance Tournament | |||
| {{Lance16}} Lance | |||
| {{Item|16|Silver Lance+|image=lance}}<br>1,250G | |||
|- | |||
| [[The Rose-Colored River|Chapter 16]] | |||
| Advanced Bow Tournament | |||
| {{Bow16}} Bow | |||
| {{Item|16|Silver Bow+|image=bow}}<br>1,250G | |||
|- | |||
| [[Blood of the Eagle and Lion|Chapter 17]] | |||
| Advanced Axe Tournament | |||
| {{Axe16}} Axe | |||
| [[File: Is ns01 axe.png|24px]] [[Silver Axe+]]<br>1,500G | |||
|- | |||
| [[The Golden Scheme|Chapter 18]] | |||
| Advanced Brawling Tournament | |||
| {{Brawling16}} Brawling | |||
| [[File: Is ns01 brawling.png|24px]] [[Silver Gauntlets+]]<br>1,500G | |||
|- | |||
| [[The Chaos of War|Chapter 19]] | |||
| Ultimate Sword Tournament | |||
| {{Sword16}} Sword | |||
| [[File: Is ns01 seal.png|24px]] [[Master Seal]]<br>2,000G | |||
|- | |||
| [[The City Without Light|Chapter 21]] | |||
| Ultimate Sword Tournament | |||
| {{Sword16}} Sword | |||
| [[File: Is ns01 seal.png|24px]] [[Master Seal]]<br>2,000G | |||
|- | |||
| class="roundbl" | [[Fódlan's New Dawn|Chapter 22]] | |||
| Ultimate Sword Tournament | |||
| {{Sword16}} Sword | |||
| class="roundbr" | [[File: Is ns01 seal.png|24px]] [[Master Seal]]<br>2,000G | |||
|} | |||
{| class="cellpadding-3 basic" style="width: 70%; padding: 4px" | |||
|+ Part II: Crimson Flower {{Crimson Flower}} | |||
|- style="color: #fff" | |||
! class="roundtl" | Chapter | |||
! Name | |||
! Weapon | |||
! class="roundtr" | Reward | |||
|- | |||
| [[Beyond Escape|Chapter 13]] | |||
| Advanced Sword Tournament | |||
| {{Sword16}} Sword | |||
| {{Item|16|Silver Sword+|image=sword}}<br>1,250G | |||
|- | |||
| [[The Master Tactician|Chapter 14]] | |||
| Advanced Lance Tournament | |||
| {{Lance16}} Lance | |||
| {{Item|16|Silver Lance+|image=lance}}<br>1,250G | |||
|- | |||
| [[Tempest of Swords and Shields|Chapter 15]] | |||
| Advanced Bow Tournament | |||
| {{Bow16}} Bow | |||
| {{Item|16|Silver Bow+|image=bow}}<br>1,250G | |||
|- | |||
| [[Lady of Deceit|Chapter 16]] | |||
| Advanced Axe Tournament | |||
| {{Axe16}} Axe | |||
| {{Item|16|Silver Axe+|image=axe}}<br>1,500G | |||
|- | |||
| class="roundbl" | [[Field of Revenge|Chapter 17]] | |||
| Ultimate Sword Tournament | |||
| {{Sword16}} Sword | |||
| class="roundbr" | {{Item|16|Master Seal|image=seal}}<br>1,500G | |||
|} | |||
Additionally, the following tournament is available from [[The Flame in the Darkness|Chapter 8]] until Chapter 12 as part of a quest. Uniquely, it allows and requires the player to deploy Byleth against a series of five especially strong opponents. While this quest is active, the player may switch between the quest tournament and the regular monthly tournaments by pressing the ZL or ZR buttons. | |||
Uniquely, the units the player faces during this tournament do not adhere to any weapon type restrictions. Instead, they will use weapons depending on their class (e.g. [[Armored Knight]]s will use [[axe]]s). The enemy composition during this tournament changes based on Byleth's gender. In addition to the tournament reward, the player will obtain the rewards from the quest. | |||
{| class="cellpadding-3 basic" style="width: 70%; padding: 4px" | |||
|+ Proper Conduct | |||
|- style="color: #fff" | |||
! class="roundtl" | Quest | |||
! Name | |||
! Weapon | |||
! class="roundtr" | Reward | |||
|- | |||
| class="roundbl" | A Question of Conduct | |||
| Proper Conduct | |||
| {{Sword16}} Sword | |||
| class="roundbr" | {{Item|16|Brave Sword|image=sword}}<br>1,150G | |||
|} | |||
===Sauna=== | |||
If the player has purchased the [[Downloadable content in Fire Emblem: Three Houses|Expansion Pass]] and is using version 1.1.0 or higher, they will be given the [[Sauna Time]] quest from [[Tower of Black Winds|Chapter 5]] onwards. Completing this quest grants them the ability to use the sauna at the monastery. The sauna is also unlocked automatically at the start of Part II if this quest has not been completed. | |||
To use the Sauna, the player will need to talk to the NPC responsible for it, who is found in front of the Sauna, between Byleth's Personal Quarters and the Training Grounds. They will be asked to select one unit from their class. Each unit can only be invited to the sauna once per in-game month, though the player may invite other units to the sauna during that same month. Using the sauna consumes one Activity point. | |||
At the sauna, the player is given five action points. These action points are independent from their activity points, and do not increase with [[Professor level]]. Additionally, both Byleth and the character they invited will have their own gauge that displays how refreshed they are. They will be given three different options: | |||
* Increase Steam | |||
* Stay Longer | |||
* Leave | |||
The first two options will consume one action point, while leaving ends the sauna session immediately. The "Increase Steam" option warms up both characters by a large amount, while the "Stay Longer" option warms up both units by a smaller amount. As the room gets warmer, both units' refreshment gauge will increase. The length of this gauge is random. However, both units have a certain point (marked through a black line on the gauge) where they will overheat. If a unit overheats, the gauge will turn from green to red, and the sauna session will be forcibly ended. | |||
After the sauna session ends, either because the player ran out of action points, because a character has overheated, or because the player chose to leave, Byleth will gain support points with the other character, and will gain more skill experience based on how refreshed they are for the rest of the month. After the sauna, Byleth will make a brief comment on the visit. | |||
===Marketplace=== | |||
The marketplace hosts multiple shops, some of which are unlocked or expand their stock as the story progresses. The Marketplace first becomes accessible in Chapter 1, featuring only the Armory and Item Shop. Each shop's supplies are renewed each month for every item not listed as "limited". | |||
====Armory==== | |||
{{main|Armory}} | |||
The Armory is available from Chapter 2 (or Chapter 1 in New Game +) when the Marketplace first becomes accessible. | |||
{{Tab | {{Tab | ||
|header= | |header=Armory {{Armory}} | ||
|width=60% | |width=60% | ||
|tab1=Chapter 1 | |tab1=Chapter 1 | ||
| Line 2,319: | Line 2,694: | ||
|tab3=Chapter 12 {{Crimson Flower|Black Eagles, if siding with Edelgard}}/14 {{Silver Snow}}{{Azure Moon}}{{Verdant Wind}} | |tab3=Chapter 12 {{Crimson Flower|Black Eagles, if siding with Edelgard}}/14 {{Silver Snow}}{{Azure Moon}}{{Verdant Wind}} | ||
|content1={{tablebegin}} class="wikitable round" style="border-collapse: separate; margin: auto; background: none; border: none" | |content1={{tablebegin}} class="wikitable round" style="border-collapse: separate; margin: auto; background: none; border: none" | ||
!style=" | ! class="roundtl" style="width: 5%" {{!}} | ||
!style="width: 45%" {{!}} Name | ! style="width: 45%" {{!}} Name | ||
!style="width: 25%" {{!}} Stock | ! style="width: 25%" {{!}} Stock | ||
!style=" | ! class="roundtr" style="width: 25%" {{!}} Price | ||
{{!-}} | {{!-}} | ||
{{!}} [[File:Is ns01 | {{!}} [[File:Is ns01 sword.png|20px]] | ||
{{!}} [[ | {{!}} [[Iron Sword]] | ||
{{!}} style="text-align: center" {{!}} ∞ | {{!}} style="text-align: center" {{!}} ∞ | ||
{{!}} style="text-align: right" {{!}} | {{!}} style="text-align: right" {{!}} 520 | ||
{{!-}} | {{!-}} | ||
{{!}} [[File:Is ns01 | {{!}} [[File:Is ns01 sword.png|20px]] | ||
{{!}} [[ | {{!}} [[Steel Sword]] | ||
{{!}} style="text-align: center" {{!}} 3 | {{!}} style="text-align: center" {{!}} 3 | ||
{{!}} style="text-align: right" {{!}} | {{!}} style="text-align: right" {{!}} 910 | ||
{{!-}} | {{!-}} | ||
{{!}} [[File:Is ns01 | {{!}} [[File:Is ns01 sword.png|20px]] | ||
{{!}} [[ | {{!}} [[Training Sword]] | ||
{{!}} style="text-align: center" {{!}} ∞ | {{!}} style="text-align: center" {{!}} ∞ | ||
{{!}} style="text-align: right" {{!}} | {{!}} style="text-align: right" {{!}} 260 | ||
{{!-}} | {{!-}} | ||
{{!}} [[File:Is ns01 | {{!}} [[File:Is ns01 lance.png|20px]] | ||
{{!}} [[ | {{!}} [[Iron Lance]] | ||
{{!}} style="text-align: center" {{!}} ∞ | {{!}} style="text-align: center" {{!}} ∞ | ||
{{!}} style="text-align: right" {{!}} | {{!}} style="text-align: right" {{!}} 560 | ||
{{!-}} | {{!-}} | ||
{{!}} [[File:Is ns01 | {{!}} [[File:Is ns01 lance.png|20px]] | ||
{{!}} [[ | {{!}} [[Steel Lance]] | ||
{{!}} style="text-align: center" {{!}} 3 | {{!}} style="text-align: center" {{!}} 3 | ||
{{!}} style="text-align: right" {{!}} | {{!}} style="text-align: right" {{!}} 910 | ||
{{!-}} | {{!-}} | ||
{{!}} [[File:Is ns01 | {{!}} [[File:Is ns01 lance.png|20px]] | ||
{{!}} [[ | {{!}} [[Training Lance]] | ||
{{!}} style="text-align: center" {{!}} ∞ | {{!}} style="text-align: center" {{!}} ∞ | ||
{{!}} style="text-align: right" {{!}} | {{!}} style="text-align: right" {{!}} 280 | ||
{{!-}} | |||
{{!}} [[File:Is ns01 lance.png|20px]] | |||
{{!}} [[Javelin]] | |||
{{!}} style="text-align: center" {{!}} 3 | |||
{{!}} style="text-align: right" {{!}} 700 | |||
{{!-}} | {{!-}} | ||
{{!}} [[File:Is ns01 | {{!}} [[File:Is ns01 axe.png|20px]] | ||
{{!}} [[ | {{!}} [[Iron Axe]] | ||
{{!}} style="text-align: center" {{!}} | {{!}} style="text-align: center" {{!}} ∞ | ||
{{!}} style="text-align: right" {{!}} 600 | {{!}} style="text-align: right" {{!}} 600 | ||
{{!-}} | {{!-}} | ||
{{!}} [[File:Is ns01 | {{!}} [[File:Is ns01 axe.png|20px]] | ||
{{!}} [[ | {{!}} [[Steel Axe]] | ||
{{!}} style="text-align: center" {{!}} 3 | |||
{{!}} style="text-align: right" {{!}} 980 | |||
{{!-}} | |||
{{!}} [[File:Is ns01 axe.png|20px]] | |||
{{!}} [[Training Axe]] | |||
{{!}} style="text-align: center" {{!}} ∞ | {{!}} style="text-align: center" {{!}} ∞ | ||
{{!}} style="text-align: right" {{!}} 300 | {{!}} style="text-align: right" {{!}} 300 | ||
{{!-}} | {{!-}} | ||
{{!}} [[File:Is ns01 axe.png|20px]] | |||
{{!}} [[ | {{!}} [[Hand Axe]] | ||
{{!}} style="text-align: center" {{!}} | {{!}} style="text-align: center" {{!}} 3 | ||
{{!}} style=" | {{!}} style="text-align: right" {{!}} 750 | ||
{{!-}} | {{!-}} | ||
{{!}} [[File:Is ns01 | {{!}} [[File:Is ns01 axe.png|20px]] | ||
{{!}} [[ | {{!}} [[Mace]] | ||
{{!}} style="text-align: center" {{!}} ∞ | {{!}} style="text-align: center" {{!}} ∞ | ||
{{!}} style="text-align: right" {{!}} | {{!}} style="text-align: right" {{!}} 720 | ||
{{!-}} | {{!-}} | ||
{{!}} [[File:Is ns01 | {{!}} [[File:Is ns01 bow.png|20px]] | ||
{{!}} [[Iron | {{!}} [[Iron Bow]] | ||
{{!}} style="text-align: center" {{!}} ∞ | {{!}} style="text-align: center" {{!}} ∞ | ||
{{!}} style="text-align: right" {{!}} | {{!}} style="text-align: right" {{!}} 560 | ||
{{!-}} | {{!-}} | ||
{{!}} [[File:Is ns01 | {{!}} [[File:Is ns01 bow.png|20px]] | ||
{{!}} [[Steel | {{!}} [[Steel Bow]] | ||
{{!}} style="text-align: center" {{!}} 3 | {{!}} style="text-align: center" {{!}} 3 | ||
{{!}} style="text-align: right" {{!}} | {{!}} style="text-align: right" {{!}} 910 | ||
{{!-}} | {{!-}} | ||
{{!}} [[File:Is ns01 | {{!}} [[File:Is ns01 bow.png|20px]] | ||
{{!}} [[ | {{!}} [[Training Bow]] | ||
{{!}} style="text-align: center" {{!}} ∞ | {{!}} style="text-align: center" {{!}} ∞ | ||
{{!}} style="text-align: right" {{!}} | {{!}} style="text-align: right" {{!}} 350 | ||
{{!-}} | {{!-}} | ||
{{!}} [[File:Is ns01 | {{!}} [[File:Is ns01 bow.png|20px]] | ||
{{!}} [[ | {{!}} [[Mini Bow]] | ||
{{!}} style="text-align: center" {{!}} ∞ | {{!}} style="text-align: center" {{!}} ∞ | ||
{{!}} style="text-align: right" {{!}} | {{!}} style="text-align: right" {{!}} 680 | ||
{{!-}} | {{!-}} | ||
{{!}} [[File:Is ns01 | {{!}} [[File:Is ns01 brawling.png|20px]] | ||
{{!}} [[ | {{!}} [[Iron Gauntlets]] | ||
{{!}} style="text-align: center" {{!}} ∞ | {{!}} style="text-align: center" {{!}} ∞ | ||
{{!}} style="text-align: right" {{!}} | {{!}} style="text-align: right" {{!}} 480 | ||
{{!-}} | {{!-}} | ||
{{!}} [[File:Is ns01 | {{!}} [[File:Is ns01 brawling.png|20px]] | ||
{{!}} [[ | {{!}} [[Steel Gauntlets]] | ||
{{!}} style="text-align: center" {{!}} 3 | {{!}} style="text-align: center" {{!}} 3 | ||
{{!}} style="text-align: right" {{!}} | {{!}} style="text-align: right" {{!}} 640 | ||
{{!-}} | {{!-}} | ||
{{!}} [[File:Is ns01 | {{!}} class="roundbl" {{!}} [[File:Is ns01 brawling.png|20px]] | ||
{{!}} [[ | {{!}} [[Training Gauntlets]] | ||
{{!}} style="text-align: center" {{!}} ∞ | {{!}} style="text-align: center" {{!}} ∞ | ||
{{!}} style="text-align: right" {{!}} | {{!}} class="roundbr" style="text-align: right" {{!}} 240 | ||
{{tableend}} | |||
|content2={{tablebegin}} class="wikitable round" style="border-collapse: separate; margin: auto; background: none; border: none" | |||
! class="roundtl" style="width: 5%" {{!}} | |||
! style="width: 45%" {{!}} Name | |||
! style="width: 25%" {{!}} Stock | |||
! class="roundtr" style="width: 25%" {{!}} Price | |||
{{!-}} | {{!-}} | ||
{{!}} [[File:Is ns01 | {{!}} [[File:Is ns01 sword.png|20px]] | ||
{{!}} [[ | {{!}} [[Iron Sword]] | ||
{{!}} style="text-align: center" {{!}} ∞ | {{!}} style="text-align: center" {{!}} ∞ | ||
{{!}} style="text-align: right" {{!}} | {{!}} style="text-align: right" {{!}} 520 | ||
{{!-}} | {{!-}} | ||
{{!}} [[File:Is ns01 | {{!}} [[File:Is ns01 sword.png|20px]] | ||
{{!}} [[ | {{!}} [[Steel Sword]] | ||
{{!}} style="text-align: center" {{!}} ∞ | {{!}} style="text-align: center" {{!}} ∞ | ||
{{!}} style="text-align: right" {{!}} | {{!}} style="text-align: right" {{!}} 910 | ||
{{!-}} | {{!-}} | ||
{{!}} [[File:Is ns01 sword.png|20px]] | |||
{{!}} [[ | {{!}} [[Silver Sword]] | ||
{{!}} style="text-align: center" {{!}} | {{!}} style="text-align: center" {{!}} 3 | ||
{{!}} style=" | {{!}} style="text-align: right" {{!}} 1,410 | ||
{{!-}} | {{!-}} | ||
{{!}} [[File:Is ns01 | {{!}} [[File:Is ns01 sword.png|20px]] | ||
{{!}} [[ | {{!}} [[Killing Edge]] | ||
{{!}} style="text-align: center" {{!}} | {{!}} style="text-align: center" {{!}} 3 | ||
{{!}} style="text-align: right" {{!}} | {{!}} style="text-align: right" {{!}} 1,470 | ||
{{!-}} | {{!-}} | ||
{{!}} [[File:Is ns01 | {{!}} [[File:Is ns01 sword.png|20px]] | ||
{{!}} [[ | {{!}} [[Training Sword]] | ||
{{!}} style="text-align: center" {{!}} ∞ | {{!}} style="text-align: center" {{!}} ∞ | ||
{{!}} style="text-align: right" {{!}} | {{!}} style="text-align: right" {{!}} 260 | ||
{{!-}} | {{!-}} | ||
{{!}} [[File:Is ns01 | {{!}} [[File:Is ns01 sword.png|20px]] | ||
{{!}} [[ | {{!}} [[Levin Sword]] | ||
{{!}} style="text-align: center" {{!}} | {{!}} style="text-align: center" {{!}} Limited: 1 | ||
{{!}} style="text-align: right" {{!}} 1, | {{!}} style="text-align: right" {{!}} 1,600 | ||
{{!-}} | {{!-}} | ||
{{!}} [[File:Is ns01 | {{!}} [[File:Is ns01 sword.png|20px]] | ||
{{!}} [[ | {{!}} [[Armorslayer]] | ||
{{!}} style="text-align: center" {{!}} | {{!}} style="text-align: center" {{!}} 3 | ||
{{!}} style="text-align: right" {{!}} | {{!}} style="text-align: right" {{!}} 1,450 | ||
{{!-}} | {{!-}} | ||
{{!}} [[File:Is ns01 | {{!}} [[File:Is ns01 lance.png|20px]] | ||
{{!}} [[ | {{!}} [[Iron Lance]] | ||
{{!}} style="text-align: center" {{!}} ∞ | {{!}} style="text-align: center" {{!}} ∞ | ||
{{!}} style="text-align: right" {{!}} | {{!}} style="text-align: right" {{!}} 560 | ||
{{!-}} | {{!-}} | ||
{{!}} [[File:Is ns01 | {{!}} [[File:Is ns01 lance.png|20px]] | ||
{{!}} [[ | {{!}} [[Steel Lance]] | ||
{{!}} style="text-align: center" {{!}} ∞ | {{!}} style="text-align: center" {{!}} ∞ | ||
{{!}} style="text-align: right" {{!}} | {{!}} style="text-align: right" {{!}} 910 | ||
{{!-}} | {{!-}} | ||
{{!}} [[File:Is ns01 | {{!}} [[File:Is ns01 lance.png|20px]] | ||
{{!}} [[ | {{!}} [[Silver Lance]] | ||
{{!}} style="text-align: center" {{!}} | {{!}} style="text-align: center" {{!}} 3 | ||
{{!}} style="text-align: right" {{!}} 1, | {{!}} style="text-align: right" {{!}} 1,560 | ||
{{!-}} | {{!-}} | ||
{{!}} [[File:Is ns01 | {{!}} [[File:Is ns01 lance.png|20px]] | ||
{{!}} [[ | {{!}} [[Killer Lance]] | ||
{{!}} style="text-align: center" {{!}} | {{!}} style="text-align: center" {{!}} 3 | ||
{{!}} style="text-align: right" {{!}} | {{!}} style="text-align: right" {{!}} 1,680 | ||
{{!-}} | {{!-}} | ||
{{!}} [[File:Is ns01 | {{!}} [[File:Is ns01 lance.png|20px]] | ||
{{!}} [[ | {{!}} [[Training Lance]] | ||
{{!}} style="text-align: center" {{!}} ∞ | {{!}} style="text-align: center" {{!}} ∞ | ||
{{!}} style="text-align: right" {{!}} | {{!}} style="text-align: right" {{!}} 280 | ||
{{!-}} | {{!-}} | ||
{{!}} [[File:Is ns01 | {{!}} [[File:Is ns01 lance.png|20px]] | ||
{{!}} [[ | {{!}} [[Javelin]] | ||
{{!}} style="text-align: center" {{!}} | {{!}} style="text-align: center" {{!}} 10 | ||
{{!}} style="text-align: right" {{!}} | {{!}} style="text-align: right" {{!}} 700 | ||
{{!-}} | {{!-}} | ||
{{!}} [[File:Is ns01 | {{!}} [[File:Is ns01 lance.png|20px]] | ||
{{!}} [[ | {{!}} [[Short Spear]] | ||
{{!}} style="text-align: center" {{!}} Limited: | {{!}} style="text-align: center" {{!}} Limited: 1 | ||
{{!}} style="text-align: right" {{!}} 3, | {{!}} style="text-align: right" {{!}} 1,600 | ||
{{!-}} | |||
{{!}} [[File:Is ns01 lance.png|20px]] | |||
{{!}} [[Horseslayer]] | |||
{{!}} style="text-align: center" {{!}} 3 | |||
{{!}} style="text-align: right" {{!}} 1,650 | |||
{{!-}} | {{!-}} | ||
{{!}} [[File:Is ns01 | {{!}} [[File:Is ns01 axe.png|20px]] | ||
{{!}} [[ | {{!}} [[Iron Axe]] | ||
{{!}} style="text-align: center" {{!}} ∞ | {{!}} style="text-align: center" {{!}} ∞ | ||
{{!}} style="text-align: right" {{!}} 600 | {{!}} style="text-align: right" {{!}} 600 | ||
{{!-}} | {{!-}} | ||
{{!}} [[File:Is ns01 | {{!}} [[File:Is ns01 axe.png|20px]] | ||
{{!}} [[ | {{!}} [[Steel Axe]] | ||
{{!}} style="text-align: center" {{!}} ∞ | {{!}} style="text-align: center" {{!}} ∞ | ||
{{!}} style="text-align: right" {{!}} | {{!}} style="text-align: right" {{!}} 980 | ||
{{!-}} | {{!-}} | ||
{{!}} [[File:Is ns01 | {{!}} [[File:Is ns01 axe.png|20px]] | ||
{{!}} [[ | {{!}} [[Silver Axe]] | ||
{{!}} style="text-align: center" {{!}} | {{!}} style="text-align: center" {{!}} 3 | ||
{{!}} style="text-align: right" {{!}} | {{!}} style="text-align: right" {{!}} 1,740 | ||
{{!-}} | {{!-}} | ||
{{!}} [[File:Is ns01 | {{!}} [[File:Is ns01 axe.png|20px]] | ||
{{!}} [[ | {{!}} [[Training Axe]] | ||
{{!}} style="text-align: center" {{!}} ∞ | {{!}} style="text-align: center" {{!}} ∞ | ||
{{!}} style="text-align: right" {{!}} 300 | {{!}} style="text-align: right" {{!}} 300 | ||
{{!-}} | {{!-}} | ||
{{!}} [[File:Is ns01 axe.png|20px]] | |||
{{!}} [[ | {{!}} [[Hand Axe]] | ||
{{!}} style="text-align: center" {{!}} | {{!}} style="text-align: center" {{!}} 10 | ||
{{!}} style=" | {{!}} style="text-align: right" {{!}} 750 | ||
{{ | {{!-}} | ||
}} | {{!}} [[File:Is ns01 axe.png|20px]] | ||
{{!}} [[Short Axe]] | |||
{{!}} style="text-align: center" {{!}} Limited: 1 | |||
{{!}} style="text-align: right" {{!}} 1,750 | |||
{{!-}} | {{!-}} | ||
{{!}} [[File:Is ns01 | {{!}} [[File:Is ns01 axe.png|20px]] | ||
{{!}} [[ | {{!}} [[Hammer]] | ||
{{!}} style="text-align: center" {{!}} 3 | |||
{{!}} style="text-align: right" {{!}} 1,850 | |||
{{!}} style="text-align: center" {{!}} | |||
{{!}} style="text-align: right" {{!}} 1, | |||
{{!-}} | {{!-}} | ||
{{!}} [[File:Is ns01 | {{!}} [[File:Is ns01 axe.png|20px]] | ||
{{!}} [[ | {{!}} [[Mace]] | ||
{{!}} style="text-align: center" {{!}} ∞ | |||
{{!}} style="text-align: right" {{!}} 720 | |||
{{!}} style="text-align: center" {{!}} | |||
{{!}} style="text-align: right" {{!}} | |||
{{!-}} | {{!-}} | ||
{{!}} [[File:Is ns01 | {{!}} [[File:Is ns01 bow.png|20px]] | ||
{{!}} [[ | {{!}} [[Iron Bow]] | ||
{{!}} style="text-align: center" {{!}} ∞ | |||
{{!}} style="text-align: right" {{!}} 560 | |||
{{!}} style="text-align: center" {{!}} | |||
{{!}} style="text-align: right" {{!}} | |||
{{!-}} | {{!-}} | ||
{{!}} [[File:Is ns01 | {{!}} [[File:Is ns01 bow.png|20px]] | ||
{{!}} [[ | {{!}} [[Steel Bow]] | ||
{{!}} style="text-align: center" {{!}} ∞ | |||
{{!}} style="text-align: right" {{!}} 910 | |||
{{!}} style="text-align: center" {{!}} | |||
{{!}} style="text-align: right" {{!}} | |||
{{!-}} | {{!-}} | ||
{{!}} [[File:Is ns01 | {{!}} [[File:Is ns01 bow.png|20px]] | ||
{{!}} [[ | {{!}} [[Silver Bow]] | ||
{{!}} style="text-align: center" {{!}} 3 | |||
{{!}} style="text-align: right" {{!}} 1,560 | |||
{{!}} style="text-align: center" {{!}} | |||
{{!}} style="text-align: right" {{!}} 1, | |||
{{!-}} | {{!-}} | ||
{{!}} [[File:Is ns01 | {{!}} [[File:Is ns01 bow.png|20px]] | ||
{{!}} [[ | {{!}} [[Training Bow]] | ||
{{!}} style="text-align: center" {{!}} ∞ | |||
{{!}} style="text-align: right" {{!}} 350 | |||
{{!}} style="text-align: center" {{!}} | |||
{{!}} style="text-align: right" {{!}} | |||
{{!-}} | {{!-}} | ||
{{!}} [[File:Is ns01 | {{!}} [[File:Is ns01 bow.png|20px]] | ||
{{!}} [[ | {{!}} [[Mini Bow]] | ||
{{!}} style="text-align: center" {{!}} ∞ | |||
{{!}} style="text-align: right" {{!}} 680 | |||
{{!}} style="text-align: center" {{!}} | |||
{{!}} style="text-align: right" {{!}} | |||
{{!-}} | {{!-}} | ||
{{!}} [[File:Is ns01 | {{!}} [[File:Is ns01 brawling.png|20px]] | ||
{{!}} [[ | {{!}} [[Iron Gauntlets]] | ||
{{!}} style="text-align: center" {{!}} ∞ | |||
{{!}} style="text-align: right" {{!}} 480 | |||
{{!}} style="text-align: center" {{!}} | |||
{{!}} style="text-align: right" {{!}} | |||
{{!-}} | {{!-}} | ||
{{!}} [[File:Is ns01 | {{!}} [[File:Is ns01 brawling.png|20px]] | ||
{{!}} [[ | {{!}} [[Steel Gauntlets]] | ||
{{!}} style="text-align: center" {{!}} ∞ | |||
{{!}} style="text-align: right" {{!}} 640 | |||
{{!}} style="text-align: center" {{!}} | |||
{{!}} style="text-align: right" {{!}} | |||
{{!-}} | {{!-}} | ||
{{!}} [[File:Is ns01 | {{!}} [[File:Is ns01 brawling.png|20px]] | ||
{{!}} [[ | {{!}} [[Silver Gauntlets]] | ||
{{!}} style="text-align: center" {{!}} 3 | |||
{{!}} style="text-align: right" {{!}} 1,290 | |||
{{!}} style="text-align: center" {{!}} | |||
{{!}} style="text-align: right" {{!}} 1, | |||
{{!-}} | {{!-}} | ||
{{!}} [[File:Is ns01 | {{!}} class="roundbl" {{!}} [[File:Is ns01 brawling.png|20px]] | ||
{{!}} [[ | {{!}} [[Training Gauntlets]] | ||
{{!}} | {{!}} style="text-align: center" {{!}} ∞ | ||
{{!}} | {{!}} class="roundbr" style="text-align: right" {{!}} 240 | ||
{{!}} style="text-align: | {{tableend}} | ||
{{!}} style=" | |content3={{tablebegin}} class="wikitable round" style="border-collapse: separate; margin: auto; background: none; border: none" | ||
! class="roundtl" style="width: 5%" {{!}} | |||
! style="width: 45%" {{!}} Name | |||
! style="width: 25%" {{!}} Stock | |||
! class="roundtr" style="width: 25%" {{!}} Price | |||
{{!-}} | {{!-}} | ||
{{!}} [[File:Is ns01 | {{!}} [[File:Is ns01 sword.png|20px]] | ||
{{!}} [[ | {{!}} [[Iron Sword]] | ||
{{!}} style="text-align: center" {{!}} ∞ | |||
{{!}} style="text-align: right" {{!}} 520 | |||
{{!}} style="text-align: center" {{!}} | |||
{{!}} style="text-align: right" {{!}} | |||
{{!-}} | {{!-}} | ||
{{!}} [[File:Is ns01 sword.png|20px]] | |||
{{!}} [[Steel Sword]] | |||
{{!}} [[File:Is ns01 | {{!}} style="text-align: center" {{!}} ∞ | ||
{{!}} [[ | {{!}} style="text-align: right" {{!}} 910 | ||
{{!}} style="text-align: center" {{!}} | |||
{{!}} style=" | |||
{{!-}} | {{!-}} | ||
{{!}} [[File:Is ns01 | {{!}} [[File:Is ns01 sword.png|20px]] | ||
{{!}} [[ | {{!}} [[Silver Sword]] | ||
{{!}} style="text-align: center" {{!}} ∞ | |||
{{!}} style="text-align: right" {{!}} 1,410 | |||
{{!}} style="text-align: center" {{!}} | |||
{{!}} style="text-align: right" {{!}} 1, | |||
{{!-}} | {{!-}} | ||
{{!}} [[File:Is ns01 | {{!}} [[File:Is ns01 sword.png|20px]] | ||
{{!}} [[ | {{!}} [[Brave Sword]] | ||
{{!}} style="text-align: center" {{!}} Limited: 1 | |||
{{!}} style="text-align: right" {{!}} 2,100 | |||
{{!}} style="text-align: center" {{!}} | |||
{{!}} style="text-align: right" {{!}} | |||
{{!-}} | {{!-}} | ||
{{!}} [[File:Is ns01 | {{!}} [[File:Is ns01 sword.png|20px]] | ||
{{!}} [[ | {{!}} [[Killing Edge]] | ||
{{!}} style="text-align: center" {{!}} ∞ | |||
{{!}} style="text-align: right" {{!}} 1,470 | |||
{{!}} style="text-align: center" {{!}} | |||
{{!}} style="text-align: right" {{!}} 1, | |||
{{!-}} | {{!-}} | ||
{{!}} [[File:Is ns01 | {{!}} [[File:Is ns01 sword.png|20px]] | ||
{{!}} [[ | {{!}} [[Training Sword]] | ||
{{!}} style="text-align: center" {{!}} ∞ | |||
{{!}} style="text-align: right" {{!}} 260 | |||
{{!}} style="text-align: center" {{!}} | |||
{{!}} style="text-align: right" {{!}} | |||
{{!-}} | {{!-}} | ||
{{!}} [[File:Is ns01 | {{!}} [[File:Is ns01 sword.png|20px]] | ||
{{!}} [[ | {{!}} [[Levin Sword]] | ||
{{!}} style="text-align: center" {{!}} Limited: 1 | |||
{{!}} style="text-align: right" {{!}} 1,600 | |||
{{!}} style="text-align: center" {{!}} | |||
{{!}} style="text-align: right" {{!}} 1, | |||
{{!-}} | {{!-}} | ||
{{!}} [[File:Is ns01 | {{!}} [[File:Is ns01 sword.png|20px]] | ||
{{!}} [[ | {{!}} [[Armorslayer]] | ||
{{!}} style="text-align: center" {{!}} ∞ | |||
{{!}} style="text-align: right" {{!}} 1,450 | |||
{{!}} style="text-align: center" {{!}} | |||
{{!}} style="text-align: right" {{!}} 1, | |||
{{!-}} | {{!-}} | ||
{{!}} [[File:Is ns01 | {{!}} [[File:Is ns01 lance.png|20px]] | ||
{{!}} [[ | {{!}} [[Iron Lance]] | ||
{{!}} style="text-align: center" {{!}} ∞ | |||
{{!}} style="text-align: right" {{!}} 560 | |||
{{!}} style="text-align: center" {{!}} | |||
{{!}} style="text-align: right" {{!}} | |||
{{!-}} | {{!-}} | ||
{{!}} [[File:Is ns01 | {{!}} [[File:Is ns01 lance.png|20px]] | ||
{{!}} [[ | {{!}} [[Steel Lance]] | ||
{{!}} style="text-align: center" {{!}} ∞ | |||
{{!}} style="text-align: right" {{!}} 910 | |||
{{!}} style="text-align: center" {{!}} | |||
{{!}} style="text-align: right" {{!}} | |||
{{!-}} | {{!-}} | ||
{{!}} [[File:Is ns01 | {{!}} [[File:Is ns01 lance.png|20px]] | ||
{{!}} [[ | {{!}} [[Silver Lance]] | ||
{{!}} style="text-align: center" {{!}} ∞ | |||
{{!}} style="text-align: right" {{!}} 1,560 | |||
{{!}} style="text-align: center" {{!}} | |||
{{!}} style="text-align: right" {{!}} 1, | |||
{{!-}} | {{!-}} | ||
{{!}} [[File:Is ns01 | {{!}} [[File:Is ns01 lance.png|20px]] | ||
{{!}} [[ | {{!}} [[Brave Lance]] | ||
{{!}} style="text-align: center" {{!}} Limited: 1 | |||
{{!}} style="text-align: right" {{!}} 2,220 | |||
{{!}} style="text-align: center" {{!}} | |||
{{!}} style="text-align: right" {{!}} | |||
{{!-}} | {{!-}} | ||
{{!}} [[File:Is ns01 | {{!}} [[File:Is ns01 lance.png|20px]] | ||
{{!}} [[ | {{!}} [[Killer Lance]] | ||
{{!}} style="text-align: center" {{!}} ∞ | |||
{{!}} style="text-align: right" {{!}} 1,680 | |||
{{!}} style="text-align: center" {{!}} | |||
{{!}} style="text-align: right" {{!}} 1, | |||
{{!-}} | {{!-}} | ||
{{!}} [[File:Is ns01 lance.png|20px]] | |||
{{!}} [[Training Lance]] | |||
{{!}} [[File:Is ns01 | {{!}} style="text-align: center" {{!}} ∞ | ||
{{!}} [[ | {{!}} style="text-align: right" {{!}} 280 | ||
{{!}} style="text-align: center" {{!}} | |||
{{!}} style=" | |||
{{!-}} | {{!-}} | ||
{{!}} [[File:Is ns01 | {{!}} [[File:Is ns01 lance.png|20px]] | ||
{{!}} [[ | {{!}} [[Javelin]] | ||
{{!}} style="text-align: center" {{!}} ∞ | |||
{{!}} style="text-align: right" {{!}} 700 | |||
{{!}} style="text-align: center" {{!}} | |||
{{!}} style="text-align: right" {{!}} | |||
{{!-}} | {{!-}} | ||
{{!}} [[File:Is ns01 | {{!}} [[File:Is ns01 lance.png|20px]] | ||
{{!}} [[ | {{!}} [[Short Spear]] | ||
{{!}} style="text-align: center" {{!}} Limited: 1 | |||
{{!}} style="text-align: right" {{!}} 1,600 | |||
{{!}} style="text-align: center" {{!}} | |||
{{!}} style="text-align: right" {{!}} | |||
{{!-}} | {{!-}} | ||
{{!}} [[File:Is ns01 | {{!}} [[File:Is ns01 lance.png|20px]] | ||
{{!}} [[ | {{!}} [[Horseslayer]] | ||
{{!}} style="text-align: center" {{!}} ∞ | |||
{{!}} style="text-align: right" {{!}} 1,650 | |||
{{!}} style="text-align: center" {{!}} | |||
{{!}} style="text-align: right" {{!}} | |||
{{!-}} | {{!-}} | ||
{{!}} [[File:Is ns01 | {{!}} [[File:Is ns01 axe.png|20px]] | ||
{{!}} [[ | {{!}} [[Iron Axe]] | ||
{{!}} style="text-align: center" {{!}} ∞ | |||
{{!}} style="text-align: right" {{!}} 600 | |||
{{!}} style="text-align: center" {{!}} | |||
{{!}} style="text-align: right" {{!}} | |||
{{!-}} | {{!-}} | ||
{{!}} [[File:Is ns01 | {{!}} [[File:Is ns01 axe.png|20px]] | ||
{{!}} [[ | {{!}} [[Steel Axe]] | ||
{{!}} style="text-align: center" {{!}} ∞ | |||
{{!}} style="text-align: right" {{!}} 980 | |||
{{!}} style="text-align: center" {{!}} | |||
{{!}} style="text-align: right" {{!}} | |||
{{!-}} | {{!-}} | ||
{{!}} [[File:Is ns01 | {{!}} [[File:Is ns01 axe.png|20px]] | ||
{{!}} [[ | {{!}} [[Silver Axe]] | ||
{{!}} style="text-align: center" {{!}} ∞ | |||
{{!}} style="text-align: right" {{!}} 1,740 | |||
{{!}} style="text-align: center" {{!}} | |||
{{!}} style="text-align: right" {{!}} | |||
{{!-}} | {{!-}} | ||
{{!}} [[File:Is ns01 | {{!}} [[File:Is ns01 axe.png|20px]] | ||
{{!}} [[ | {{!}} [[Brave Axe]] | ||
{{!}} style="text-align: center" {{!}} Limited: 1 | |||
{{!}} style="text-align: right" {{!}} 2,400 | |||
{{!}} style="text-align: center" {{!}} | |||
{{!}} style="text-align: right" {{!}} 2, | |||
{{!-}} | {{!-}} | ||
{{!}} [[File:Is ns01 axe.png|20px]] | |||
{{!}} [[Training Axe]] | |||
{{!}} [[File:Is ns01 | {{!}} style="text-align: center" {{!}} ∞ | ||
{{!}} [[ | {{!}} style="text-align: right" {{!}} 300 | ||
{{!}} style="text-align: center" {{!}} | |||
{{!}} style=" | |||
{{!-}} | {{!-}} | ||
{{ | {{!}} [[File:Is ns01 axe.png|20px]] | ||
{{!}} [[Hand Axe]] | |||
!style=" | {{!}} style="text-align: center" {{!}} ∞ | ||
!style=" | {{!}} style="text-align: right" {{!}} 750 | ||
{{!-}} | |||
! | {{!}} [[File:Is ns01 axe.png|20px]] | ||
!style=" | {{!}} [[Short Axe]] | ||
!style=" | {{!}} style="text-align: center" {{!}} Limited: 1 | ||
{{!}} style="text-align: right" {{!}} 1,750 | |||
{{!-}} | {{!-}} | ||
{{!}} [[File:Is ns01 | {{!}} [[File:Is ns01 axe.png|20px]] | ||
{{!}} [[ | {{!}} [[Hammer]] | ||
{{!}} style="text-align: center" {{!}} ∞ | |||
{{!}} style="text-align: right" {{!}} 1,850 | |||
{{!}} style="text-align: center" {{!}} | |||
{{!}} style="text-align: right" {{!}} | |||
{{!-}} | {{!-}} | ||
{{!}} [[File:Is ns01 | {{!}} [[File:Is ns01 axe.png|20px]] | ||
{{!}} [[ | {{!}} [[Mace]] | ||
{{!}} style="text-align: center" {{!}} ∞ | |||
{{!}} style="text-align: right" {{!}} 720 | |||
{{!}} style="text-align: center" {{!}} | |||
{{!}} style="text-align: right" {{!}} | |||
{{!-}} | {{!-}} | ||
{{!}} [[File:Is ns01 | {{!}} [[File:Is ns01 bow.png|20px]] | ||
{{!}} [[ | {{!}} [[Iron Bow]] | ||
{{!}} style="text-align: center" {{!}} ∞ | |||
{{!}} style="text-align: right" {{!}} 560 | |||
{{!}} style="text-align: center" {{!}} | |||
{{!}} style="text-align: right" {{!}} | |||
{{!-}} | {{!-}} | ||
{{!}} [[File:Is ns01 | {{!}} [[File:Is ns01 bow.png|20px]] | ||
{{!}} [[ | {{!}} [[Steel Bow]] | ||
{{!}} style="text-align: center" {{!}} ∞ | |||
{{!}} style="text-align: right" {{!}} 910 | |||
{{!}} style="text-align: center" {{!}} | |||
{{!}} style="text-align: right" {{!}} | |||
{{!-}} | {{!-}} | ||
{{!}} [[File:Is ns01 | {{!}} [[File:Is ns01 bow.png|20px]] | ||
{{!}} [[ | {{!}} [[Silver Bow]] | ||
{{!}} style="text-align: center" {{!}} ∞ | |||
{{!}} style="text-align: right" {{!}} 1,560 | |||
{{!}} style="text-align: center" {{!}} | |||
{{!}} style="text-align: right" {{!}} | |||
{{!-}} | {{!-}} | ||
{{!}} [[File:Is ns01 | {{!}} [[File:Is ns01 bow.png|20px]] | ||
{{!}} [[ | {{!}} [[Brave Bow]] | ||
{{!}} style="text-align: center" {{!}} Limited: 1 | |||
{{!}} style="text-align: right" {{!}} 2,220 | |||
{{!}} style="text-align: center" {{!}} | |||
{{!}} style="text-align: right" {{!}} 2, | |||
{{!-}} | {{!-}} | ||
{{!}} [[File:Is ns01 | {{!}} [[File:Is ns01 bow.png|20px]] | ||
{{!}} [[ | {{!}} [[Training Bow]] | ||
{{!}} style="text-align: center" {{!}} ∞ | |||
{{!}} style="text-align: right" {{!}} 350 | |||
{{!}} style="text-align: center" {{!}} | |||
{{!}} style="text-align: right" {{!}} | |||
{{!-}} | {{!-}} | ||
{{!}} [[File:Is ns01 | {{!}} [[File:Is ns01 bow.png|20px]] | ||
{{!}} [[ | {{!}} [[Mini Bow]] | ||
{{!}} [[File:Is ns01 | {{!}} style="text-align: center" {{!}} ∞ | ||
{{!}} [[ | {{!}} style="text-align: right" {{!}} 680 | ||
{{!}} style="text-align: center" {{!}} | {{!-}} | ||
{{!}} style="text-align: right" {{!}} | {{!}} [[File:Is ns01 brawling.png|20px]] | ||
{{!}} [[Iron Gauntlets]] | |||
{{!}} style="text-align: center" {{!}} ∞ | |||
{{!}} style="text-align: right" {{!}} 480 | |||
{{!-}} | {{!-}} | ||
{{!}} [[File:Is ns01 | {{!}} [[File:Is ns01 brawling.png|20px]] | ||
{{!}} [[ | {{!}} [[Steel Gauntlets]] | ||
{{!}} style="text-align: center" {{!}} ∞ | |||
{{!}} style="text-align: right" {{!}} 640 | |||
{{!}} style="text-align: center" {{!}} | |||
{{!}} style="text-align: right" {{!}} | |||
{{!-}} | {{!-}} | ||
{{!}} [[File:Is ns01 | {{!}} [[File:Is ns01 brawling.png|20px]] | ||
{{!}} [[ | {{!}} [[Silver Gauntlets]] | ||
{{!}} style="text-align: center" {{!}} ∞ | |||
{{!}} style="text-align: right" {{!}} 1,290 | |||
{{!}} style="text-align: center" {{!}} | |||
{{!}} style="text-align: right" {{!}} | |||
{{!-}} | {{!-}} | ||
{{!}} | {{!}} class="roundbl" {{!}} [[File:Is ns01 brawling.png|20px]] | ||
{{!}} [[ | {{!}} [[Training Gauntlets]] | ||
{{!}} style="text-align: center" {{!}} ∞ | |||
{{!}} class="roundbr" style="text-align: right" {{!}} 240 | |||
{{!}} style="text-align: center" {{!}} | |||
{{!}} style=" | |||
{{tableend}} | {{tableend}} | ||
}} | }} | ||
| | |||
|header= | ====Item Shop==== | ||
{{main|Item shop}} | |||
The Item Shop is available from Chapter 2 (or Chapter 1 in New Game +) when the Marketplace first becomes accessible. | |||
{{Tab | |||
|header=Item Shop {{ItemShop}} | |||
|width=60% | |width=60% | ||
|tab1=Chapter | |tab1=Chapter 1 | ||
|tab2=Chapter 8 | |tab2=Chapter 8 | ||
|tab3=Chapter 14 | |tab3=Chapter 12 {{Crimson Flower|Black Eagles, if siding with Edelgard}}/14 {{Silver Snow}}{{Azure Moon}}{{Verdant Wind}} | ||
|content1={{tablebegin}} class="wikitable round" style="border-collapse: separate; margin: auto; background: none; border: none" | |content1={{tablebegin}} class="wikitable round" style="border-collapse: separate; margin: auto; background: none; border: none" | ||
! | ! class="roundtl" style="width: 5%" {{!}} | ||
! style="width: 45%" {{!}} Name | |||
!style="width: | ! style="width: 25%" {{!}} Stock | ||
!style="width: | ! class="roundtr" style="width: 25%" {{!}} Price | ||
! | |||
{{!-}} | {{!-}} | ||
{{!}} [[File:Is ns01 | {{!}} [[File:Is ns01 shield.png|20px]] | ||
{{!}} [[ | {{!}} [[Leather Shield]] | ||
{{!}} [[File:Is ns01 | {{!}} style="text-align: center" {{!}} ∞ | ||
{{!}} [[ | {{!}} style="text-align: right" {{!}} 500 | ||
{{!}} style="text-align: center" {{!}} | {{!-}} | ||
{{!}} [[File:Is ns01 shield.png|20px]] | |||
{{!}} [[Iron Shield]] | |||
{{!}} style="text-align: center" {{!}} 3 | |||
{{!}} style="text-align: right" {{!}} 1,000 | {{!}} style="text-align: right" {{!}} 1,000 | ||
{{!-}} | {{!-}} | ||
{{!}} [[File:Is ns01 | {{!}} [[File:Is ns01 potion.png|20px]] | ||
{{!}} [[ | {{!}} [[Vulnerary]] | ||
{{!}} style="text-align: center" {{!}} ∞ | |||
{{!}} style="text-align: right" {{!}} 300 | |||
{{!}} style="text-align: center" {{!}} | |||
{{!}} style="text-align: right" {{!}} | |||
{{!-}} | {{!-}} | ||
{{!}} [[File:Is ns01 | {{!}} [[File:Is ns01 seal.png|20px]] | ||
{{!}} [[ | {{!}} [[Beginner Seal]] | ||
{{!}} style="text-align: center" {{!}} ∞ | |||
{{!}} style="text-align: right" {{!}} 500 | |||
{{!}} style="text-align: center" {{!}} | |||
{{!}} style="text-align: right" {{!}} | |||
{{!-}} | {{!-}} | ||
{{!}} [[File:Is ns01 | {{!}} [[File:Is ns01 seal.png|20px]] | ||
{{!}} [[ | {{!}} [[Intermediate Seal]] | ||
{{!}} [[File:Is ns01 | {{!}} style="text-align: center" {{!}} 3 | ||
{{!}} [[ | {{!}} style="text-align: right" {{!}} 1,000 | ||
{{!}} style="text-align: center" {{!}} | {{!-}} | ||
{{!}} style="text-align: right" {{!}} | {{!}} [[File:Is ns01 torch.png|20px]] | ||
{{!}} [[Torch (item)|Torch]] | |||
{{!}} style="text-align: center" {{!}} ∞ | |||
{{!}} style="text-align: right" {{!}} 600 | |||
{{!-}} | {{!-}} | ||
{{!}} [[File:Is ns01 | {{!}} [[File:Is ns01 potion.png|20px]] | ||
{{!}} [[ | {{!}} [[Pure Water]] | ||
{{!}} style="text-align: center" {{!}} 5 | |||
{{!}} style="text-align: right" {{!}} 600 | |||
{{!}} style="text-align: center" {{!}} | |||
{{!}} style="text-align: right" {{!}} | |||
{{!-}} | {{!-}} | ||
{{!}} [[File:Is ns01 | {{!}} [[File:Is ns01 key.png|20px]] | ||
{{!}} [[ | {{!}} [[Door Key]] | ||
{{!}} style="text-align: center" {{!}} ∞ | |||
{{!}} style="text-align: right" {{!}} 300 | |||
{{!}} style="text-align: center" {{!}} | |||
{{!}} style="text-align: right" {{!}} | |||
{{!-}} | {{!-}} | ||
{{!}} [[File:Is ns01 | {{!}} class="roundbl" {{!}} [[File:Is ns01 key.png|20px]] | ||
{{!}} [[ | {{!}} [[Chest Key]] | ||
{{!}} | {{!}} style="text-align: center" {{!}} ∞ | ||
{{!}} | {{!}} class="roundbr" style="text-align: right" {{!}} 300 | ||
{{!}} style="text-align: | {{tableend}} | ||
{{!}} style=" | |content2={{tablebegin}} class="wikitable round" style="border-collapse: separate; margin: auto; background: none; border: none" | ||
! class="roundtl" style="width: 5%" {{!}} | |||
! style="width: 45%" {{!}} Name | |||
! style="width: 25%" {{!}} Stock | |||
! class="roundtr" style="width: 25%" {{!}} Price | |||
{{!-}} | {{!-}} | ||
{{!}} [[File:Is ns01 | {{!}} [[File:Is ns01 shield.png|20px]] | ||
{{!}} [[ | {{!}} [[Leather Shield]] | ||
{{!}} style="text-align: center" {{!}} ∞ | |||
{{!}} style="text-align: right" {{!}} 500 | |||
{{!}} style="text-align: center" {{!}} | |||
{{!}} style="text-align: right" {{!}} | |||
{{!-}} | {{!-}} | ||
{{!}} [[File:Is ns01 | {{!}} [[File:Is ns01 shield.png|20px]] | ||
{{!}} [[ | {{!}} [[Iron Shield]] | ||
{{!}} style="text-align: center" {{!}} ∞ | |||
{{!}} style="text-align: center" {{!}} | |||
{{!}} style="text-align: right" {{!}} 1,000 | {{!}} style="text-align: right" {{!}} 1,000 | ||
{{!-}} | {{!-}} | ||
{{!}} [[File:Is ns01 | {{!}} [[File:Is ns01 shield.png|20px]] | ||
{{!}} [[ | {{!}} [[Steel Shield]] | ||
{{!}} [[File:Is ns01 | {{!}} style="text-align: center" {{!}} 3 | ||
{{!}} [[ | {{!}} style="text-align: right" {{!}} 1,500 | ||
{{!}} style="text-align: center" {{!}} | {{!-}} | ||
{{!}} style="text-align: right" {{!}} | {{!}} [[File:Is ns01 potion.png|20px]] | ||
{{!}} [[Vulnerary]] | |||
{{!}} style="text-align: center" {{!}} ∞ | |||
{{!}} style="text-align: right" {{!}} 300 | |||
{{!-}} | {{!-}} | ||
{{!}} [[File:Is ns01 | {{!}} [[File:Is ns01 potion.png|20px]] | ||
{{!}} [[ | {{!}} [[Concoction]] | ||
{{!}} style="text-align: center" {{!}} 5 | |||
{{!}} style="text-align: right" {{!}} 600 | |||
{{!}} style="text-align: center" {{!}} | |||
{{!}} style="text-align: right" {{!}} | |||
{{!-}} | {{!-}} | ||
{{!}} [[File:Is ns01 | {{!}} [[File:Is ns01 seal.png|20px]] | ||
{{!}} [[ | {{!}} [[Beginner Seal]] | ||
{{!}} style="text-align: center" {{!}} ∞ | |||
{{!}} style="text-align: right" {{!}} 500 | |||
{{!}} style="text-align: center" {{!}} | |||
{{!}} style="text-align: right" {{!}} | |||
{{!-}} | {{!-}} | ||
{{!}} [[File:Is ns01 seal.png|20px]] | |||
{{!}} [[Intermediate Seal]] | |||
{{!}} style="text-align: center" {{!}} ∞ | |||
{{!}} [[File:Is ns01 | |||
{{!}} [[ | |||
{{!}} style="text-align: center" {{!}} | |||
{{!}} style="text-align: right" {{!}} 1,000 | {{!}} style="text-align: right" {{!}} 1,000 | ||
{{!-}} | {{!-}} | ||
{{!}} [[File:Is ns01 | {{!}} [[File:Is ns01 seal.png|20px]] | ||
{{!}} [[ | {{!}} [[Advanced Seal]] | ||
{{!}} style="text-align: center" {{!}} 3 | |||
{{!}} style="text-align: right" {{!}} 2,000 | |||
{{!}} style="text-align: center" {{!}} | |||
{{!}} style="text-align: right" {{!}} | |||
{{!-}} | {{!-}} | ||
{{!}} [[File:Is ns01 | {{!}} [[File:Is ns01 torch.png|20px]] | ||
{{!}} [[ | {{!}} [[Torch (item)|Torch]] | ||
{{!}} style="text-align: center" {{!}} ∞ | |||
{{!}} style="text-align: right" {{!}} 600 | |||
{{!}} style="text-align: center" {{!}} | |||
{{!}} style="text-align: right" {{!}} | |||
{{!-}} | {{!-}} | ||
{{!}} [[File:Is ns01 | {{!}} [[File:Is ns01 potion.png|20px]] | ||
{{!}} [[ | {{!}} [[Antitoxin]] | ||
{{!}} style="text-align: center" {{!}} 5 | |||
{{!}} style="text-align: right" {{!}} 600 | |||
{{!}} style="text-align: center" {{!}} | |||
{{!}} style="text-align: right" {{!}} | |||
{{!-}} | {{!-}} | ||
{{!}} [[File:Is ns01 | {{!}} [[File:Is ns01 potion.png|20px]] | ||
{{!}} [[ | {{!}} [[Pure Water]] | ||
{{!}} style="text-align: center" {{!}} ∞ | |||
{{!}} style="text-align: right" {{!}} 600 | |||
{{!}} style="text-align: center" {{!}} | |||
{{!}} style="text-align: right" {{!}} | |||
{{!-}} | {{!-}} | ||
{{!}} [[File:Is ns01 | {{!}} [[File:Is ns01 key.png|20px]] | ||
{{!}} [[ | {{!}} [[Door Key]] | ||
{{!}} style="text-align: center" {{!}} ∞ | |||
{{!}} style="text-align: right" {{!}} 300 | |||
{{!}} style="text-align: center" {{!}} | |||
{{!}} style="text-align: right" {{!}} | |||
{{!-}} | {{!-}} | ||
{{!}} [[File:Is ns01 | {{!}} class="roundbl" {{!}} [[File:Is ns01 key.png|20px]] | ||
{{!}} [[ | {{!}} [[Chest Key]] | ||
{{!}} | {{!}} style="text-align: center" {{!}} ∞ | ||
{{!}} | {{!}} class="roundbr" style="text-align: right" {{!}} 300 | ||
{{!}} style="text-align: | {{tableend}} | ||
{{!}} style=" | |content3={{tablebegin}} class="wikitable round" style="border-collapse: separate; margin: auto; background: none; border: none" | ||
! class="roundtl" style="width: 5%" {{!}} | |||
! style="width: 45%" {{!}} Name | |||
! style="width: 25%" {{!}} Stock | |||
! class="roundtr" style="width: 25%" {{!}} Price | |||
{{!-}} | {{!-}} | ||
{{!}} [[File:Is ns01 | {{!}} [[File:Is ns01 shield.png|20px]] | ||
{{!}} [[ | {{!}} [[Leather Shield]] | ||
{{!}} style="text-align: center" {{!}} ∞ | |||
{{!}} style="text-align: right" {{!}} 500 | |||
{{!}} style="text-align: center" {{!}} | |||
{{!}} style="text-align: right" {{!}} | |||
{{!-}} | {{!-}} | ||
{{!}} [[File:Is ns01 | {{!}} [[File:Is ns01 shield.png|20px]] | ||
{{!}} [[ | {{!}} [[Iron Shield]] | ||
{{!}} style="text-align: center" {{!}} ∞ | |||
{{!}} style="text-align: right" {{!}} 1,000 | |||
{{!}} style="text-align: center" {{!}} | |||
{{!}} style="text-align: right" {{!}} 1, | |||
{{!-}} | {{!-}} | ||
{{!}} [[File:Is ns01 | {{!}} [[File:Is ns01 shield.png|20px]] | ||
{{!}} [[ | {{!}} [[Steel Shield]] | ||
{{!}} style="text-align: center" {{!}} ∞ | |||
{{!}} style="text-align: center" {{!}} | |||
{{!}} style="text-align: right" {{!}} 1,500 | {{!}} style="text-align: right" {{!}} 1,500 | ||
{{!-}} | {{!-}} | ||
{{!}} [[File:Is ns01 | {{!}} [[File:Is ns01 shield.png|20px]] | ||
{{!}} [[ | {{!}} [[Silver Shield]] | ||
{{!}} style="text-align: center" {{!}} Limited: 1 | |||
{{!}} style="text-align: right" {{!}} 2,000 | |||
{{!}} style="text-align: center" {{!}} | |||
{{!}} style="text-align: right" {{!}} | |||
{{!-}} | {{!-}} | ||
{{!}} [[File:Is ns01 potion.png|20px]] | |||
{{!}} [[Vulnerary]] | |||
{{!}} [[File:Is ns01 | {{!}} style="text-align: center" {{!}} ∞ | ||
{{!}} [[ | {{!}} style="text-align: right" {{!}} 300 | ||
{{!}} style="text-align: center" {{!}} | |||
{{!}} style=" | |||
{{!-}} | {{!-}} | ||
{{!}} [[File:Is ns01 | {{!}} [[File:Is ns01 potion.png|20px]] | ||
{{!}} [[ | {{!}} [[Concoction]] | ||
{{!}} [[File:Is ns01 | {{!}} style="text-align: center" {{!}} ∞ | ||
{{!}} [[ | {{!}} style="text-align: right" {{!}} 600 | ||
{{!}} style="text-align: center" {{!}} | {{!-}} | ||
{{!}} style="text-align: right" {{!}} | {{!}} [[File:Is ns01 potion.png|20px]] | ||
{{!}} [[Elixir]] | |||
{{!}} style="text-align: center" {{!}} ∞ | |||
{{!}} style="text-align: right" {{!}} 1,200 | |||
{{!-}} | {{!-}} | ||
{{!}} [[File:Is ns01 | {{!}} [[File:Is ns01 seal.png|20px]] | ||
{{!}} [[ | {{!}} [[Beginner Seal]] | ||
{{!}} style="text-align: center" {{!}} ∞ | |||
{{!}} style="text-align: right" {{!}} 500 | |||
{{!}} style="text-align: center" {{!}} | |||
{{!}} style="text-align: right" {{!}} | |||
{{!-}} | {{!-}} | ||
{{!}} [[File:Is ns01 | {{!}} [[File:Is ns01 seal.png|20px]] | ||
{{!}} [[ | {{!}} [[Intermediate Seal]] | ||
{{!}} style="text-align: center" {{!}} ∞ | |||
{{!}} style="text-align: right" {{!}} 1,000 | |||
{{!}} style="text-align: center" {{!}} | |||
{{!}} style="text-align: right" {{!}} | |||
{{!-}} | {{!-}} | ||
{{!}} [[File:Is ns01 | {{!}} [[File:Is ns01 seal.png|20px]] | ||
{{!}} [[ | {{!}} [[Advanced Seal]] | ||
{{!}} style="text-align: center" {{!}} ∞ | |||
{{!}} style="text-align: center" {{!}} | |||
{{!}} style="text-align: right" {{!}} 2,000 | {{!}} style="text-align: right" {{!}} 2,000 | ||
{{!-}} | {{!-}} | ||
{{!}} [[File:Is ns01 | {{!}} [[File:Is ns01 seal.png|20px]] | ||
{{!}} [[ | {{!}} [[Master Seal]] | ||
{{!}} style="text-align: center" {{!}} Limited: 5 | |||
{{!}} style="text-align: right" {{!}} 3,000 | |||
{{!}} style="text-align: center" {{!}} | |||
{{!}} style="text-align: right" {{!}} | |||
{{!-}} | {{!-}} | ||
{{!}} [[File:Is ns01 | {{!}} [[File:Is ns01 torch.png|20px]] | ||
{{!}} [[ | {{!}} [[Torch (item)|Torch]] | ||
{{!}} style="text-align: center" {{!}} ∞ | |||
{{!}} style="text-align: right" {{!}} 600 | |||
{{!}} style="text-align: center" {{!}} | |||
{{!}} style="text-align: right" {{!}} | |||
{{!-}} | {{!-}} | ||
{{!}} [[File:Is ns01 | {{!}} [[File:Is ns01 potion.png|20px]] | ||
{{!}} [[ | {{!}} [[Antitoxin]] | ||
{{!}} style="text-align: center" {{!}} ∞ | |||
{{!}} style="text-align: right" {{!}} 600 | |||
{{!}} style="text-align: center" {{!}} | |||
{{!}} style="text-align: right" {{!}} | |||
{{!-}} | {{!-}} | ||
{{!}} [[File:Is ns01 | {{!}} [[File:Is ns01 potion.png|20px]] | ||
{{!}} [[ | {{!}} [[Pure Water]] | ||
{{!}} style="text-align: center" {{!}} ∞ | |||
{{!}} style="text-align: right" {{!}} 600 | |||
{{!}} style="text-align: center" {{!}} | |||
{{!}} style="text-align: right" {{!}} | |||
{{!-}} | {{!-}} | ||
{{!}} [[File:Is ns01 | {{!}} [[File:Is ns01 key.png|20px]] | ||
{{!}} [[ | {{!}} [[Door Key]] | ||
{{!}} style="text-align: center" {{!}} ∞ | |||
{{!}} style="text-align: right" {{!}} 300 | |||
{{!}} style="text-align: center" {{!}} | |||
{{!}} style="text-align: right" {{!}} | |||
{{!-}} | {{!-}} | ||
{{!}} | {{!}} class="roundbl" {{!}} [[File:Is ns01 key.png|20px]] | ||
{{!}} [[Chest Key]] | |||
{{!}} [[File:Is ns01 | {{!}} style="text-align: center" {{!}} ∞ | ||
{{!}} [[ | {{!}} class="roundbr" style="text-align: right" {{!}} 300 | ||
{{!}} style="text-align: center" {{!}} | |||
{{!}} | |||
{{tableend}} | {{tableend}} | ||
}} | }} | ||
| | |||
|header=Battalion Guild – | ====Battalion Guild==== | ||
The Battalion Guild is unlocked at the start of Chapter 3. The battalions available for hire differ depending on the house chosen at the start of the game. If the player is on the version of Chapter 12 leading into the Crimson Flower route, all battalions affiliated with the Church of Seiros will be removed from the roster. | |||
{{Tab | |||
|width=100% | |||
|tab1=Black Eagles {{Silver Snow}}{{Crimson Flower}} | |||
|tab2=Blue Lions {{Azure Moon}} | |||
|tab3=Golden Deer {{Verdant Wind}} | |||
|content1={{Tab | |||
|header=Battalion Guild – Black Eagles {{BattalionGuild}} | |||
|width=60% | |width=60% | ||
|tab1=Chapter 3 | |tab1=Chapter 3 | ||
|tab2=Chapter 8 | |tab2=Chapter 8 | ||
|tab3=Chapter 14 | |tab3=Chapter 12 {{Crimson Flower|Black Eagles, if siding with Edelgard}} | ||
|tab4=Chapter 14 {{Silver Snow}} | |||
|content1={{tablebegin}} class="wikitable round" style="border-collapse: separate; margin: auto; background: none; border: none" | |content1={{tablebegin}} class="wikitable round" style="border-collapse: separate; margin: auto; background: none; border: none" | ||
!style=" | ! class="roundtl" style="width: 5%" {{!}} | ||
!style="width: 35%" {{!}} Name | ! style="width: 35%" {{!}} Name | ||
!style="width: 5%" {{!}} | ! style="width: 5%" {{!}} | ||
!style="width: 35%" {{!}} Gambit | ! style="width: 35%" {{!}} Gambit | ||
!style="width: 5%" {{!}} Level | ! style="width: 5%" {{!}} Level | ||
!style=" | ! class="roundtr" style="width: 15%" {{!}} Price | ||
{{!-}} | {{!-}} | ||
{{!}} [[File:Is ns01 battalion infantry.png|20px]] | {{!}} [[File:Is ns01 battalion infantry.png|20px]] | ||
| Line 3,214: | Line 3,424: | ||
{{!}} [[File:Is ns01 gambit magic.png|20px]] | {{!}} [[File:Is ns01 gambit magic.png|20px]] | ||
{{!}} [[Group Flames]] | {{!}} [[Group Flames]] | ||
{{!}} style="text-align: center" {{!}} | {{!}} style="text-align: center" {{!}} D | ||
{{!}} style="text-align: right" {{!}} 1,200 | {{!}} style="text-align: right" {{!}} 1,200 | ||
{{!-}} | {{!-}} | ||
| Line 3,232: | Line 3,442: | ||
{{!-}} | {{!-}} | ||
{{!}} [[File:Is ns01 battalion infantry.png|20px]] | {{!}} [[File:Is ns01 battalion infantry.png|20px]] | ||
{{!}} [[ | {{!}} [[Empire Infantry]] | ||
{{!}} [[File:Is ns01 gambit.png|20px]] | {{!}} [[File:Is ns01 gambit.png|20px]] | ||
{{!}} [[Lure]] | {{!}} [[Lure]] | ||
| Line 3,239: | Line 3,449: | ||
{{!-}} | {{!-}} | ||
{{!}} [[File:Is ns01 battalion infantry.png|20px]] | {{!}} [[File:Is ns01 battalion infantry.png|20px]] | ||
{{!}} [[ | {{!}} [[Empire Warriors]] | ||
{{!}} [[File:Is ns01 gambit.png|20px]] | {{!}} [[File:Is ns01 gambit.png|20px]] | ||
{{!}} [[ | {{!}} [[Random Shot]] | ||
{{!}} style="text-align: center" {{!}} E | {{!}} style="text-align: center" {{!}} E | ||
{{!}} style="text-align: right" {{!}} 1, | {{!}} style="text-align: right" {{!}} 1,000 | ||
{{!-}} | {{!-}} | ||
{{!}} [[File:Is ns01 battalion infantry.png|20px]] | {{!}} [[File:Is ns01 battalion infantry.png|20px]] | ||
{{!}} [[ | {{!}} [[Empire Brawlers]] | ||
{{!}} [[File:Is ns01 gambit.png|20px]] | {{!}} [[File:Is ns01 gambit.png|20px]] | ||
{{!}} [[Disturbance]] | {{!}} [[Disturbance]] | ||
| Line 3,253: | Line 3,463: | ||
{{!-}} | {{!-}} | ||
{{!}} [[File:Is ns01 battalion infantry.png|20px]] | {{!}} [[File:Is ns01 battalion infantry.png|20px]] | ||
{{!}} [[ | {{!}} [[Empire Magic Corps]] | ||
{{!}} [[File:Is ns01 gambit magic.png|20px]] | {{!}} [[File:Is ns01 gambit magic.png|20px]] | ||
{{!}} [[Group | {{!}} [[Group Flames]] | ||
{{!}} style="text-align: center" {{!}} D | |||
{{!}} style="text-align: right" {{!}} 1,200 | |||
{{!-}} | |||
{{!}} [[File:Is ns01 battalion infantry.png|20px]] | |||
{{!}} [[Empire Archers]] | |||
{{!}} [[File:Is ns01 gambit.png|20px]] | |||
{{!}} [[Fusillade]] | |||
{{!}} style="text-align: center" {{!}} D | {{!}} style="text-align: center" {{!}} D | ||
{{!}} style="text-align: right" {{!}} 1,200 | {{!}} style="text-align: right" {{!}} 1,200 | ||
{{!-}} | {{!-}} | ||
{{!}} | {{!}} class="roundbl" {{!}} [[File:Is ns01 battalion cavalry silver.png|20px]] | ||
{{!}} [[ | {{!}} [[Empire Knights]] | ||
{{!}} [[File:Is ns01 gambit.png|20px]] | {{!}} [[File:Is ns01 gambit.png|20px]] | ||
{{!}} [[Blaze]] | {{!}} [[Blaze]] | ||
{{!}} style="text-align: center" {{!}} C | {{!}} style="text-align: center" {{!}} C | ||
{{!}} style=" | {{!}} class="roundbr" style="text-align: right" {{!}} 1,500 | ||
{{tableend}} | {{tableend}} | ||
|content2={{tablebegin}} class="wikitable round" style="border-collapse: separate; margin: auto; background: none; border: none" | |content2={{tablebegin}} class="wikitable round" style="border-collapse: separate; margin: auto; background: none; border: none" | ||
!style=" | ! class="roundtl" style="width: 5%" {{!}} | ||
!style="width: 35%" {{!}} Name | ! style="width: 35%" {{!}} Name | ||
!style="width: 5%" {{!}} | ! style="width: 5%" {{!}} | ||
!style="width: 35%" {{!}} Gambit | ! style="width: 35%" {{!}} Gambit | ||
!style="width: 5%" {{!}} Level | ! style="width: 5%" {{!}} Level | ||
!style=" | ! class="roundtr" style="width: 15%" {{!}} Price | ||
{{!-}} | {{!-}} | ||
{{!}} [[File:Is ns01 battalion infantry.png|20px]] | {{!}} [[File:Is ns01 battalion infantry.png|20px]] | ||
| Line 3,303: | Line 3,520: | ||
{{!-}} | {{!-}} | ||
{{!}} [[File:Is ns01 battalion infantry.png|20px]] | {{!}} [[File:Is ns01 battalion infantry.png|20px]] | ||
{{!}} [[ | {{!}} [[Empire Archers]] | ||
{{!}} [[File:Is ns01 gambit.png|20px]] | {{!}} [[File:Is ns01 gambit.png|20px]] | ||
{{!}} [[ | {{!}} [[Fusillade]] | ||
{{!}} style="text-align: center" {{!}} D | {{!}} style="text-align: center" {{!}} D | ||
{{!}} style="text-align: right" {{!}} 1,200 | {{!}} style="text-align: right" {{!}} 1,200 | ||
{{!-}} | {{!-}} | ||
{{!}} [[File:Is ns01 battalion cavalry.png|20px]] | {{!}} [[File:Is ns01 battalion cavalry.png|20px]] | ||
{{!}} [[ | {{!}} [[Empire Cavalry]] | ||
{{!}} [[File:Is ns01 gambit.png|20px]] | {{!}} [[File:Is ns01 gambit.png|20px]] | ||
{{!}} [[Assault Troop]] | {{!}} [[Assault Troop]] | ||
| Line 3,317: | Line 3,534: | ||
{{!-}} | {{!-}} | ||
{{!}} [[File:Is ns01 battalion armored.png|20px]] | {{!}} [[File:Is ns01 battalion armored.png|20px]] | ||
{{!}} [[ | {{!}} [[Empire Armored Co.]] | ||
{{!}} [[File:Is ns01 gambit.png|20px]] | {{!}} [[File:Is ns01 gambit support.png|20px]] | ||
{{!}} [[ | {{!}} [[Impregnable Wall]] | ||
{{!}} style="text-align: center" {{!}} D | {{!}} style="text-align: center" {{!}} D | ||
{{!}} style="text-align: right" {{!}} 1,200 | {{!}} style="text-align: right" {{!}} 1,200 | ||
{{!-}} | {{!-}} | ||
{{!}} [[File:Is ns01 battalion infantry silver.png|20px]] | {{!}} [[File:Is ns01 battalion infantry silver.png|20px]] | ||
{{!}} [[ | {{!}} [[Empire Snipers]] | ||
{{!}} [[File:Is ns01 gambit.png|20px]] | {{!}} [[File:Is ns01 gambit.png|20px]] | ||
{{!}} [[ | {{!}} [[Flash-Fire Arrows]] | ||
{{!}} style="text-align: center" {{!}} C | {{!}} style="text-align: center" {{!}} C | ||
{{!}} style="text-align: right" {{!}} 1,500 | {{!}} style="text-align: right" {{!}} 1,500 | ||
{{!-}} | {{!-}} | ||
{{!}} [[File:Is ns01 battalion infantry silver.png|20px]] | {{!}} [[File:Is ns01 battalion infantry silver.png|20px]] | ||
{{!}} [[ | {{!}} [[Empire Magic Users]] | ||
{{!}} [[File:Is ns01 gambit magic.png|20px]] | {{!}} [[File:Is ns01 gambit magic.png|20px]] | ||
{{!}} [[Resonant | {{!}} [[Resonant Flames]] | ||
{{!}} style="text-align: center" {{!}} C | {{!}} style="text-align: center" {{!}} C | ||
{{!}} style="text-align: right" {{!}} 1,500 | {{!}} style="text-align: right" {{!}} 1,500 | ||
{{!-}} | {{!-}} | ||
{{!}} [[File:Is ns01 battalion | {{!}} [[File:Is ns01 battalion armored silver.png|20px]] | ||
{{!}} [[ | {{!}} [[Empire Pavise Co.]] | ||
{{!}} [[File:Is ns01 gambit.png|20px]] | {{!}} [[File:Is ns01 gambit.png|20px]] | ||
{{!}} [[ | {{!}} [[Blaze]] | ||
{{!}} style="text-align: center" {{!}} C | {{!}} style="text-align: center" {{!}} C | ||
{{!}} style="text-align: right" {{!}} 1,500 | {{!}} style="text-align: right" {{!}} 1,500 | ||
{{!-}} | {{!-}} | ||
{{!}} [[File:Is ns01 battalion flying.png|20px]] | {{!}} [[File:Is ns01 battalion flying.png|20px]] | ||
{{!}} [[ | {{!}} [[Empire Pegasus Co.]] | ||
{{!}} [[File:Is ns01 gambit.png|20px]] | {{!}} [[File:Is ns01 gambit.png|20px]] | ||
{{!}} [[ | {{!}} [[Group Lance Attack]] | ||
{{!}} style="text-align: center" {{!}} D | {{!}} style="text-align: center" {{!}} D | ||
{{!}} style="text-align: right" {{!}} 1,500 | {{!}} style="text-align: right" {{!}} 1,500 | ||
{{!-}} | {{!-}} | ||
{{!}} | {{!}} class="roundbl" {{!}} [[File:Is ns01 battalion flying silver.png|20px]] | ||
{{!}} [[ | {{!}} [[Empire Wyvern Co.]] | ||
{{!}} [[File:Is ns01 gambit | {{!}} [[File:Is ns01 gambit.png|20px]] | ||
{{!}} [[ | {{!}} [[Reversal]] | ||
{{!}} style="text-align: center" {{!}} C | {{!}} style="text-align: center" {{!}} C | ||
{{!}} style=" | {{!}} class="roundbr" style="text-align: right" {{!}} 1,500 | ||
{{tableend}} | {{tableend}} | ||
|content3={{tablebegin}} class="wikitable round" style="border-collapse: separate; margin: auto; background: none; border: none" | |content3={{tablebegin}} class="wikitable round" style="border-collapse: separate; margin: auto; background: none; border: none" | ||
!style=" | ! class="roundtl" style="width: 5%" {{!}} | ||
!style="width: 35%" {{!}} Name | ! style="width: 35%" {{!}} Name | ||
!style="width: 5%" {{!}} | ! style="width: 5%" {{!}} | ||
!style="width: 35%" {{!}} Gambit | ! style="width: 35%" {{!}} Gambit | ||
!style="width: 5%" {{!}} Level | ! style="width: 5%" {{!}} Level | ||
!style=" | ! class="roundtr" style="width: 15%" {{!}} Price | ||
{{!-}} | {{!-}} | ||
{{!}} [[File:Is ns01 battalion | {{!}} [[File:Is ns01 battalion armored silver.png|20px]] | ||
{{!}} [[ | {{!}} [[Empire Heavy Soldiers]] | ||
{{!}} [[File:Is ns01 gambit.png|20px]] | {{!}} [[File:Is ns01 gambit.png|20px]] | ||
{{!}} [[ | {{!}} [[Line of Lances]] | ||
{{!}} style="text-align: center" {{!}} B | {{!}} style="text-align: center" {{!}} B | ||
{{!}} style="text-align: right" {{!}} 2,000 | {{!}} style="text-align: right" {{!}} 2,000 | ||
{{!-}} | {{!-}} | ||
{{!}} [[File:Is ns01 battalion | {{!}} [[File:Is ns01 battalion infantry silver.png|20px]] | ||
{{!}} [[ | {{!}} [[Empire Holy Magic Users]] | ||
{{!}} [[File:Is ns01 gambit support.png|20px]] | {{!}} [[File:Is ns01 gambit support.png|20px]] | ||
{{!}} [[ | {{!}} [[Blessing (gambit)|Blessing]] | ||
{{!}} style="text-align: center" {{!}} B | {{!}} style="text-align: center" {{!}} B | ||
{{!}} style="text-align: right" {{!}} 2,000 | {{!}} style="text-align: right" {{!}} 2,000 | ||
{{!-}} | {{!-}} | ||
{{!}} [[File:Is ns01 battalion infantry silver.png|20px]] | {{!}} [[File:Is ns01 battalion infantry silver.png|20px]] | ||
{{!}} [[ | {{!}} [[Empire Raiders]] | ||
{{!}} [[File:Is ns01 gambit | {{!}} [[File:Is ns01 gambit.png|20px]] | ||
{{!}} [[ | {{!}} [[Absorption]] | ||
{{!}} style="text-align: center" {{!}} B | {{!}} style="text-align: center" {{!}} B | ||
{{!}} style="text-align: right" {{!}} 2,000 | {{!}} style="text-align: right" {{!}} 2,000 | ||
{{!-}} | {{!-}} | ||
{{!}} [[File:Is ns01 battalion | {{!}} [[File:Is ns01 battalion armored silver.png|20px]] | ||
{{!}} [[ | {{!}} [[Imperial Guard]] | ||
{{!}} [[File:Is ns01 gambit.png|20px]] | {{!}} [[File:Is ns01 gambit.png|20px]] | ||
{{!}} [[ | {{!}} [[Blaze]] | ||
{{!}} style="text-align: center" {{!}} B | {{!}} style="text-align: center" {{!}} B | ||
{{!}} style="text-align: right" {{!}} 2,000 | {{!}} style="text-align: right" {{!}} 2,000 | ||
{{!-}} | {{!-}} | ||
{{!}} [[File:Is ns01 battalion | {{!}} [[File:Is ns01 battalion flying silver.png|20px]] | ||
{{!}} [[ | {{!}} [[Empire Elite Wyvern Co.]] | ||
{{!}} [[File:Is ns01 gambit.png|20px]] | {{!}} [[File:Is ns01 gambit.png|20px]] | ||
{{!}} [[ | {{!}} [[Assembly]] | ||
{{!}} style="text-align: center" {{!}} B | {{!}} style="text-align: center" {{!}} B | ||
{{!}} style="text-align: right" {{!}} 2,000 | {{!}} style="text-align: right" {{!}} 2,000 | ||
{{!-}} | {{!-}} | ||
{{!}} [[File:Is ns01 battalion | {{!}} [[File:Is ns01 battalion armored gold.png|20px]] | ||
{{!}} [[ | {{!}} [[Black Eagle Heavy Axes]] | ||
{{!}} [[File:Is ns01 gambit.png|20px]] | {{!}} [[File:Is ns01 gambit.png|20px]] | ||
{{!}} [[ | {{!}} [[Onslaught]] | ||
{{!}} style="text-align: center" {{!}} A | {{!}} style="text-align: center" {{!}} A | ||
{{!}} style="text-align: right" {{!}} 2,500 | {{!}} style="text-align: right" {{!}} 2,500 | ||
{{!-}} | {{!-}} | ||
{{!}} [[File:Is ns01 battalion | {{!}} [[File:Is ns01 battalion cavalry gold.png|20px]] | ||
{{!}} [[ | {{!}} [[Black Eagle Cavalry]] | ||
{{!}} [[File:Is ns01 gambit.png|20px]] | {{!}} [[File:Is ns01 gambit.png|20px]] | ||
{{!}} [[ | {{!}} [[Linked Horses]] | ||
{{!}} style="text-align: center" {{!}} A | {{!}} style="text-align: center" {{!}} A | ||
{{!}} style="text-align: right" {{!}} 2,500 | {{!}} style="text-align: right" {{!}} 2,500 | ||
{{!-}} | {{!-}} | ||
{{!}} | {{!}} class="roundbl" {{!}} [[File:Is ns01 battalion flying gold.png|20px]] | ||
{{!}} [[ | {{!}} [[Black Eagle Pegasus Co.]] | ||
{{!}} [[File:Is ns01 gambit.png|20px]] | {{!}} [[File:Is ns01 gambit support.png|20px]] | ||
{{!}} [[ | {{!}} [[Retribution (gambit)|Retribution]] | ||
{{!}} style="text-align: center" {{!}} A | {{!}} style="text-align: center" {{!}} A | ||
{{!}} style=" | {{!}} class="roundbr" style="text-align: right" {{!}} 2,500 | ||
{{tableend}} | {{tableend}} | ||
|content4={{tablebegin}} class="wikitable round" style="border-collapse: separate; margin: auto; background: none; border: none" | |||
! class="roundtl" style="width: 5%" {{!}} | |||
! style="width: 35%" {{!}} Name | |||
! style="width: 5%" {{!}} | |||
! style="width: 35%" {{!}} Gambit | |||
! style="width: 5%" {{!}} Level | |||
! class="roundtr" style="width: 15%" {{!}} Price | |||
{{!-}} | |||
{{!}} [[File:Is ns01 battalion cavalry silver.png|20px]] | |||
{{!}} [[Holy Knights of Seiros]] | |||
{{!}} [[File:Is ns01 gambit.png|20px]] | |||
{{!}} [[Assault Troop]] | |||
{{!}} style="text-align: center" {{!}} B | |||
{{!}} style="text-align: right" {{!}} 2,000 | |||
!style=" | |||
!style="width: | |||
!style="width: | |||
!style=" | |||
{{!-}} | {{!-}} | ||
{{!}} [[File:Is ns01 | {{!}} [[File:Is ns01 battalion armored gold.png|20px]] | ||
{{!}} [[ | {{!}} [[Indech Sword Fighters]] | ||
{{!}} style="text-align: center" {{!}} | {{!}} [[File:Is ns01 gambit support.png|20px]] | ||
{{!}} style="text-align: right" {{!}} | {{!}} [[Retribution (gambit)|Retribution]] | ||
{{!}} style="text-align: center" {{!}} A | |||
{{!}} style="text-align: right" {{!}} 2,500 | |||
{{!-}} | {{!-}} | ||
{{!}} [[File:Is ns01 | {{!}} [[File:Is ns01 battalion infantry gold.png|20px]] | ||
{{!}} [[ | {{!}} [[Macuil Evil Repelling Co.]] | ||
{{!}} style="text-align: center" {{!}} | {{!}} [[File:Is ns01 gambit magic.png|20px]] | ||
{{!}} style="text-align: right" {{!}} 500 | {{!}} [[Resonant Lightning]] | ||
{{!}} style="text-align: center" {{!}} A | |||
{{!}} style="text-align: right" {{!}} 2,500 | |||
{{!-}} | {{!-}} | ||
{{!}} [[File:Is ns01 | {{!}} [[File:Is ns01 battalion armored silver.png|20px]] | ||
{{!}} [[ | {{!}} [[Empire Heavy Soldiers]] | ||
{{!}} style="text-align: center" {{!}} | {{!}} [[File:Is ns01 gambit.png|20px]] | ||
{{!}} style="text-align: right" {{!}} | {{!}} [[Line of Lances]] | ||
{{!}} style="text-align: center" {{!}} B | |||
{{!}} style="text-align: right" {{!}} 2,000 | |||
{{!-}} | {{!-}} | ||
{{!}} [[File:Is ns01 | {{!}} [[File:Is ns01 battalion infantry silver.png|20px]] | ||
{{!}} [[ | {{!}} [[Empire Holy Magic Users]] | ||
{{!}} style="text-align: center" {{!}} | {{!}} [[File:Is ns01 gambit support.png|20px]] | ||
{{!}} style="text-align: right" {{!}} | {{!}} [[Blessing (gambit)|Blessing]] | ||
{{!}} style="text-align: center" {{!}} B | |||
{{!}} style="text-align: right" {{!}} 2,000 | |||
{{!-}} | {{!-}} | ||
{{!}} [[File:Is ns01 | {{!}} [[File:Is ns01 battalion infantry silver.png|20px]] | ||
{{!}} [[ | {{!}} [[Empire Raiders]] | ||
{{!}} style="text-align: center" {{!}} | {{!}} [[File:Is ns01 gambit.png|20px]] | ||
{{!}} style="text-align: right" {{!}} | {{!}} [[Absorption]] | ||
{{!}} style="text-align: center" {{!}} B | |||
{{!}} style="text-align: right" {{!}} 2,000 | |||
{{!-}} | {{!-}} | ||
{{!}} [[File:Is ns01 | {{!}} [[File:Is ns01 battalion armored silver.png|20px]] | ||
{{!}} [[ | {{!}} [[Imperial Guard]] | ||
{{!}} style="text-align: center" {{!}} | {{!}} [[File:Is ns01 gambit.png|20px]] | ||
{{!}} style="text-align: right" {{!}} | {{!}} [[Blaze]] | ||
{{!}} style="text-align: center" {{!}} B | |||
{{!}} style="text-align: right" {{!}} 2,000 | |||
{{!-}} | {{!-}} | ||
{{!}} [[File:Is ns01 | {{!}} [[File:Is ns01 battalion flying silver.png|20px]] | ||
{{!}} [[ | {{!}} [[Empire Elite Wyvern Co.]] | ||
{{!}} style="text-align: center" {{!}} | {{!}} [[File:Is ns01 gambit.png|20px]] | ||
{{!}} style="text-align: right" {{!}} | {{!}} [[Assembly]] | ||
{{!}} style="text-align: center" {{!}} B | |||
{{!}} style="text-align: right" {{!}} 2,000 | |||
{{!-}} | {{!-}} | ||
{{!}} [[File:Is ns01 | {{!}} [[File:Is ns01 battalion armored gold.png|20px]] | ||
{{!}} [[ | {{!}} [[Black Eagle Heavy Axes]] | ||
{{!}} style="text-align: center" {{!}} | {{!}} [[File:Is ns01 gambit.png|20px]] | ||
{{!}} style="text-align: right" {{!}} | {{!}} [[Onslaught]] | ||
{{!}} style="text-align: center" {{!}} A | |||
{{!}} style="text-align: right" {{!}} 2,500 | |||
{{!-}} | {{!-}} | ||
{{!}} [[File:Is ns01 | {{!}} [[File:Is ns01 battalion cavalry gold.png|20px]] | ||
{{!}} [[ | {{!}} [[Black Eagle Cavalry]] | ||
{{!}} style="text-align: center" {{!}} | {{!}} [[File:Is ns01 gambit.png|20px]] | ||
{{!}} style="text-align: right" {{!}} | {{!}} [[Linked Horses]] | ||
{{!}} style="text-align: center" {{!}} A | |||
{{!}} style="text-align: right" {{!}} 2,500 | |||
{{!-}} | {{!-}} | ||
{{!}} [[File:Is ns01 | {{!}} class="roundbl" {{!}} [[File:Is ns01 battalion flying gold.png|20px]] | ||
{{!}} [[ | {{!}} [[Black Eagle Pegasus Co.]] | ||
{{!}} style="text-align: center" {{!}} | {{!}} [[File:Is ns01 gambit support.png|20px]] | ||
{{!}} style="text-align: right" {{!}} | {{!}} [[Retribution (gambit)|Retribution]] | ||
{{!}} style="text-align: center" {{!}} A | |||
{{!}} class="roundbr" style="text-align: right" {{!}} 2,500 | |||
{{tableend}} | |||
}} | |||
|content2={{Tab | |||
|header=Battalion Guild – Blue Lions {{BattalionGuild}} | |||
|width=60% | |||
|tab1=Chapter 3 | |||
|tab2=Chapter 8 | |||
|tab3=Chapter 14 | |||
|content1={{tablebegin}} class="wikitable round" style="border-collapse: separate; margin: auto; background: none; border: none" | |||
! class="roundtl" style="width: 5%" {{!}} | |||
! style="width: 35%" {{!}} Name | |||
! style="width: 5%" {{!}} | |||
! style="width: 35%" {{!}} Gambit | |||
! style="width: 5%" {{!}} Level | |||
! class="roundtr" style="width: 15%" {{!}} Price | |||
{{!-}} | {{!-}} | ||
{{!}} [[File:Is ns01 | {{!}} [[File:Is ns01 battalion infantry.png|20px]] | ||
{{!}} [[ | {{!}} [[Church of Seiros Soldiers]] | ||
{{!}} style="text-align: center" {{!}} | {{!}} [[File:Is ns01 gambit.png|20px]] | ||
{{!}} style="text-align: right" {{!}} | {{!}} [[Disturbance]] | ||
{{!}} style="text-align: center" {{!}} E | |||
{{!}} style="text-align: right" {{!}} 1,000 | |||
{{!-}} | {{!-}} | ||
{{!}} [[File:Is ns01 | {{!}} [[File:Is ns01 battalion infantry.png|20px]] | ||
{{!}} [[ | {{!}} [[Seiros Mercenaries]] | ||
{{!}} style="text-align: center" {{!}} | {{!}} [[File:Is ns01 gambit.png|20px]] | ||
{{!}} style="text-align: right" {{!}} | {{!}} [[Onslaught]] | ||
{{!}} style="text-align: center" {{!}} E | |||
{{!}} style="text-align: right" {{!}} 1,200 | |||
{{!-}} | {{!-}} | ||
{{!}} [[File:Is ns01 | {{!}} [[File:Is ns01 battalion infantry.png|20px]] | ||
{{!}} [[ | {{!}} [[Seiros Holy Monks]] | ||
{{!}} style="text-align: center" {{!}} | {{!}} [[File:Is ns01 gambit support.png|20px]] | ||
{{!}} style="text-align: right" {{!}} | {{!}} [[Stride]] | ||
{{!}} style="text-align: center" {{!}} E | |||
{{!}} style="text-align: right" {{!}} 1,200 | |||
{{!-}} | {{!-}} | ||
{{!}} [[File:Is ns01 | {{!}} [[File:Is ns01 battalion infantry.png|20px]] | ||
{{!}} [[ | {{!}} [[Seiros Sacred Monks]] | ||
{{!}} style="text-align: center" {{!}} | {{!}} [[File:Is ns01 gambit support.png|20px]] | ||
{{!}} style="text-align: right" {{!}} | {{!}} [[Resonant White Magic]] | ||
{{!}} style="text-align: center" {{!}} E | |||
{{!}} style="text-align: right" {{!}} 1,200 | |||
{{!-}} | {{!-}} | ||
{{!}} [[File:Is ns01 | {{!}} [[File:Is ns01 battalion infantry.png|20px]] | ||
{{!}} [[ | {{!}} [[Seiros Brawlers]] | ||
{{!}} style="text-align: center" {{!}} | {{!}} [[File:Is ns01 gambit.png|20px]] | ||
{{!}} style="text-align: right" {{!}} | {{!}} [[Disturbance]] | ||
{{!}} style="text-align: center" {{!}} E | |||
{{!}} style="text-align: right" {{!}} 1,200 | |||
{{!-}} | {{!-}} | ||
{{!}} [[File:Is ns01 | {{!}} [[File:Is ns01 battalion flying.png|20px]] | ||
{{!}} [[ | {{!}} [[Seiros Pegasus Co.]] | ||
{{!}} style="text-align: center" {{!}} | {{!}} [[File:Is ns01 gambit.png|20px]] | ||
{{!}} style="text-align: right" {{!}} | {{!}} [[Assembly]] | ||
{{!}} style="text-align: center" {{!}} D | |||
{{!}} style="text-align: right" {{!}} 1,200 | |||
{{!-}} | {{!-}} | ||
{{!}} [[File:Is ns01 | {{!}} [[File:Is ns01 battalion infantry.png|20px]] | ||
{{!}} [[ | {{!}} [[Seiros Magic Corps]] | ||
{{!}} style="text-align: center" {{!}} | {{!}} [[File:Is ns01 gambit magic.png|20px]] | ||
{{!}} style="text-align: right" {{!}} | {{!}} [[Group Flames]] | ||
{{!}} style="text-align: center" {{!}} D | |||
{{!}} style="text-align: right" {{!}} 1,200 | |||
{{!-}} | {{!-}} | ||
{{!}} [[File:Is ns01 | {{!}} [[File:Is ns01 battalion cavalry silver.png|20px]] | ||
{{!}} [[ | {{!}} [[Knights of Seiros (battalion)|Knights of Seiros]] | ||
{{!}} style="text-align: center" {{!}} | {{!}} [[File:Is ns01 gambit.png|20px]] | ||
{{!}} style="text-align: right" {{!}} | {{!}} [[Blaze]] | ||
{{!}} style="text-align: center" {{!}} C | |||
{{!}} style="text-align: right" {{!}} 1,500 | |||
{{!-}} | {{!-}} | ||
{{!}} [[File:Is ns01 | {{!}} [[File:Is ns01 battalion infantry.png|20px]] | ||
{{!}} [[ | {{!}} [[Kingdom Infantry]] | ||
{{!}} style="text-align: center" {{!}} | {{!}} [[File:Is ns01 gambit.png|20px]] | ||
{{!}} style="text-align: right" {{!}} | {{!}} [[Lure]] | ||
{{!}} style="text-align: center" {{!}} E | |||
{{!}} style="text-align: right" {{!}} 1,000 | |||
{{!-}} | {{!-}} | ||
{{!}} [[File:Is ns01 | {{!}} [[File:Is ns01 battalion infantry.png|20px]] | ||
{{!}} [[ | {{!}} [[Kingdom Lance Co.]] | ||
{{!}} style="text-align: center" {{!}} | {{!}} [[File:Is ns01 gambit.png|20px]] | ||
{{!}} style="text-align: right" {{!}} | {{!}} [[Group Lance Attack]] | ||
{{!}} style="text-align: center" {{!}} E | |||
{{!}} style="text-align: right" {{!}} 1,200 | |||
{{!-}} | {{!-}} | ||
{{!}} [[File:Is ns01 | {{!}} [[File:Is ns01 battalion infantry.png|20px]] | ||
{{!}} [[ | {{!}} [[Kingdom Brawlers]] | ||
{{!}} style="text-align: center" {{!}} | {{!}} [[File:Is ns01 gambit.png|20px]] | ||
{{!}} style="text-align: right" {{!}} | {{!}} [[Disturbance]] | ||
{{!}} style="text-align: center" {{!}} E | |||
{{!}} style="text-align: right" {{!}} 1,200 | |||
{{!-}} | {{!-}} | ||
{{!}} [[File:Is ns01 | {{!}} [[File:Is ns01 battalion infantry.png|20px]] | ||
{{!}} [[ | {{!}} [[Kingdom Magic Corps]] | ||
{{!}} style="text-align: center" {{!}} | {{!}} [[File:Is ns01 gambit magic.png|20px]] | ||
{{!}} style="text-align: right" {{!}} | {{!}} [[Group Ice]] | ||
{{!}} style="text-align: center" {{!}} D | |||
{{!}} style="text-align: right" {{!}} 1,200 | |||
{{!-}} | {{!-}} | ||
{{!}} [[File:Is ns01 | {{!}} class="roundbl" {{!}} [[File:Is ns01 battalion cavalry silver.png|20px]] | ||
{{!}} [[ | {{!}} [[Kingdom Knights]] | ||
{{!}} style="text-align: center" {{!}} | {{!}} [[File:Is ns01 gambit.png|20px]] | ||
{{!}} style="text-align: right" {{!}} 500 | {{!}} [[Assault Troop]] | ||
{{!}} style="text-align: center" {{!}} C | |||
{{!}} class="roundbr" style="text-align: right" {{!}} 1,500 | |||
{{tableend}} | |||
|content2={{tablebegin}} class="wikitable round" style="border-collapse: separate; margin: auto; background: none; border: none" | |||
! class="roundtl" style="width: 5%" {{!}} | |||
! style="width: 35%" {{!}} Name | |||
! style="width: 5%" {{!}} | |||
! style="width: 35%" {{!}} Gambit | |||
! style="width: 5%" {{!}} Level | |||
! class="roundtr" style="width: 15%" {{!}} Price | |||
{{!-}} | {{!-}} | ||
{{!}} [[File:Is ns01 | {{!}} [[File:Is ns01 battalion infantry.png|20px]] | ||
{{!}} [[ | {{!}} [[Church of Seiros Soldiers]] | ||
{{!}} [[File:Is ns01 gambit.png|20px]] | |||
{{!}} [[Disturbance]] | |||
{{!}} style="text-align: center" {{!}} E | |||
{{!}} [[File:Is ns01 | |||
{{!}} [[ | |||
{{!}} style="text-align: center" {{!}} | |||
{{!}} style="text-align: right" {{!}} 1,000 | {{!}} style="text-align: right" {{!}} 1,000 | ||
{{!-}} | {{!-}} | ||
{{!}} | {{!}} [[File:Is ns01 battalion infantry.png|20px]] | ||
{{!}} [[ | {{!}} [[Seiros Brawlers]] | ||
{{!}} style="text-align: center" {{!}} | {{!}} [[File:Is ns01 gambit.png|20px]] | ||
{{!}} style=" | {{!}} [[Disturbance]] | ||
{{!}} style="text-align: center" {{!}} E | |||
{{!}} style="text-align: right" {{!}} 1,200 | |||
{{!-}} | {{!-}} | ||
{{!}} [[File:Is ns01 | {{!}} [[File:Is ns01 battalion infantry.png|20px]] | ||
{{!}} [[ | {{!}} [[Seiros Archers]] | ||
{{!}} style="text-align: center" {{!}} | {{!}} [[File:Is ns01 gambit.png|20px]] | ||
{{!}} style="text-align: right" {{!}} | {{!}} [[Fusillade]] | ||
{{!}} style="text-align: center" {{!}} D | |||
{{!}} style="text-align: right" {{!}} 1,200 | |||
{{!-}} | {{!-}} | ||
{{!}} [[File:Is ns01 | {{!}} [[File:Is ns01 battalion armored.png|20px]] | ||
{{!}} [[ | {{!}} [[Seiros Armored Co.]] | ||
{{!}} style="text-align: center" {{!}} | {{!}} [[File:Is ns01 gambit.png|20px]] | ||
{{!}} style="text-align: right" {{!}} | {{!}} [[Onslaught]] | ||
{{!}} style="text-align: center" {{!}} D | |||
{{!}} style="text-align: right" {{!}} 1,200 | |||
{{!-}} | {{!-}} | ||
{{!}} [[File:Is ns01 | {{!}} [[File:Is ns01 battalion infantry.png|20px]] | ||
{{!}} [[ | {{!}} [[Kingdom Archers]] | ||
{{!}} style="text-align: center" {{!}} | {{!}} [[File:Is ns01 gambit support.png|20px]] | ||
{{!}} style="text-align: right" {{!}} | {{!}} [[Retribution (gambit)|Retribution]] | ||
{{!}} style="text-align: center" {{!}} D | |||
{{!}} style="text-align: right" {{!}} 1,200 | |||
{{!-}} | {{!-}} | ||
{{!}} [[File:Is ns01 | {{!}} [[File:Is ns01 battalion cavalry.png|20px]] | ||
{{!}} [[ | {{!}} [[Kingdom Cavalry]] | ||
{{!}} style="text-align: center" {{!}} | {{!}} [[File:Is ns01 gambit support.png|20px]] | ||
{{!}} style="text-align: right" {{!}} | {{!}} [[Stride]] | ||
{{!}} style="text-align: center" {{!}} D | |||
{{!}} style="text-align: right" {{!}} 1,200 | |||
{{!-}} | {{!-}} | ||
{{!}} [[File:Is ns01 | {{!}} [[File:Is ns01 battalion armored.png|20px]] | ||
{{!}} [[ | {{!}} [[Kingdom Armored Co.]] | ||
{{!}} style="text-align: center" {{!}} | {{!}} [[File:Is ns01 gambit support.png|20px]] | ||
{{!}} style="text-align: right" {{!}} | {{!}} [[Impregnable Wall]] | ||
{{!}} style="text-align: center" {{!}} D | |||
{{!}} style="text-align: right" {{!}} 1,200 | |||
{{!-}} | {{!-}} | ||
{{!}} [[File:Is ns01 | {{!}} [[File:Is ns01 battalion infantry silver.png|20px]] | ||
{{!}} [[ | {{!}} [[Kingdom Snipers]] | ||
{{!}} style="text-align: center" {{!}} | {{!}} [[File:Is ns01 gambit.png|20px]] | ||
{{!}} style="text-align: right" {{!}} | {{!}} [[Flash-Fire Arrows]] | ||
{{!}} style="text-align: center" {{!}} C | |||
{{!}} style="text-align: right" {{!}} 1,500 | |||
{{!-}} | {{!-}} | ||
{{!}} [[File:Is ns01 | {{!}} [[File:Is ns01 battalion infantry silver.png|20px]] | ||
{{!}} [[ | {{!}} [[Kingdom Magic Users]] | ||
{{!}} style="text-align: center" {{!}} | {{!}} [[File:Is ns01 gambit magic.png|20px]] | ||
{{!}} style="text-align: right" {{!}} | {{!}} [[Resonant Ice]] | ||
{{!}} style="text-align: center" {{!}} C | |||
{{!}} style="text-align: right" {{!}} 1,500 | |||
{{!-}} | {{!-}} | ||
{{!}} [[File:Is ns01 | {{!}} [[File:Is ns01 battalion infantry silver.png|20px]] | ||
{{!}} [[ | {{!}} [[Kingdom Brave Lance Co.]] | ||
{{!}} style="text-align: center" {{!}} | {{!}} [[File:Is ns01 gambit.png|20px]] | ||
{{!}} style="text-align: right" {{!}} 500 | {{!}} [[Onslaught]] | ||
{{!}} style="text-align: center" {{!}} C | |||
{{!}} style="text-align: right" {{!}} 1,500 | |||
{{!-}} | {{!-}} | ||
{{!}} [[File:Is ns01 | {{!}} [[File:Is ns01 battalion flying.png|20px]] | ||
{{!}} [[ | {{!}} [[Kingdom Pegasus Co.]] | ||
{{!}} style="text-align: center" {{!}} | {{!}} [[File:Is ns01 gambit.png|20px]] | ||
{{!}} style="text-align: right" {{!}} 500 | {{!}} [[Assembly]] | ||
{{!}} style="text-align: center" {{!}} D | |||
{{!}} style="text-align: right" {{!}} 1,500 | |||
{{!-}} | {{!-}} | ||
{{!}} [[File:Is ns01 | {{!}} class="roundbl" {{!}} [[File:Is ns01 battalion flying silver.png|20px]] | ||
{{!}} [[ | {{!}} [[Kingdom Wyvern Co.]] | ||
{{!}} style="text-align: center" {{!}} | {{!}} [[File:Is ns01 gambit support.png|20px]] | ||
{{!}} style="text-align: right" {{!}} 500 | {{!}} [[Recovery Roar]] | ||
{{!}} style="text-align: center" {{!}} C | |||
{{!}} class="roundbr" style="text-align: right" {{!}} 1,500 | |||
{{tableend}} | |||
|content3={{tablebegin}} class="wikitable round" style="border-collapse: separate; margin: auto; background: none; border: none" | |||
! class="roundtl" style="width: 5%" {{!}} | |||
! style="width: 35%" {{!}} Name | |||
! style="width: 5%" {{!}} | |||
! style="width: 35%" {{!}} Gambit | |||
! style="width: 5%" {{!}} Level | |||
! class="roundtr" style="width: 15%" {{!}} Price | |||
{{!-}} | {{!-}} | ||
{{!}} [[File:Is ns01 | {{!}} [[File:Is ns01 battalion cavalry silver.png|20px]] | ||
{{!}} [[ | {{!}} [[Holy Knights of Seiros]] | ||
{{!}} style="text-align: center" {{!}} | {{!}} [[File:Is ns01 gambit.png|20px]] | ||
{{!}} style="text-align: right" {{!}} | {{!}} [[Assault Troop]] | ||
{{!}} style="text-align: center" {{!}} B | |||
{{!}} style="text-align: right" {{!}} 2,000 | |||
{{!-}} | {{!-}} | ||
{{!}} [[File:Is ns01 | {{!}} [[File:Is ns01 battalion armored gold.png|20px]] | ||
{{!}} [[ | {{!}} [[Indech Sword Fighters]] | ||
{{!}} style="text-align: center" {{!}} | {{!}} [[File:Is ns01 gambit support.png|20px]] | ||
{{!}} style="text-align: right" {{!}} 500 | {{!}} [[Retribution (gambit)|Retribution]] | ||
{{!}} style="text-align: center" {{!}} A | |||
{{!}} style="text-align: right" {{!}} 2,500 | |||
{{!-}} | {{!-}} | ||
{{!}} [[File:Is ns01 | {{!}} [[File:Is ns01 battalion infantry gold.png|20px]] | ||
{{!}} [[ | {{!}} [[Macuil Evil Repelling Co.]] | ||
{{!}} style="text-align: center" {{!}} | {{!}} [[File:Is ns01 gambit magic.png|20px]] | ||
{{!}} style="text-align: right" {{!}} 500 | {{!}} [[Resonant Lightning]] | ||
{{!}} style="text-align: center" {{!}} A | |||
{{!}} style="text-align: right" {{!}} 2,500 | |||
{{!-}} | {{!-}} | ||
{{!}} [[File:Is ns01 | {{!}} [[File:Is ns01 battalion armored silver.png|20px]] | ||
{{!}} [[ | {{!}} [[Kingdom Heavy Soldiers]] | ||
{{!}} style="text-align: center" {{!}} | {{!}} [[File:Is ns01 gambit.png|20px]] | ||
{{!}} style="text-align: right" {{!}} | {{!}} [[Group Lance Attack]] | ||
{{!}} style="text-align: center" {{!}} B | |||
{{!}} style="text-align: right" {{!}} 2,000 | |||
{{!-}} | {{!-}} | ||
{{!}} [[File:Is ns01 | {{!}} [[File:Is ns01 battalion cavalry silver.png|20px]] | ||
{{!}} [[ | {{!}} [[Kingdom Holy Knights]] | ||
{{!}} style="text-align: center" {{!}} | {{!}} [[File:Is ns01 gambit.png|20px]] | ||
{{!}} style="text-align: right" {{!}} | {{!}} [[Linked Horses]] | ||
{{!}} style="text-align: center" {{!}} B | |||
{{!}} style="text-align: right" {{!}} 2,000 | |||
{{!-}} | {{!-}} | ||
{{!}} [[File:Is ns01 | {{!}} [[File:Is ns01 battalion cavalry silver.png|20px]] | ||
{{!}} [[ | {{!}} [[Kingdom Heavy Knights]] | ||
{{!}} style="text-align: center" {{!}} | {{!}} [[File:Is ns01 gambit support.png|20px]] | ||
{{!}} style="text-align: right" {{!}} | {{!}} [[Sacred Shield]] | ||
{{!}} style="text-align: center" {{!}} B | |||
{{!}} style="text-align: right" {{!}} 2,000 | |||
{{!-}} | {{!-}} | ||
{{!}} [[File:Is ns01 | {{!}} [[File:Is ns01 battalion infantry silver.png|20px]] | ||
{{!}} [[ | {{!}} [[Royal Guard]] | ||
{{!}} style="text-align: center" {{!}} | {{!}} [[File:Is ns01 gambit.png|20px]] | ||
{{!}} style="text-align: right" {{!}} | {{!}} [[Line of Lances]] | ||
{{!}} style="text-align: center" {{!}} B | |||
{{!}} style="text-align: right" {{!}} 2,000 | |||
{{!-}} | {{!-}} | ||
{{!}} [[File:Is ns01 | {{!}} [[File:Is ns01 battalion infantry silver.png|20px]] | ||
{{!}} [[ | {{!}} [[Kingdom Priests]] | ||
{{!}} style="text-align: center" {{!}} | {{!}} [[File:Is ns01 gambit support.png|20px]] | ||
{{!}} style="text-align: right" {{!}} | {{!}} [[Blessing (gambit)|Blessing]] | ||
{{!}} style="text-align: center" {{!}} B | |||
{{!}} style="text-align: right" {{!}} 2,000 | |||
{{!-}} | {{!-}} | ||
{{!}} [[File:Is ns01 | {{!}} [[File:Is ns01 battalion cavalry gold.png|20px]] | ||
{{!}} [[ | {{!}} [[Blue Lion Knights]] | ||
{{!}} style="text-align: center" {{!}} | {{!}} [[File:Is ns01 gambit.png|20px]] | ||
{{!}} style="text-align: right" {{!}} | {{!}} [[Linked Horses]] | ||
{{!}} style="text-align: center" {{!}} A | |||
{{!}} style="text-align: right" {{!}} 2,500 | |||
{{!-}} | {{!-}} | ||
{{!}} [[File:Is ns01 | {{!}} [[File:Is ns01 battalion infantry gold.png|20px]] | ||
{{!}} [[ | {{!}} [[Blue Lion Magic Corps]] | ||
{{!}} style="text-align: center" {{!}} | {{!}} [[File:Is ns01 gambit magic.png|20px]] | ||
{{!}} style="text-align: right" {{!}} | {{!}} [[Resonant Ice]] | ||
{{!}} style="text-align: center" {{!}} A | |||
{{!}} style="text-align: right" {{!}} 2,500 | |||
{{!-}} | {{!-}} | ||
{{!}} [[File:Is ns01 | {{!}} class="roundbl" {{!}} [[File:Is ns01 battalion infantry gold.png|20px]] | ||
{{!}} [[ | {{!}} [[Blue Lion Dancers]] | ||
{{!}} style="text-align: center" {{!}} | {{!}} [[File:Is ns01 gambit support.png|20px]] | ||
{{!}} style="text-align: right" {{!}} | {{!}} [[Dance of the Goddess]] | ||
{{!}} style="text-align: center" {{!}} A | |||
{{!}} class="roundbr" style="text-align: right" {{!}} 2,500 | |||
{{tableend}} | |||
}} | |||
|content3={{Tab | |||
|header=Battalion Guild – Golden Deer {{BattalionGuild}} | |||
|width=60% | |||
|tab1=Chapter 3 | |||
|tab2=Chapter 8 | |||
|tab3=Chapter 14 | |||
|content1={{tablebegin}} class="wikitable round" style="border-collapse: separate; margin: auto; background: none; border: none" | |||
! class="roundtl" style="width: 5%" {{!}} | |||
! style="width: 35%" {{!}} Name | |||
! style="width: 5%" {{!}} | |||
! style="width: 35%" {{!}} Gambit | |||
! style="width: 5%" {{!}} Level | |||
! class="roundtr" style="width: 15%" {{!}} Price | |||
{{!-}} | {{!-}} | ||
{{!}} [[File:Is ns01 | {{!}} [[File:Is ns01 battalion infantry.png|20px]] | ||
{{!}} [[ | {{!}} [[Church of Seiros Soldiers]] | ||
{{!}} style="text-align: center" {{!}} | {{!}} [[File:Is ns01 gambit.png|20px]] | ||
{{!}} style="text-align: right" {{!}} 1, | {{!}} [[Disturbance]] | ||
{{!}} style="text-align: center" {{!}} E | |||
{{!}} style="text-align: right" {{!}} 1,000 | |||
{{!-}} | {{!-}} | ||
{{!}} [[File:Is ns01 | {{!}} [[File:Is ns01 battalion infantry.png|20px]] | ||
{{!}} [[ | {{!}} [[Seiros Mercenaries]] | ||
{{!}} style="text-align: center" {{!}} | {{!}} [[File:Is ns01 gambit.png|20px]] | ||
{{!}} style="text-align: right" {{!}} | {{!}} [[Onslaught]] | ||
{{!}} style="text-align: center" {{!}} E | |||
{{!}} style="text-align: right" {{!}} 1,200 | |||
{{!-}} | {{!-}} | ||
{{!}} [[File:Is ns01 | {{!}} [[File:Is ns01 battalion infantry.png|20px]] | ||
{{!}} [[ | {{!}} [[Seiros Holy Monks]] | ||
{{!}} style="text-align: center" {{!}} | {{!}} [[File:Is ns01 gambit support.png|20px]] | ||
{{!}} style="text-align: right" {{!}} | {{!}} [[Stride]] | ||
{{!}} style="text-align: center" {{!}} E | |||
{{!}} style="text-align: right" {{!}} 1,200 | |||
{{!-}} | {{!-}} | ||
{{!}} [[File:Is ns01 | {{!}} [[File:Is ns01 battalion infantry.png|20px]] | ||
{{!}} [[ | {{!}} [[Seiros Sacred Monks]] | ||
{{!}} style="text-align: center" {{!}} | {{!}} [[File:Is ns01 gambit support.png|20px]] | ||
{{!}} style="text-align: right" {{!}} | {{!}} [[Resonant White Magic]] | ||
{{!}} style="text-align: center" {{!}} E | |||
{{!}} style="text-align: right" {{!}} 1,200 | |||
{{!-}} | {{!-}} | ||
{{!}} [[File:Is ns01 | {{!}} [[File:Is ns01 battalion infantry.png|20px]] | ||
{{!}} [[ | {{!}} [[Seiros Magic Corps]] | ||
{{!}} style="text-align: center" {{!}} | {{!}} [[File:Is ns01 gambit magic.png|20px]] | ||
{{!}} style="text-align: right" {{!}} | {{!}} [[Group Flames]] | ||
{{!}} style="text-align: center" {{!}} E | |||
{{!}} style="text-align: right" {{!}} 1,200 | |||
{{!-}} | {{!-}} | ||
{{!}} [[File:Is ns01 | {{!}} [[File:Is ns01 battalion flying.png|20px]] | ||
{{!}} [[ | {{!}} [[Seiros Pegasus Co.]] | ||
{{!}} style="text-align: center" {{!}} | {{!}} [[File:Is ns01 gambit.png|20px]] | ||
{{!}} style="text-align: right" {{!}} | {{!}} [[Assembly]] | ||
{{!}} style="text-align: center" {{!}} D | |||
{{!}} style="text-align: right" {{!}} 1,200 | |||
{{!-}} | {{!-}} | ||
{{!}} [[File:Is ns01 | {{!}} [[File:Is ns01 battalion cavalry silver.png|20px]] | ||
{{!}} [[ | {{!}} [[Knights of Seiros (battalion)|Knights of Seiros]] | ||
{{!}} style="text-align: center" {{!}} | {{!}} [[File:Is ns01 gambit.png|20px]] | ||
{{!}} style="text-align: right" {{!}} 500 | {{!}} [[Blaze]] | ||
{{!}} style="text-align: center" {{!}} C | |||
{{!}} style="text-align: right" {{!}} 1,500 | |||
{{!-}} | {{!-}} | ||
{{!}} [[File:Is ns01 | {{!}} [[File:Is ns01 battalion infantry.png|20px]] | ||
{{!}} [[ | {{!}} [[Alliance Infantry]] | ||
{{!}} [[File:Is ns01 gambit.png|20px]] | |||
{{!}} [[Lure]] | |||
{{!}} style="text-align: center" {{!}} E | |||
{{!}} [[File:Is ns01 | |||
{{!}} [[ | |||
{{!}} style="text-align: center" {{!}} | |||
{{!}} style="text-align: right" {{!}} 1,000 | {{!}} style="text-align: right" {{!}} 1,000 | ||
{{!-}} | {{!-}} | ||
{{!}} | {{!}} [[File:Is ns01 battalion infantry.png|20px]] | ||
{{!}} [[ | {{!}} [[Alliance Duelists]] | ||
{{!}} style="text-align: center" {{!}} | {{!}} [[File:Is ns01 gambit.png|20px]] | ||
{{!}} style=" | {{!}} [[Mad Melee]] | ||
{{!}} style="text-align: center" {{!}} E | |||
{{!}} style="text-align: right" {{!}} 1,200 | |||
{{!-}} | {{!-}} | ||
{{!}} [[File:Is ns01 | {{!}} [[File:Is ns01 battalion infantry.png|20px]] | ||
{{!}} [[ | {{!}} [[Alliance Brawlers]] | ||
{{!}} style="text-align: center" {{!}} | {{!}} [[File:Is ns01 gambit.png|20px]] | ||
{{!}} style="text-align: right" {{!}} | {{!}} [[Disturbance]] | ||
{{!}} style="text-align: center" {{!}} E | |||
{{!}} style="text-align: right" {{!}} 1,200 | |||
{{!-}} | {{!-}} | ||
{{!}} [[File:Is ns01 | {{!}} [[File:Is ns01 battalion infantry.png|20px]] | ||
{{!}} [[ | {{!}} [[Alliance Magic Corps]] | ||
{{!}} style="text-align: center" {{!}} | {{!}} [[File:Is ns01 gambit magic.png|20px]] | ||
{{!}} style="text-align: right" {{!}} | {{!}} [[Group Lightning]] | ||
{{!}} style="text-align: center" {{!}} D | |||
{{!}} style="text-align: right" {{!}} 1,200 | |||
{{!-}} | {{!-}} | ||
{{!}} [[File:Is ns01 | {{!}} class="roundbl" {{!}} [[File:Is ns01 battalion cavalry silver.png|20px]] | ||
{{!}} [[ | {{!}} [[Alliance Knights]] | ||
{{!}} style="text-align: center" {{!}} | {{!}} [[File:Is ns01 gambit.png|20px]] | ||
{{!}} style="text-align: right" {{!}} | {{!}} [[Blaze]] | ||
{{!}} style="text-align: center" {{!}} C | |||
{{!}} class="roundbr" style="text-align: right" {{!}} 1,500 | |||
{{tableend}} | |||
|content2={{tablebegin}} class="wikitable round" style="border-collapse: separate; margin: auto; background: none; border: none" | |||
! class="roundtl" style="width: 5%" {{!}} | |||
! style="width: 35%" {{!}} Name | |||
! style="width: 5%" {{!}} | |||
! style="width: 35%" {{!}} Gambit | |||
! style="width: 5%" {{!}} Level | |||
! class="roundtr" style="width: 15%" {{!}} Price | |||
{{!-}} | {{!-}} | ||
{{!}} [[File:Is ns01 | {{!}} [[File:Is ns01 battalion infantry.png|20px]] | ||
{{!}} [[ | {{!}} [[Church of Seiros Soldiers]] | ||
{{!}} style="text-align: center" {{!}} | {{!}} [[File:Is ns01 gambit.png|20px]] | ||
{{!}} style="text-align: right" {{!}} | {{!}} [[Disturbance]] | ||
{{!}} style="text-align: center" {{!}} E | |||
{{!}} style="text-align: right" {{!}} 1,000 | |||
{{!-}} | {{!-}} | ||
{{!}} [[File:Is ns01 | {{!}} [[File:Is ns01 battalion infantry.png|20px]] | ||
{{!}} [[ | {{!}} [[Seiros Brawlers]] | ||
{{!}} style="text-align: center" {{!}} | {{!}} [[File:Is ns01 gambit.png|20px]] | ||
{{!}} style="text-align: right" {{!}} | {{!}} [[Disturbance]] | ||
{{!}} style="text-align: center" {{!}} E | |||
{{!}} style="text-align: right" {{!}} 1,200 | |||
{{!-}} | {{!-}} | ||
{{!}} [[File:Is ns01 | {{!}} [[File:Is ns01 battalion infantry.png|20px]] | ||
{{!}} [[ | {{!}} [[Seiros Archers]] | ||
{{!}} style="text-align: center" {{!}} | {{!}} [[File:Is ns01 gambit.png|20px]] | ||
{{!}} style="text-align: right" {{!}} | {{!}} [[Fusillade]] | ||
{{!}} style="text-align: center" {{!}} D | |||
{{!}} style="text-align: right" {{!}} 1,200 | |||
{{!-}} | {{!-}} | ||
{{!}} [[File:Is ns01 | {{!}} [[File:Is ns01 battalion armored.png|20px]] | ||
{{!}} [[ | {{!}} [[Seiros Armored Co.]] | ||
{{!}} style="text-align: center" {{!}} | {{!}} [[File:Is ns01 gambit.png|20px]] | ||
{{!}} style="text-align: right" {{!}} | {{!}} [[Onslaught]] | ||
{{!}} style="text-align: center" {{!}} D | |||
{{!}} style="text-align: right" {{!}} 1,200 | |||
{{!-}} | {{!-}} | ||
{{!}} [[File:Is ns01 | {{!}} [[File:Is ns01 battalion infantry.png|20px]] | ||
{{!}} [[ | {{!}} [[Alliance Archers]] | ||
{{!}} style="text-align: center" {{!}} | {{!}} [[File:Is ns01 gambit.png|20px]] | ||
{{!}} style="text-align: right" {{!}} | {{!}} [[Poisoned Arrows]] | ||
{{!}} style="text-align: center" {{!}} D | |||
{{!}} style="text-align: right" {{!}} 1,200 | |||
{{!-}} | {{!-}} | ||
{{!}} [[File:Is ns01 | {{!}} [[File:Is ns01 battalion cavalry.png|20px]] | ||
{{!}} [[ | {{!}} [[Alliance Cavalry]] | ||
{{!}} style="text-align: center" {{!}} | {{!}} [[File:Is ns01 gambit.png|20px]] | ||
{{!}} [[Assault Troop]] | |||
{{!}} style="text-align: center" {{!}} D | |||
{{!}} style="text-align: right" {{!}} 1,200 | {{!}} style="text-align: right" {{!}} 1,200 | ||
{{!-}} | {{!-}} | ||
{{!}} [[File:Is ns01 | {{!}} [[File:Is ns01 battalion armored.png|20px]] | ||
{{!}} [[ | {{!}} [[Alliance Armored Co.]] | ||
{{!}} style="text-align: center" {{!}} | {{!}} [[File:Is ns01 gambit.png|20px]] | ||
{{!}} style="text-align: right" {{!}} | {{!}} [[Disturbance]] | ||
{{!}} style="text-align: center" {{!}} D | |||
{{!}} style="text-align: right" {{!}} 1,200 | |||
{{!-}} | {{!-}} | ||
{{!}} [[File:Is ns01 | {{!}} [[File:Is ns01 battalion infantry silver.png|20px]] | ||
{{!}} [[ | {{!}} [[Alliance Snipers]] | ||
{{!}} style="text-align: center" {{!}} | {{!}} [[File:Is ns01 gambit.png|20px]] | ||
{{!}} style="text-align: right" {{!}} | {{!}} [[Fusillade]] | ||
{{!}} style="text-align: center" {{!}} C | |||
{{!}} style="text-align: right" {{!}} 1,500 | |||
{{!-}} | {{!-}} | ||
{{!}} [[File:Is ns01 | {{!}} [[File:Is ns01 battalion infantry silver.png|20px]] | ||
{{!}} [[ | {{!}} [[Alliance Magic Users]] | ||
{{!}} style="text-align: center" {{!}} | {{!}} [[File:Is ns01 gambit magic.png|20px]] | ||
{{!}} style="text-align: right" {{!}} | {{!}} [[Resonant Lightning]] | ||
{{!}} style="text-align: center" {{!}} C | |||
{{!}} style="text-align: right" {{!}} 1,500 | |||
{{!-}} | {{!-}} | ||
{{!}} [[File:Is ns01 | {{!}} [[File:Is ns01 battalion infantry silver.png|20px]] | ||
{{!}} [[ | {{!}} [[Alliance Veteran Duelists]] | ||
{{!}} style="text-align: center" {{!}} | {{!}} [[File:Is ns01 gambit.png|20px]] | ||
{{!}} style="text-align: right" {{!}} | {{!}} [[Absorption]] | ||
{{!}} style="text-align: center" {{!}} C | |||
{{!}} style="text-align: right" {{!}} 1,500 | |||
{{!-}} | {{!-}} | ||
{{!}} [[File:Is ns01 | {{!}} [[File:Is ns01 battalion flying.png|20px]] | ||
{{!}} [[ | {{!}} [[Alliance Pegasus Co.]] | ||
{{!}} style="text-align: center" {{!}} | {{!}} [[File:Is ns01 gambit.png|20px]] | ||
{{!}} style="text-align: right" {{!}} | {{!}} [[Assembly]] | ||
{{!}} style="text-align: center" {{!}} D | |||
{{!}} style="text-align: right" {{!}} 1,500 | |||
{{!-}} | {{!-}} | ||
{{!}} [[File:Is ns01 | {{!}} class="roundbl" {{!}} [[File:Is ns01 battalion flying silver.png|20px]] | ||
{{!}} [[ | {{!}} [[Alliance Wyvern Co.]] | ||
{{!}} style="text-align: center" {{!}} | {{!}} [[File:Is ns01 gambit support.png|20px]] | ||
{{!}} style="text-align: right" {{!}} | {{!}} [[Impregnable Wall]] | ||
{{!}} style="text-align: center" {{!}} C | |||
{{!}} class="roundbr" style="text-align: right" {{!}} 1,500 | |||
{{tableend}} | |||
|content3={{tablebegin}} class="wikitable round" style="border-collapse: separate; margin: auto; background: none; border: none" | |||
! class="roundtl" style="width: 5%" {{!}} | |||
! style="width: 35%" {{!}} Name | |||
! style="width: 5%" {{!}} | |||
! style="width: 35%" {{!}} Gambit | |||
! style="width: 5%" {{!}} Level | |||
! class="roundtr" style="width: 15%" {{!}} Price | |||
{{!-}} | {{!-}} | ||
{{!}} [[File:Is ns01 | {{!}} [[File:Is ns01 battalion cavalry silver.png|20px]] | ||
{{!}} [[ | {{!}} [[Holy Knights of Seiros]] | ||
{{!}} style="text-align: center" {{!}} | {{!}} [[File:Is ns01 gambit.png|20px]] | ||
{{!}} style="text-align: right" {{!}} 2, | {{!}} [[Assault Troop]] | ||
{{!}} style="text-align: center" {{!}} B | |||
{{!}} style="text-align: right" {{!}} 2,000 | |||
{{!-}} | {{!-}} | ||
{{!}} [[File:Is ns01 | {{!}} [[File:Is ns01 battalion armored gold.png|20px]] | ||
{{!}} [[ | {{!}} [[Indech Sword Fighters]] | ||
{{!}} style="text-align: center" {{!}} | {{!}} [[File:Is ns01 gambit support.png|20px]] | ||
{{!}} [[Retribution (gambit)|Retribution]] | |||
{{!}} style="text-align: center" {{!}} A | |||
{{!}} style="text-align: right" {{!}} 2,500 | {{!}} style="text-align: right" {{!}} 2,500 | ||
{{!-}} | {{!-}} | ||
{{!}} [[File:Is ns01 | {{!}} [[File:Is ns01 battalion infantry gold.png|20px]] | ||
{{!}} [[ | {{!}} [[Macuil Evil Repelling Co.]] | ||
{{!}} style="text-align: center" {{!}} | {{!}} [[File:Is ns01 gambit magic.png|20px]] | ||
{{!}} [[Resonant Lightning]] | |||
{{!}} style="text-align: center" {{!}} A | |||
{{!}} style="text-align: right" {{!}} 2,500 | {{!}} style="text-align: right" {{!}} 2,500 | ||
{{!-}} | {{!-}} | ||
{{!}} | {{!}} [[File:Is ns01 battalion armored silver.png|20px]] | ||
{{!}} [[ | {{!}} [[Alliance Pavise Co.]] | ||
{{!}} style="text-align: center" {{!}} | {{!}} [[File:Is ns01 gambit.png|20px]] | ||
{{!}} style=" | {{!}} [[Group Lance Attack]] | ||
{{!}} style="text-align: center" {{!}} B | |||
{{!}} style="text-align: right" {{!}} 2,000 | |||
{{!-}} | {{!-}} | ||
{{!}} [[File:Is ns01 | {{!}} [[File:Is ns01 battalion infantry silver.png|20px]] | ||
{{!}} [[ | {{!}} [[Alliance Physicians]] | ||
{{!}} style="text-align: center" {{!}} | {{!}} [[File:Is ns01 gambit support.png|20px]] | ||
{{!}} style="text-align: right" {{!}} | {{!}} [[Resonant White Magic]] | ||
{{!}} style="text-align: center" {{!}} B | |||
{{!}} style="text-align: right" {{!}} 2,000 | |||
{{!-}} | {{!-}} | ||
{{!}} [[File:Is ns01 | {{!}} [[File:Is ns01 battalion infantry silver.png|20px]] | ||
{{!}} [[ | {{!}} [[Alliance Sages]] | ||
{{!}} [[File:Is ns01 gambit support.png|20px]] | |||
{{!}} [[Blessing (gambit)|Blessing]] | |||
{{!}} style="text-align: center" {{!}} B | |||
{{!}} [[File:Is ns01 | |||
{{!}} [[ | |||
{{!}} style="text-align: center" {{!}} | |||
{{!}} style="text-align: right" {{!}} 2,000 | {{!}} style="text-align: right" {{!}} 2,000 | ||
{{!-}} | {{!-}} | ||
{{!}} [[File:Is ns01 | {{!}} [[File:Is ns01 battalion infantry silver.png|20px]] | ||
{{!}} [[ | {{!}} [[Alliance Master Archers]] | ||
{{!}} style="text-align: center" {{!}} | {{!}} [[File:Is ns01 gambit.png|20px]] | ||
{{!}} [[Flash-Fire Arrows]] | |||
{{!}} style="text-align: center" {{!}} B | |||
{{!}} style="text-align: right" {{!}} 2,000 | {{!}} style="text-align: right" {{!}} 2,000 | ||
{{!-}} | {{!-}} | ||
{{!}} [[File:Is ns01 | {{!}} [[File:Is ns01 battalion infantry silver.png|20px]] | ||
{{!}} [[ | {{!}} [[Alliance Guard]] | ||
{{!}} style="text-align: center" {{!}} | {{!}} [[File:Is ns01 gambit.png|20px]] | ||
{{!}} style="text-align: right" {{!}} | {{!}} [[Poison Tactic]] | ||
{{!}} style="text-align: center" {{!}} B | |||
{{!}} style="text-align: right" {{!}} 2,000 | |||
{{!-}} | {{!-}} | ||
{{!}} [[File:Is ns01 | {{!}} [[File:Is ns01 battalion flying gold.png|20px]] | ||
{{!}} [[ | {{!}} [[Golden Deer Wyvern Co.]] | ||
{{!}} style="text-align: center" {{!}} | {{!}} [[File:Is ns01 gambit.png|20px]] | ||
{{!}} style="text-align: right" {{!}} 500 | {{!}} [[Assault Troop]] | ||
{{!}} style="text-align: center" {{!}} A | |||
{{!}} style="text-align: right" {{!}} 2,500 | |||
{{!-}} | {{!-}} | ||
{{!}} [[File:Is ns01 | {{!}} [[File:Is ns01 battalion infantry gold.png|20px]] | ||
{{!}} [[ | {{!}} [[Golden Deer Archers]] | ||
{{!}} style="text-align: center" {{!}} | {{!}} [[File:Is ns01 gambit.png|20px]] | ||
{{!}} style="text-align: right" {{!}} 500 | {{!}} [[Poison Tactic]] | ||
{{!}} style="text-align: center" {{!}} A | |||
{{!}} style="text-align: right" {{!}} 2,500 | |||
{{!-}} | {{!-}} | ||
{{!}} [[File:Is ns01 | {{!}} class="roundbl" {{!}} [[File:Is ns01 battalion cavalry gold.png|20px]] | ||
{{!}} [[ | {{!}} [[Golden Deer Cavalry]] | ||
{{!}} style="text-align: center" {{!}} | {{!}} [[File:Is ns01 gambit.png|20px]] | ||
{{!}} style="text-align: right" {{!}} 500 | {{!}} [[Linked Horses]] | ||
{{!-}} | {{!}} style="text-align: center" {{!}} A | ||
{{!}} [[File:Is ns01 | {{!}} class="roundbr" style="text-align: right" {{!}} 2,500 | ||
{{!}} [[ | {{tableend}} | ||
{{!}} style="text-align: center" {{!}} | }} | ||
}} | |||
====Blacksmith==== | |||
{{main|Forge}} | |||
The Blacksmith can be unlocked in Chapter 5 by clearing the [[Forge the Way]] quest, and can be used to [[forge]] and repair weapons. Forging or repairing a weapon requires [[Monastery item#Ores|ores]], and forging a weapon requires a certain professor level depending on what the weapon is being forged into. | |||
====Travelling Merchants and Anna's Shop==== | |||
Up to three merchants can appear in the marketplace, each of whom sell items for use around the Monastery, as can Anna, who will sell various rare items and equipment. The Southern Merchant and Eastern Merchant can be unlocked in Chapter 5 by clearing the [[Clearing the Way]] quest. Anna's Shop can be unlocked in Chapter 15 of every route by clearing the [[The Secret Shop]] quest. The Dark Merchant can be unlocked in Chapter 16 of every route by clearing the [[Taking Care of Business]] quest. | |||
{{Tab | |||
|header=Travelling Merchants and Anna's Shop | |||
|width=60% | |||
|tab1=Southern Merchant {{SouthernMerchant}} | |||
|tab2=Eastern Merchant {{EasternMerchant}} | |||
|tab3=Anna's Shop {{Anna's Shop}} | |||
|tab4=Dark Merchant {{DarkMerchant}} | |||
|content1={{tablebegin}} class="wikitable round" style="border-collapse: separate; margin: auto; background: none; border: none" | |||
! class="roundtl" style="width: 5%" {{!}} | |||
! style="width: 45%" {{!}} Name | |||
! style="width: 25%" {{!}} Stock | |||
! class="roundtr" style="width: 25%" {{!}} Price | |||
{{!-}} | |||
{{!}} [[File:Is ns01 meat.png|20px]] | |||
{{!}} [[Poultry]] | |||
{{!}} style="text-align: center" {{!}} ∞ | |||
{{!}} style="text-align: right" {{!}} 250 | |||
{{!-}} | |||
{{!}} [[File:Is ns01 meat.png|20px]] | |||
{{!}} [[Wild Game]] | |||
{{!}} style="text-align: center" {{!}} ∞ | |||
{{!}} style="text-align: right" {{!}} 500 | {{!}} style="text-align: right" {{!}} 500 | ||
{{!-}} | {{!-}} | ||
{{!}} [[File:Is ns01 | {{!}} [[File:Is ns01 seed.png|20px]] | ||
{{!}} [[ | {{!}} [[Mixed Herb Seeds]] | ||
{{!}} style="text-align: center" {{!}} | {{!}} style="text-align: center" {{!}} ∞ | ||
{{!}} style="text-align: right" {{!}} | {{!}} style="text-align: right" {{!}} 50 | ||
{{!-}} | {{!-}} | ||
{{!}} [[File:Is ns01 | {{!}} [[File:Is ns01 seed.png|20px]] | ||
{{!}} [[ | {{!}} [[Root Vegetable Seeds]] | ||
{{!}} style="text-align: center" {{!}} | {{!}} style="text-align: center" {{!}} ∞ | ||
{{!}} style="text-align: right" {{!}} | {{!}} style="text-align: right" {{!}} 50 | ||
{{!-}} | {{!-}} | ||
{{!}} [[File:Is ns01 | {{!}} [[File:Is ns01 seed.png|20px]] | ||
{{!}} [[ | {{!}} [[Vegetable Seeds]] | ||
{{!}} style="text-align: center" {{!}} | {{!}} style="text-align: center" {{!}} ∞ | ||
{{!}} style="text-align: right" {{!}} | {{!}} style="text-align: right" {{!}} 50 | ||
{{!-}} | {{!-}} | ||
{{!}} [[File:Is ns01 | {{!}} [[File:Is ns01 seed.png|20px]] | ||
{{!}} [[ | {{!}} [[Western Fódlan Seeds]] | ||
{{!}} style="text-align: center" {{!}} | {{!}} style="text-align: center" {{!}} ∞ | ||
{{!}} style="text-align: right" {{!}} | {{!}} style="text-align: right" {{!}} 50 | ||
{{!-}} | {{!-}} | ||
{{!}} [[File:Is ns01 | {{!}} [[File:Is ns01 seed.png|20px]] | ||
{{!}} [[ | {{!}} [[Eastern Fódlan Seeds]] | ||
{{!}} style="text-align: center" {{!}} | {{!}} style="text-align: center" {{!}} ∞ | ||
{{!}} style="text-align: right" {{!}} | {{!}} style="text-align: right" {{!}} 100 | ||
{{!-}} | {{!-}} | ||
{{!}} [[File:Is ns01 | {{!}} [[File:Is ns01 seed.png|20px]] | ||
{{!}} [[ | {{!}} [[Southern Fódlan Seeds]] | ||
{{!}} style="text-align: center" {{!}} | {{!}} style="text-align: center" {{!}} ∞ | ||
{{!}} style="text-align: right" {{!}} | {{!}} style="text-align: right" {{!}} 100 | ||
{{!-}} | {{!-}} | ||
{{!}} [[File:Is ns01 | {{!}} [[File:Is ns01 seed.png|20px]] | ||
{{!}} [[ | {{!}} [[Northern Fódlan Seeds]] | ||
{{!}} style="text-align: center" {{!}} | {{!}} style="text-align: center" {{!}} ∞ | ||
{{!}} style="text-align: right" {{!}} | {{!}} style="text-align: right" {{!}} 100 | ||
{{!-}} | {{!-}} | ||
{{!}} [[File:Is ns01 | {{!}} [[File:Is ns01 seed.png|20px]] | ||
{{!}} [[ | {{!}} [[Red Flower Seeds]] | ||
{{!}} style="text-align: center" {{!}} | {{!}} style="text-align: center" {{!}} ∞ | ||
{{!}} style="text-align: right" {{!}} | {{!}} style="text-align: right" {{!}} 300 | ||
{{!-}} | {{!-}} | ||
{{!}} [[File:Is ns01 | {{!}} [[File:Is ns01 seed.png|20px]] | ||
{{!}} [[ | {{!}} [[White Flower Seeds]] | ||
{{!}} style="text-align: center" {{!}} | {{!}} style="text-align: center" {{!}} ∞ | ||
{{!}} style="text-align: right" {{!}} | {{!}} style="text-align: right" {{!}} 300 | ||
{{!-}} | {{!-}} | ||
{{!}} [[File:Is ns01 | {{!}} [[File:Is ns01 seed.png|20px]] | ||
{{!}} [[ | {{!}} [[Blue Flower Seeds]] | ||
{{!}} style="text-align: center" {{!}} | {{!}} style="text-align: center" {{!}} ∞ | ||
{{!}} style="text-align: right" {{!}} | {{!}} style="text-align: right" {{!}} 300 | ||
{{!-}} | {{!-}} | ||
{{!}} [[File:Is ns01 | {{!}} [[File:Is ns01 seed.png|20px]] | ||
{{!}} [[ | {{!}} [[Purple Flower Seeds]] | ||
{{!}} style="text-align: center" {{!}} | {{!}} style="text-align: center" {{!}} ∞ | ||
{{!}} style="text-align: right" {{!}} | {{!}} style="text-align: right" {{!}} 300 | ||
{{!-}} | {{!-}} | ||
{{!}} [[File:Is ns01 | {{!}} [[File:Is ns01 seed.png|20px]] | ||
{{!}} [[ | {{!}} [[Yellow Flower Seeds]] | ||
{{!}} style="text-align: center" {{!}} | {{!}} style="text-align: center" {{!}} ∞ | ||
{{!}} style="text-align: right" {{!}} | {{!}} style="text-align: right" {{!}} 300 | ||
{{!-}} | {{!-}} | ||
{{!}} [[File:Is ns01 seed.png|20px]] | |||
{{!}} [[ | {{!}} [[Green Flower Seeds]] | ||
{{!}} style="text-align: center" {{!}} | {{!}} style="text-align: center" {{!}} ∞ | ||
{{!}} style=" | {{!}} style="text-align: right" {{!}} 300 | ||
{{ | {{!-}} | ||
}} | {{!}} [[File:Is ns01 seed.png|20px]] | ||
{{!}} [[Pale-Blue Flower Seeds]] | |||
{{!}} style="text-align: center" {{!}} ∞ | |||
{{!}} style="text-align: right" {{!}} 300 | |||
{{!-}} | |||
{{!}} [[File:Is ns01 gift.png|20px]] | |||
{ | {{!}} [[Floral Adornment]] | ||
| | {{!}} style="text-align: center" {{!}} 1 | ||
{{!}} style="text-align: right" {{!}} 100 | |||
{{!-}} | |||
{{!}} [[File:Is ns01 gift.png|20px]] | |||
{{!}} [[Tasty Baked Treat]] | |||
{{!}} style="text-align: center" {{!}} 1 | |||
{{!}} style="text-align: right" {{!}} 100 | |||
{{!-}} | |||
{{!}} [[File:Is ns01 gift.png|20px]] | |||
{{!}} [[Smoked Meat]] | |||
{{!}} style="text-align: center" {{!}} 1 | |||
{{!}} style="text-align: right" {{!}} 100 | |||
{{!-}} | |||
{{!}} [[File:Is ns01 gift.png|20px]] | |||
{{!}} [[Watering Can]] | |||
{{!}} style="text-align: center" {{!}} 1 | |||
{{!}} style="text-align: right" {{!}} 300 | |||
{{!-}} | |||
{{!}} [[File:Is ns01 gift.png|20px]] | |||
{{!}} [[Dapper Handkerchief]] | |||
{{!}} style="text-align: center" {{!}} 1 | |||
{{!}} style="text-align: right" {{!}} 300 | |||
{{!-}} | |||
{{!}} [[File:Is ns01 gift.png|20px]] | |||
{{!}} [[Armored Bear Stuffy]] | |||
{{!}} style="text-align: center" {{!}} 1 | |||
{{!}} style="text-align: right" {{!}} 500 | |||
{{!-}} | |||
{{!}} [[File:Is ns01 gift.png|20px]] | |||
{{!}} [[Riding Boots]] | |||
{{!}} style="text-align: center" {{!}} 1 | |||
{{!}} style="text-align: right" {{!}} 500 | |||
{{!-}} | |||
{{!}} [[File:Is ns01 gift.png|20px]] | |||
{{!}} [[Legends of Chivalry]] | |||
{{!}} style="text-align: center" {{!}} 1 | |||
{{!}} style="text-align: right" {{!}} 500 | |||
{{!-}} | |||
{{!}} [[File:Is ns01 gift.png|20px]] | |||
{{!}} [[Goddess Statuette]] | |||
{{!}} style="text-align: center" {{!}} 1 | |||
{{!}} style="text-align: right" {{!}} 500 | |||
{{!-}} | |||
{{!}} [[File:Is ns01 gift.png|20px]] | |||
{{!}} [[Ceremonial Sword]] | |||
{{!}} style="text-align: center" {{!}} 1 | |||
{{!}} style="text-align: right" {{!}} 1,000 | |||
{{!-}} | |||
{{!}} class="roundbl" {{!}} [[File:Is ns01 gift.png|20px]] | |||
{{!}} [[Coffee Beans]] | |||
{{!}} style="text-align: center" {{!}} 1 | |||
{{!}} class="roundbr" style="text-align: right" {{!}} 1,000 | |||
{{tableend}} | |||
|content2={{tablebegin}} class="wikitable round" style="border-collapse: separate; margin: auto; background: none; border: none" | |||
! class="roundtl" style="width: 5%" {{!}} | |||
! style="width: 45%" {{!}} Name | |||
! style="width: 25%" {{!}} Stock | |||
! class="roundtr" style="width: 25%" {{!}} Price | |||
{{!-}} | |||
{{!}} [[File:Is ns01 bait.png|20px]] | |||
{{!}} [[Insect Larva]] | |||
{{!}} style="text-align: center" {{!}} 10 | |||
{{!}} style="text-align: right" {{!}} 10 | |||
{{!-}} | |||
{{!}} [[File:Is ns01 bait.png|20px]] | |||
{{!}} [[Pond Snail]] | |||
{{!}} style="text-align: center" {{!}} 10 | |||
{{!}} style="text-align: right" {{!}} 20 | |||
{{!-}} | |||
| | {{!}} [[File:Is ns01 bait.png|20px]] | ||
{{!}} [[Earthworm]] | |||
{{!}} style="text-align: center" {{!}} 10 | |||
{ | {{!}} style="text-align: right" {{!}} 30 | ||
{{!-}} | |||
{{!}} [[File:Is ns01 bait.png|20px]] | |||
| | {{!}} [[Blowfly]] | ||
{{!}} style="text-align: center" {{!}} 5 | |||
{{!}} style="text-align: right" {{!}} 40 | |||
{{!-}} | |||
{{!}} [[File:Is ns01 bait.png|20px]] | |||
{{!}} [[Herring Bait]] | |||
{{!}} style="text-align: center" {{!}} 5 | |||
{{!}} style="text-align: right" {{!}} 50 | |||
- | {{!-}} | ||
{{!}} [[File:Is ns01 ore.png|20px]] | |||
{{!}} [[Smithing Stone]] | |||
{{!}} style="text-align: center" {{!}} ∞ | |||
{{!}} style="text-align: right" {{!}} 100 | |||
{{!-}} | |||
- | {{!}} [[File:Is ns01 ore.png|20px]] | ||
{{!}} [[Black-Sand Steel]] | |||
{{!}} style="text-align: center" {{!}} ∞ | |||
{{!}} style="text-align: right" {{!}} 300 | |||
{{!-}} | |||
{{!}} [[File:Is ns01 tea.png|20px]] | |||
- | {{!}} [[Sweet-Apple Blend]] | ||
{{!}} style="text-align: center" {{!}} ∞ | |||
{{!}} style="text-align: right" {{!}} 500 | |||
{{!-}} | |||
{{!}} [[File:Is ns01 tea.png|20px]] | |||
- | {{!}} [[Albinean Berry Blend]] | ||
{{!}} style="text-align: center" {{!}} ∞ | |||
{{!}} style="text-align: right" {{!}} 500 | |||
{{!-}} | |||
{{!}} [[File:Is ns01 tea.png|20px]] | |||
{{!}} [[Southern Fruit Blend]] | |||
{{!}} style="text-align: center" {{!}} ∞ | |||
{{!}} style="text-align: right" {{!}} 500 | |||
{{!-}} | |||
{{!}} [[File:Is ns01 tea.png|20px]] | |||
- | {{!}} [[Mint Leaves]] | ||
{{!}} style="text-align: center" {{!}} ∞ | |||
{{!}} style="text-align: right" {{!}} 500 | |||
{{!-}} | |||
{{!}} [[File:Is ns01 tea.png|20px]] | |||
{{!}} [[Almond Blend]] | |||
{{!}} style="text-align: center" {{!}} ∞ | |||
{{!}} style="text-align: right" {{!}} 500 | |||
{ | {{!-}} | ||
{{!}} [[File:Is ns01 tea.png|20px]] | |||
{{!}} [[Ginger Tea]] | |||
| | {{!}} style="text-align: center" {{!}} ∞ | ||
{{!}} style="text-align: right" {{!}} 500 | |||
- | {{!-}} | ||
{{!}} [[File:Is ns01 tea.png|20px]] | |||
{{!}} [[Angelica Tea]] | |||
{{!}} style="text-align: center" {{!}} ∞ | |||
{{!}} style="text-align: right" {{!}} 500 | |||
- | {{!-}} | ||
{{!}} [[File:Is ns01 tea.png|20px]] | |||
{{!}} [[Almyran Pine Needles]] | |||
{{!}} style="text-align: center" {{!}} ∞ | |||
{{!}} style="text-align: right" {{!}} 1,000 | |||
- | {{!-}} | ||
{{!}} [[File:Is ns01 tea.png|20px]] | |||
{{!}} [[Crescent-Moon Tea]] | |||
{{!}} style="text-align: center" {{!}} ∞ | |||
{{!}} style="text-align: right" {{!}} 1,000 | |||
{{!-}} | |||
{{!}} [[File:Is ns01 tea.png|20px]] | |||
{{!}} [[Honeyed-Fruit Blend]] | |||
{{!}} style="text-align: center" {{!}} ∞ | |||
{{!}} style="text-align: right" {{!}} 1,000 | |||
{{!-}} | |||
- | {{!}} [[File:Is ns01 tea.png|20px]] | ||
{{!}} [[Lavender Blend]] | |||
{{!}} style="text-align: center" {{!}} ∞ | |||
{{!}} style="text-align: right" {{!}} 1,000 | |||
{{!-}} | |||
- | {{!}} [[File:Is ns01 tea.png|20px]] | ||
{{!}} [[Chamomile]] | |||
{{!}} style="text-align: center" {{!}} ∞ | |||
{{!}} style="text-align: right" {{!}} 1,000 | |||
{{!-}} | |||
{{!}} [[File:Is ns01 tea.png|20px]] | |||
- | {{!}} [[Bergamot]] | ||
{{!}} style="text-align: center" {{!}} ∞ | |||
{{!}} style="text-align: right" {{!}} 1,500 | |||
{{!-}} | |||
{{!}} [[File:Is ns01 tea.png|20px]] | |||
- | {{!}} [[Rose Petal Blend]] | ||
{{!}} style="text-align: center" {{!}} ∞ | |||
{{!}} style="text-align: right" {{!}} 1,500 | |||
{{!-}} | |||
{{!}} [[File:Is ns01 tea.png|20px]] | |||
{{!}} [[Four-Spice Blend]] | |||
- | {{!}} style="text-align: center" {{!}} ∞ | ||
{{!}} style="text-align: right" {{!}} 1,500 | |||
{{!-}} | |||
{{!}} [[File:Is ns01 gift.png|20px]] | |||
{{!}} [[Fishing Float]] | |||
{{!}} style="text-align: center" {{!}} 1 | |||
- | {{!}} style="text-align: right" {{!}} 100 | ||
{{!-}} | |||
{{!}} [[File:Is ns01 gift.png|20px]] | |||
{{!}} [[Gemstone Beads]] | |||
{{!}} style="text-align: center" {{!}} 1 | |||
- | {{!}} style="text-align: right" {{!}} 100 | ||
{{!-}} | |||
{{!}} [[File:Is ns01 gift.png|20px]] | |||
{{!}} [[Hunting Dagger]] | |||
{{!}} style="text-align: center" {{!}} 1 | |||
{{!}} style="text-align: right" {{!}} 300 | |||
{{!-}} | |||
{{!}} [[File:Is ns01 gift.png|20px]] | |||
{ | {{!}} [[Whetstone]] | ||
{{!}} style="text-align: center" {{!}} 1 | |||
{{!}} style="text-align: right" {{!}} 300 | |||
| | {{!-}} | ||
{{!}} [[File:Is ns01 gift.png|20px]] | |||
{{!}} [[Stylish Hair Clip]] | |||
{{!}} style="text-align: center" {{!}} 1 | |||
{{!}} style="text-align: right" {{!}} 300 | |||
{{!-}} | |||
{{!}} [[File:Is ns01 gift.png|20px]] | |||
{{!}} [[Training Weight]] | |||
{{!}} style="text-align: center" {{!}} 1 | |||
{{!}} style="text-align: right" {{!}} 500 | |||
{{!-}} | |||
{{!}} [[File:Is ns01 gift.png|20px]] | |||
{{!}} [[Tea Leaves]] | |||
{{!}} style="text-align: center" {{!}} 1 | |||
{{!}} style="text-align: right" {{!}} 500 | |||
{{!-}} | |||
{{!}} [[File:Is ns01 gift.png|20px]] | |||
{{!}} [[Exotic Spices]] | |||
{{!}} style="text-align: center" {{!}} 1 | |||
{{!}} style="text-align: right" {{!}} 1,000 | |||
{{!-}} | |||
{{!}} class="roundbl" {{!}} [[File:Is ns01 gift.png|20px]] | |||
{{!}} [[Board Game]] | |||
{{!}} style="text-align: center" {{!}} 1 | |||
{{!}} class="roundbr" style="text-align: right" {{!}} 1,000 | |||
{{tableend}} | |||
|content3={{tablebegin}} class="wikitable round" style="border-collapse: separate; margin: auto; background: none; border: none" | |||
! class="roundtl" style="width: 5%" {{!}} | |||
! style="width: 45%" {{!}} Name | |||
! style="width: 25%" {{!}} Stock | |||
! class="roundtr" style="width: 25%" {{!}} Price | |||
{{!-}} | |||
{{!}} [[File:Is ns01 shield.png|20px]] | |||
{{!}} [[Silver Shield]] | |||
{{!}} style="text-align: center" {{!}} ∞ | |||
{{!}} style="text-align: right" {{!}} 2,000 | |||
{{!-}} | |||
{{!}} [[File:Is ns01 shield.png|20px]] | |||
{{!}} [[Hexlock Shield]] | |||
{{!}} style="text-align: center" {{!}} Limited: 1 | |||
{{!}} style="text-align: right" {{!}} 3,000 | |||
{{!-}} | |||
{{!}} [[File:Is ns01 ring.png|20px]] | |||
{{!}} [[Accuracy Ring]] | |||
{{!}} style="text-align: center" {{!}} Limited: 1 | |||
{{!}} style="text-align: right" {{!}} 3,000 | |||
{{!-}} | |||
{{!}} [[File:Is ns01 ring.png|20px]] | |||
{{!}} [[Critical Ring]] | |||
{{!}} style="text-align: center" {{!}} Limited: 1 | |||
{{!}} style="text-align: right" {{!}} 3,000 | |||
{{!-}} | |||
{{!}} [[File:Is ns01 ring.png|20px]] | |||
{{!}} [[Evasion Ring]] | |||
{{!}} style="text-align: center" {{!}} Limited: 1 | |||
{{!}} style="text-align: right" {{!}} 3,000 | |||
{{!-}} | |||
{{!}} [[File:Is ns01 ring.png|20px]] | |||
{{!}} [[Speed Ring]] | |||
{ | {{!}} style="text-align: center" {{!}} Limited: 1 | ||
{{!}} style="text-align: right" {{!}} 3,000 | |||
{{!-}} | |||
{{!}} [[File:Is ns01 ring.png|20px]] | |||
{{!}} [[Goddess Ring]] | |||
{{!}} style="text-align: center" {{!}} Limited: 1 | |||
{{!}} style="text-align: right" {{!}} 2,500 | |||
{{!-}} | |||
{{!}} [[File:Is ns01 ring.png|20px]] | |||
{{!}} [[Prayer Ring]] | |||
{{!}} style="text-align: center" {{!}} Limited: 1 | |||
{{!}} style="text-align: right" {{!}} 2,500 | |||
{{!-}} | |||
{{!}} [[File:Is ns01 potion.png|20px]] | |||
{{!}} [[Elixir]] | |||
{{!}} style="text-align: center" {{!}} ∞ | |||
{{!}} style="text-align: right" {{!}} 1,200 | |||
{{!-}} | |||
{{!}} [[File:Is ns01 seal.png|20px]] | |||
{{!}} [[Master Seal]] | |||
{{!}} style="text-align: center" {{!}} ∞ | |||
{{!}} style="text-align: right" {{!}} 3,000 | |||
{{!-}} | |||
{{!}} [[File:Is ns01 stat booster.png|20px]] | |||
{{!}} [[Seraph Robe]] | |||
{{!}} style="text-align: center" {{!}} Limited: 1 | |||
{{!}} style="text-align: right" {{!}} 2,500 | |||
{{!-}} | |||
{{!}} [[File:Is ns01 stat booster.png|20px]] | |||
{{!}} [[Energy Drop]] | |||
{{!}} style="text-align: center" {{!}} Limited: 1 | |||
{{!}} style="text-align: right" {{!}} 2,500 | |||
{{!-}} | |||
{{!}} [[File:Is ns01 stat booster.png|20px]] | |||
{{!}} [[Spirit Dust]] | |||
{{!}} style="text-align: center" {{!}} Limited: 1 | |||
{{!}} style="text-align: right" {{!}} 2,500 | |||
{{!-}} | |||
{{!}} [[File:Is ns01 stat booster.png|20px]] | |||
{{!}} [[Secret Book]] | |||
{{!}} style="text-align: center" {{!}} Limited: 1 | |||
{{!}} style="text-align: right" {{!}} 2,500 | |||
{{!-}} | |||
{{!}} [[File:Is ns01 stat booster.png|20px]] | |||
{{!}} [[Speedwing]] | |||
{{!}} style="text-align: center" {{!}} Limited: 1 | |||
{{!}} style="text-align: right" {{!}} 2,500 | |||
{{!-}} | |||
{{!}} [[File:Is ns01 stat booster.png|20px]] | |||
{{!}} [[Goddess Icon]] | |||
{{!}} style="text-align: center" {{!}} Limited: 1 | |||
{{!}} style="text-align: right" {{!}} 2,500 | |||
{{!-}} | |||
{ | {{!}} [[File:Is ns01 stat booster.png|20px]] | ||
{{!}} [[Giant Shell]] | |||
{{!}} style="text-align: center" {{!}} Limited: 1 | |||
{{!}} style="text-align: right" {{!}} 2,500 | |||
{{!-}} | |||
{{!}} [[File:Is ns01 stat booster.png|20px]] | |||
{{!}} [[Talisman]] | |||
{{!}} style="text-align: center" {{!}} Limited: 1 | |||
{{!}} style="text-align: right" {{!}} 2,500 | |||
{{!-}} | |||
{{!}} class="roundbl" {{!}} [[File:Is ns01 stat booster.png|20px]] | |||
{{!}} [[Black Pearl]] | |||
{{!}} style="text-align: center" {{!}} Limited: 1 | |||
{{!}} class="roundbr" style="text-align: right" {{!}} 2,500 | |||
{{tableend}} | |||
|content4={{tablebegin}} class="wikitable round" style="border-collapse: separate; margin: auto; background: none; border: none" | |||
! class="roundtl" style="width: 5%" {{!}} | |||
! style="width: 45%" {{!}} Name | |||
! style="width: 25%" {{!}} Stock | |||
! class="roundtr" style="width: 25%" {{!}} Price | |||
{{!-}} | |||
{{!}} [[File:Is ns01 ore.png|20px]] | |||
{{!}} [[Arcane Crystal]] | |||
{{!}} style="text-align: center" {{!}} ∞ | |||
{{!}} style="text-align: right" {{!}} 500 | |||
{{!-}} | |||
{{!}} [[File:Is ns01 tea.png|20px]] | |||
{{!}} [[Cinnamon Blend]] | |||
{{!}} style="text-align: center" {{!}} ∞ | |||
{{!}} style="text-align: right" {{!}} 1,500 | |||
{{!-}} | |||
{{!}} [[File:Is ns01 tea.png|20px]] | |||
{{!}} [[Seiros Tea]] | |||
{{!}} style="text-align: center" {{!}} ∞ | |||
{{!}} style="text-align: right" {{!}} 1,500 | |||
{{!-}} | |||
{{!}} [[File:Is ns01 tea.png|20px]] | |||
{{!}} [[Dagda Fruit Blend]] | |||
{{!}} style="text-align: center" {{!}} ∞ | |||
{{!}} style="text-align: right" {{!}} 1,500 | |||
{{!-}} | |||
{{!}} [[File:Is ns01 tea.png|20px]] | |||
{{!}} [[Hresvelg Blend]] | |||
{{!}} style="text-align: center" {{!}} ∞ | |||
{{!}} style="text-align: right" {{!}} 2,000 | |||
{{!-}} | |||
{{!}} [[File:Is ns01 tea.png|20px]] | |||
{{!}} [[Leicester Cortania]] | |||
{{!}} style="text-align: center" {{!}} ∞ | |||
{{!}} style="text-align: right" {{!}} 2,000 | |||
{{!-}} | |||
{{!}} [[File:Is ns01 gift.png|20px]] | |||
{{!}} [[Book of Sheet Music]] | |||
{{!}} style="text-align: center" {{!}} 1 | |||
{{!}} style="text-align: right" {{!}} 500 | |||
{{!-}} | |||
{{!}} [[File:Is ns01 gift.png|20px]] | |||
{{!}} [[Arithmetic Textbook]] | |||
{{!}} style="text-align: center" {{!}} 1 | |||
{{!}} style="text-align: right" {{!}} 500 | |||
| | {{!-}} | ||
{{!}} [[File:Is ns01 gift.png|20px]] | |||
{{!}} [[The History of Fódlan]] | |||
{{!}} style="text-align: center" {{!}} 1 | |||
{{!}} style="text-align: right" {{!}} 500 | |||
{{!-}} | |||
{{!}} [[File:Is ns01 gift.png|20px]] | |||
{{!}} [[Monarch Studies Book]] | |||
{{!}} style="text-align: center" {{!}} 1 | |||
{{!}} style="text-align: right" {{!}} 500 | |||
{{!-}} | |||
{{!}} [[File:Is ns01 gift.png|20px]] | |||
{{!}} [[Ancient Coin]] | |||
{{!}} style="text-align: center" {{!}} 1 | |||
{{!}} style="text-align: right" {{!}} 500 | |||
{{!-}} | |||
{{!}} [[File:Is ns01 gift.png|20px]] | |||
{{!}} [[Book of Crest Designs]] | |||
{{!}} style="text-align: center" {{!}} 1 | |||
{{!}} style="text-align: right" {{!}} 1,000 | |||
{{!-}} | |||
{{!}} [[File:Is ns01 gift.png|20px]] | |||
{{!}} [[Blue Cheese]] | |||
{{!}} style="text-align: center" {{!}} 1 | |||
{{!}} style="text-align: right" {{!}} 1,000 | |||
{{!-}} | |||
{{!}} [[File:Is ns01 gift.png|20px]] | |||
{{!}} [[Landscape Painting]] | |||
{{!}} style="text-align: center" {{!}} 1 | |||
{{!}} style="text-align: right" {{!}} 1,000 | |||
{{!-}} | |||
{{!}} [[File:Is ns01 fish.png|20px]] | |||
{{!}} [[Queen Loach]] | |||
{{!}} style="text-align: center" {{!}} 1 | |||
{{!}} style="text-align: right" {{!}} 150 | |||
{{!-}} | |||
{{!}} [[File:Is ns01 fish.png|20px]] | |||
{{!}} [[Teutates Pike]] | |||
{{!}} style="text-align: center" {{!}} 1 | |||
{{!}} style="text-align: right" {{!}} 250 | |||
{{!-}} | |||
{{!}} [[File:Is ns01 fish.png|20px]] | |||
{{!}} [[Bullhead]] | |||
{{!}} style="text-align: center" {{!}} 1 | |||
{{!}} style="text-align: right" {{!}} 500 | |||
{{!-}} | |||
{{!}} [[File:Is ns01 produce.png|20px]] | |||
{{!}} [[Morfis Plum]] | |||
{{!}} style="text-align: center" {{!}} 1 | |||
{{!}} style="text-align: right" {{!}} 500 | |||
{{!-}} | |||
{{!}} [[File:Is ns01 produce.png|20px]] | |||
{{!}} [[Nordsalat]] | |||
{{!}} style="text-align: center" {{!}} 1 | |||
{{!}} style="text-align: right" {{!}} 500 | |||
{{!-}} | |||
{{!}} [[File:Is ns01 produce.png|20px]] | |||
{{!}} [[Boa Fruit]] | |||
{{!}} style="text-align: center" {{!}} 1 | |||
{{!}} style="text-align: right" {{!}} 1,000 | |||
{{!-}} | |||
{{!}} [[File:Is ns01 produce.png|20px]] | |||
{{!}} [[Magdred Kirsch]] | |||
{{!}} style="text-align: center" {{!}} 1 | |||
{{!}} style="text-align: right" {{!}} 500 | |||
{{!-}} | |||
{{!}} [[File:Is ns01 produce.png|20px]] | |||
{{!}} [[Angelica]] | |||
{{!}} style="text-align: center" {{!}} 1 | |||
{{!}} style="text-align: right" {{!}} 1,000 | |||
{{!-}} | |||
{{!}} [[File:Is ns01 meat.png|20px]] | |||
{{!}} [[Duscur Bear]] | |||
{{!}} style="text-align: center" {{!}} 1 | |||
{{!}} style="text-align: right" {{!}} 1,000 | |||
{{!-}} | |||
{{!}} class="roundbl" {{!}} [[File:Is ns01 meat.png|20px]] | |||
{{!}} [[Oghma Wolverine]] | |||
{{!}} style="text-align: center" {{!}} 1 | |||
{{!}} class="roundbr" style="text-align: right" {{!}} 2,500 | |||
{{tableend}} | |||
}} | |||
==Other notable locations== | |||
===Library=== | |||
The Library contains ten accessible books and historical texts detailing the lore of Fódlan and the lands surrounding it, all of which have been approved by the Church of Seiros. | |||
====The Book of Seiros, Part I==== | |||
{|class="mw-collapsible mw-collapsed" | |||
| | |||
|- | |||
| | |||
<blockquote> | |||
The Revelation<br> | |||
The goddess is all things. She is heaven above and the land below.<br> | |||
She is eternity incarnate. She is the present, the past, and the future.<br> | |||
Her eyes see all. Her ears hear all. Her hands receive all. | |||
She who was graced with the holy word of the divine goddess,<br> | |||
who bore witness to her magnificence, is the one called Seiros.<br> | |||
She is the messenger of the heavens, the bridge between the lands<br> | |||
above and below, and her blessings shall bring tidings of peace to all. | |||
of | |||
With the goddess's omnipotence and wisdom to guide her,<br> | |||
Seiros ensures that her will be done.<br> | |||
As the goddess's sword, Seiros wards away evil.<br> | |||
As the goddess's child, Seiros makes emperors of mortals.<br> | |||
of | As the goddess's wings, Seiros elevates her people.<br> | ||
As the goddess's voice, Seiros spreads the word of love. | |||
</blockquote> | |||
|} | |||
====The Book of Seiros, Part II==== | |||
{|class="mw-collapsible mw-collapsed" | |||
| | |||
of | |- | ||
| | |||
<blockquote> | |||
The Creation<br> | |||
In the beginning, amid the great cloudless ocean, Fódlan came to be.<br> | |||
At the end of a long journey, the goddess glimpsed that land and there<br> | |||
alighted. Upon that sacred ground, she breathed life into the world and<br> | |||
created all of the creatures upon it. | |||
By the goddess's hand, plants took root, birds took to the sky,<br> | |||
and animals roamed the land. Last of all, she created humanity.<br> | |||
When the humans wished for power, she granted it. She gifted them<br> | |||
the blessings of the heavens and of the earth. By way of the magical arts,<br> | |||
humanity attained great power, yet unaware that great power portends<br> | |||
great evil. | |||
By the grace of the goddess's divine protection, humanity thrived.<br> | |||
Through her blessings, they grew prosperous and their numbers rose.<br> | |||
Before long they became the most powerful creatures in all of Fódlan.<br> | |||
All was well until darkness descended from the north...a darkness that<br> | |||
devoured the earth, desecrated the heavens, and threw the world and<br> | |||
a | its inhabitants into a state of chaos. | ||
To face this evil force, the goddess created a new well of power.<br> | |||
She gifted certain chosen individuals with sacred blood, allowing them<br> | |||
to wield mystical weapons, that they may prevail against the darkness.<br> | |||
against the | These souls, buoyed by their divine gifts, conquered the evil ones and<br> | ||
drove them back to the north. They came to be known as Heroes. | |||
The Heroes experienced unnaturally long lives, persisting for hundreds<br> | |||
This | of years. Even after they breathed their last, the power coursing through<br> | ||
the | their blood remained, leaving an indelible mark upon this world.<br> | ||
This power, passed through bloodlines, came to be known as the Crests.<br> | |||
The mystical weapons they once wielded are now called Heroes' Relics.<br> | |||
And so the legend of a new age was born. | |||
The descendants of the Heroes sought their ancestor's power, and thusly<br> | |||
their blood. In time, they amassed Crests, Relics, land, and wealth,<br> | |||
using all to set the land aflame with war. The goddess's power, intended<br> | |||
to stem the flow of evil, became a tool of destruction, all because of the<br> | |||
greed of humanity. The goddess grieved and, heartbroken, hid herself<br> | |||
in the heavens from whence she came... | |||
</blockquote> | </blockquote> | ||
|} | |} | ||
==== | ====The History of Fódlan, Part I==== | ||
{|class="mw-collapsible mw-collapsed" | {|class="mw-collapsible mw-collapsed" | ||
| | | | ||
| Line 4,424: | Line 4,915: | ||
| | | | ||
<blockquote> | <blockquote> | ||
Under the tyranny of ruthless disorder, the people endured a long period<br> | |||
of suffering. The vile Nemesis, who proclaimed himself the King of<br> | |||
Liberation, delighted in war and bloodshed. Rather than rebelling against<br> | |||
his persecution, the people of Fódlan fell to his depths in a mad scramble<br> | |||
to attain power through murder and theft. | |||
- 41 Years Before the Founding of the Adrestian Empire -<br> | |||
Saint Seiros appeared in the land of Enbarr and, through the many<br> | |||
unfathomable miracles she performed, spread light across the land.<br> | |||
In doing so, she joined the shattered hearts of the purest people<br> | |||
of Fódlan, who went on to form the Holy Church of Seiros. | |||
- Imperial Year 1: The Founding of the Adrestian Empire -<br> | |||
In the first year of our calendar, the glorious Adrestian Empire was<br> | |||
founded. Its name was gifted by an oracle, and its future blessed by<br> | |||
the | the goddess. Its capital, Enbarr, was chosen to govern the southern<br> | ||
and the | reaches of Fódlan, where the divine Saint Seiros also lent her power. | ||
- Imperial Year 32: The War of Heroes -<br> | |||
Wilhelm Paul Hresvelg, the inaugural Adrestian Emperor, raised an<br> | |||
army in pursuit of the unification of Fódlan. With his might, he hunted<br> | |||
and destroyed any house's territory that dared to seek more power. | |||
- Imperial Year 46: The Battle of Gronder -<br> | |||
An intense battle erupted on Gronder Field, where the houses that<br> | |||
were allied with Nemesis and the Imperial forces of the Adrestian Empire<br> | |||
clashed. There, the Imperial forces emerged victorious. | |||
- Imperial Year 91: The Battle of Tailtean -<br> | |||
The houses that were allied with Nemesis once again faced off against the<br> | |||
Imperial forces, this time at Tailtean Plains. There, the evil Nemesis<br> | |||
finally fell and the Empire secured a momentous victory. | |||
- Imperial Year 98: The War of Heroes Ends -<br> | |||
The successor to Great Emperor Wilhelm I, Lycaon I, succumbed to<br> | |||
sudden illness. The Empire, which ruled over the majority of Fódlan,<br> | |||
took this opportunity to put an end to the seemingly endless fighting. | |||
</blockquote> | </blockquote> | ||
|} | |} | ||
==== | ====The History of Fódlan, Part II==== | ||
{|class="mw-collapsible mw-collapsed" | {|class="mw-collapsible mw-collapsed" | ||
| | | | ||
| Line 4,463: | Line 4,961: | ||
| | | | ||
<blockquote> | <blockquote> | ||
- Imperial Year 721: The First Mach War -<br> | |||
The Dagdan army invaded from across the sea. Though the Imperial<br> | |||
forces resisted the attack and drove off the enemy, the land of Mach<br> | |||
sustained considerable damage. | |||
Brigid<br> | - Imperial Year 728: The Invasion of Brigid -<br> | ||
The Empire invaded the Brigid archipelago, a land occupied by allies<br> | |||
of Dagda. As penance for their refusal to surrender, the people of Brigid<br> | |||
were relegated to a life of Imperial subjugation. | |||
- Imperial Year 731: The Invasion of Dagda -<br> | |||
With the boon of a strong foothold in Brigid, the Empire mounted a<br> | |||
large-scale invasion of Dagda. However, the fortunes of war were not<br> | |||
on their side, and their attack failed. | |||
- Imperial Year 747: The Faerghus Rebellion -<br> | |||
Loog, a descendant of one of the houses that first quarreled with<br> | |||
the Empire, raised an army to demand independence, pulling the<br> | |||
land of Faerghus into a fierce rebellion. This clash came to be<br> | |||
known as the War of the Eagle and Lion. | |||
- Imperial Year 751: The Founding of the Holy Kingdom of Faerghus -<br> | |||
Loog and his resistance army were victorious over the Imperial forces.<br> | |||
The Holy Church of Seiros mediated between the two, and Faerghus<br> | |||
secured its hard-won independence as the Holy Kingdom of Faerghus. | |||
- Imperial Year 801: The Leicester Rebellion -<br> | |||
A rebellion broke out in the Imperial lands of Leicester, which the<br> | |||
Imperial army was unable to suppress. The Holy Kingdom, viewing the<br> | |||
uprising as an opportunity to increase its own political sway, occupied<br> | |||
the Leicester region, formally declaring it as a territory of Faerghus. | |||
- Imperial Year 861: Faerghus Divided -<br> | |||
Following the death of King Klaus I, three princes became archdukes and<br> | |||
split the Holy Kingdom of Faerghus, that they may rule over it as<br> | |||
three separate territories. | |||
- Imperial Year 881: The Crescent Moon War -<br> | |||
The archduke ruling over the Leicester region of the Kingdom<br> | |||
succumbed to illness. The lords of the Leicester lands refused to<br> | |||
acknowledge the next archduke in line, instead plotting to rule<br> | |||
jointly as an alliance. | |||
- Imperial Year 901: The Founding of the Leicester Alliance -<br> | |||
The Leicester Alliance was officially formed after the subjugation of<br> | |||
hostile nobles and the removal of all opposing forces in the regions<br> | |||
The | of Faerghus. An influential figure from the outset, Duke Riegan was<br> | ||
inarguably the heart of the newly formed Alliance. | |||
The | - Imperial Year 961: The Almyran Invasion -<br> | ||
The great eastern nation of Almyra crossed through Fódlan's Throat and<br> | |||
invaded Alliance territory. The Empire dispatched troops in order to<br> | |||
help conquer this threat, and the attackers were just barely driven off. | |||
- Imperial Year 1101: The Construction of Fódlan's Locket -<br> | |||
To defend against future Almyran invasions, the Alliance, the Kingdom,<br> | |||
and the Empire joined their efforts and resources to construct the<br> | |||
indomitable fort known as Fódlan's Locket. | |||
</blockquote> | |||
|} | |||
====Register of Empire Nobles, Part I==== | |||
{|class="mw-collapsible mw-collapsed" | |||
| | |||
|- | |||
| | |||
<blockquote> | |||
A register of prominent noble houses of the Adrestian Empire.<br> | |||
This document is expressly for official use by the Church of Seiros.<br> | |||
Students are forbidden to remove or peruse this documentation.<br> | |||
1179 edition. | |||
House Hresvelg<br> | |||
The most distinguished noble house of the Empire, tracing its roots all<br> | |||
the way back to Great Emperor Wilhelm. It has been the governing<br> | |||
house of the Empire for 1,100 years. In addition to the first emperor,<br> | |||
its lineage is also traced back to Saint Seiros herself, which is why<br> | |||
generations of emperors are believed to bear the Crest of Seiros. | |||
House Hresvelg resides in Enbarr, the Imperial Capital, claiming all of<br> | |||
the surrounding territory as its domain. It boasted supreme authority<br> | |||
both within the Empire and without until the Insurrection of the Seven<br> | |||
in 1171, in which much of its power was stripped away by the nobility.<br> | |||
In recent years, a series of misfortunes has plagued this storied house,<br> | |||
and some believe dark clouds hover over the future of the Hresvelg reign. | |||
House Aegir<br> | |||
A house of dukes possessing great power within the Empire, second only<br> | |||
to House Hresvelg. The head of the house came to occupy the post of<br> | |||
prime minister, rendering the title a hereditary one thereafter.<br> | |||
House Aegir led the Insurrection of the Seven and, in many ways,<br> | |||
holds the true power governing the Empire. | |||
House Vestra<br> | |||
A house of marquises without a domain, existing in the shadow of House<br> | |||
Hresvelg. In addition to managing the darker tasks of the Empire, it is<br> | |||
responsible for the emperor's periphery affairs, including coordinating<br> | |||
things such as ceremonies and rituals, Imperial consorts, and the Imperial<br> | |||
Guard. House Vestra was allied with House Aegir in the Insurrection. | |||
House Hevring<br> | |||
A house of counts that has inherited rule over the Empire's domestic<br> | |||
affairs, particularly those relating to administration, finance, and the<br> | |||
judiciary. It frequently clashes with the Minister of Military Affairs<br> | |||
over these matters. Much of its territory lies in the Oghma Mountains,<br> | |||
and as such, it enjoys the fruits of a lucrative mining industry. | |||
House Bergliez<br> | |||
A house of counts that has inherited rule over the Empire's Ministry of<br> | |||
Military Affairs. It commands all of the armies that do not directly belong<br> | |||
to the emperor. During times of war, the head of the house becomes the<br> | |||
Imperial army's commander-in-chief. Their territory encompasses most<br> | |||
of the Empire's main breadbasket, Gronder Field. | |||
House Varley<br> | |||
A house of counts that has inherited rule over the Empire's Ministry of<br> | |||
Religion, whose main responsibility is to maintain amiable relations with<br> | |||
the Church of Seiros. However, due to the estrangement of the church<br> | |||
from the Empire in recent years, it is now more involved with the<br> | |||
judiciary, causing political strife within the Ministry of the Interior. | |||
</blockquote> | |||
|} | |||
====Register of Empire Nobles, Part II==== | |||
{|class="mw-collapsible mw-collapsed" | |||
| | |||
|- | |||
| | |||
<blockquote> | |||
A register of prominent noble houses of the Adrestian Empire.<br> | |||
This document is expressly for official use by the Church of Seiros.<br> | |||
Students are forbidden to remove or peruse this documentation.<br> | |||
1179 edition. | |||
| | |||
| | House Gerth<br> | ||
A house of dukes that has inherited rule over the Empire's Ministry of<br> | |||
the Exterior. Diplomacy, foreign relations, and relations between various<br> | |||
provinces and the capital fall under its purview. It worked hard to secure<br> | |||
the ceasefires that ended both the Brigid and Dagda campaigns. Though<br> | |||
complicit in the Insurrection, it remains distant from associated houses. | |||
House Arundel<br> | |||
Formerly a minor noble house of the Empire. As head of the house,<br> | |||
when Volkhard's younger sister became betrothed to Emperor Ionius IX,<br> | |||
< | Volkhard was granted the title of Lord Arundel. Having worked closely<br> | ||
with House Aegir, House Arundel is seen as one of the chief instigators<br> | |||
of the Insurrection of the Seven. | |||
House Hrym<br> | |||
A house of Imperial viscounts. Resisting Emperor Ionius IX's policy<br> | |||
of power centralization, it set out to join the Alliance and secure<br> | |||
independence from the Empire, but was unable to overcome the<br> | |||
Imperial army's intervention. In the aftermath, the house's main genetic<br> | |||
line was wiped out. Its current head of house is an adoptee. | |||
House Nuvelle<br> | |||
A house of Imperial viscounts with territory on the western coast of the<br> | |||
Empire, centered around its namesake harbor city of Nuvelle. The house<br> | |||
flourished thanks to commerce with Dagda, Albinea, Brigid, and other<br> | |||
territories. Even still, it fell to ruin in 1175 after permitting the combined<br> | |||
invading forces of the Dagda and Brigid armies to make landfall. | |||
House Ochs<br> | |||
A house of Imperial barons. Its territory occupies the northern half of the<br> | |||
western peninsula known as Fódlan's Fangs. The head of the house was<br> | |||
lost to the Dagda and Brigid War. | |||
House Bartels<br> | |||
A house of Imperial barons. Highly ambitious, it sought out and acquired<br> | |||
several Crests for its bloodline. In 1176, many members, including the<br> | |||
head of the house, died under unexplained circumstances. The deed was<br> | |||
attributed to the heir, Emile. As his whereabouts are unknown,<br> | |||
leadership of the house fell to a distant relative. | |||
</blockquote> | |||
|} | |||
====Register of Alliance Nobles==== | |||
{|class="mw-collapsible mw-collapsed" | |||
| | |||
|- | |||
| | |||
<blockquote> | |||
A register of prominent noble houses of the Leicester Alliance.<br> | |||
This document is expressly for official use by the Church of Seiros.<br> | |||
Students are forbidden to remove or peruse this documentation.<br> | |||
1179 edition. | |||
House Riegan<br> | |||
The leading house of the Leicester Alliance and descendants of one of the<br> | |||
10 Elites. In the Crescent Moon War of 881, they spearheaded the move<br> | |||
toward independence from the Kingdom, as well as the establishment of a<br> | |||
republic by its former vassals. They have held the esteemed responsibility<br> | |||
of leading the Alliance roundtable ever since. | |||
The position of this house of dukes relies on the noble rank bestowed<br> | |||
upon it by the Kingdom, well before the Alliance's founding. The current<br> | |||
Duke Riegan's heir, Godfrey, died in an accident while on duty. While he<br> | |||
did leave behind a surviving daughter, she is presently unaccounted for. | |||
House Goneril<br> | |||
Descendants of one of the 10 Elites, it is a military house that is chiefly<br> | |||
tasked with military strikes and defense against the Almyran army, mostly<br> | |||
due to its territory's position in the east. Lord Holst, the next head of<br> | |||
the house, is widely renowned as the Alliance's bravest general. | |||
House Ordelia<br> | |||
A house of counts with land in the east of Leicester territory. In 1167 it<br> | |||
was involved in House Hrym's rebellion, and the Empire retaliated by<br> | |||
repeatedly meddling in the house's internal affairs, leading to a sharp<br> | |||
decline in its noble standing. | |||
House Gloucester<br> | |||
Descendants of one of the 10 Elites, this house of counts hails from<br> | |||
southern Leicester territory. The current head of house is ambitious,<br> | |||
excels at public relations, and has an influential voice among the five<br> | |||
noble families with voting rights at the Leicester Alliance Roundtable,<br> | |||
second only to House Riegan. | |||
House Edmund<br> | |||
A house of margraves with land in the north of Leicester territory.<br> | |||
Its beneficial trade policies, emphasizing fair use of its personal harbors,<br> | |||
have awarded the house a great deal of clout, to such a degree that it<br> | |||
was eventually accepted into the ranks of the Five Great Lords of the<br> | |||
Alliance. Their current head of house is a renowned orator. | |||
House Daphnel<br> | |||
Descendants of one of the 10 Elites and formerly among the Five Great<br> | |||
Lords of the Alliance, it lost much power due to internal discord. For the<br> | |||
last several generations, no head of House Daphnel has born a Crest.<br> | |||
In spite of this, it still maintains its status as a noble family. | |||
</blockquote> | |||
|} | |||
====Register of Kingdom Nobles==== | |||
{|class="mw-collapsible mw-collapsed" | |||
| | |||
|- | |||
| | |||
<blockquote> | |||
A register of prominent noble houses of the Holy Kingdom of Faerghus.<br> | |||
This document is expressly for official use by the Church of Seiros.<br> | |||
Students are forbidden to remove or peruse this documentation.<br> | |||
1179 edition. | |||
House Blaiddyd<br> | |||
This house claims Blaiddyd of the 10 Elites as its ancestor. It has ruled<br> | |||
the Kingdom for over 400 years, ever since Loog, the King of Lions,<br> | |||
claimed victory in the War of the Eagle and Lion in 751. This secured<br> | |||
the Kingdom's independence from the Adrestian Empire, after which<br> | |||
Loog was crowned as its inaugural king by the Church of Seiros. | |||
House Blaiddyd resides in Fhirdiad, the Kingdom Capital, claiming all of<br> | |||
the surrounding territory as its domain and many of the fiefdoms in the<br> | |||
north of Fódlan as its vassals. With the passing of King Lambert in 1176,<br> | |||
his older brother, Grand Duke Rufus of Itha, assumed the burden of<br> | |||
ruling the Kingdom in the young crown prince's stead. Even still,<br> | |||
strife and disorder continue to plague the land. | |||
House Fraldarius<br> | |||
This house of dukes claims Fraldarius of the 10 Elites as its ancestor.<br> | |||
It is one of the most ancient houses on record, even amongst Kingdom<br> | |||
nobility. It is said that Kyphon, the sworn friend of Loog, the King<br> | |||
of Lions, was also related to the Hero Fraldarius. | |||
House Gautier<br> | |||
This house of margraves claims Gautier of the 10 Elites as its ancestor.<br> | |||
Its territory lies in the northernmost reaches of the Kingdom. As such,<br> | |||
it has safeguarded Kingdom territory against incursions by the people<br> | |||
of the Sreng region for over 200 years. | |||
House Charon<br> | |||
This house of counts claims Charon of the 10 Elites as its ancestor.<br> | |||
Tasked with negotiating between the resistance armies and the Church<br> | |||
of Seiros during the War of the Eagle and Lion, the head of House<br> | |||
Charon continues the tradition of a ceremonial competition within<br> | |||
the Kingdom. | |||
House Galatea<br> | |||
When House Daphnel, once a cornerstone of the Leicester Alliance,<br> | |||
was divided in two over an inheritance feud, half of them defected to<br> | |||
Faerghus and established House Galatea, which was granted the noble<br> | |||
title of count. Much of its territory consists of a frigid wasteland where<br> | |||
a severe famine occurred in the early 1170s. | |||
House Rowe<br> | |||
A noble house that once held territory in the northern Empire. When the<br> | |||
Fortress City of Arianrhod was constructed within its domain, it revolted<br> | |||
against the Empire and pledged the entirety of its territory, including<br> | |||
Arianrhod, to the Holy Kingdom of Faerghus. For this contribution,<br> | |||
it was awarded the noble title of count. | |||
House Kleiman<br> | |||
This house originally held no more than a lordship over a single castle in<br> | |||
the west of the Kingdom, but it was awarded the noble title of viscount<br> | |||
for its great success in the subjugation of the Duscur region in 1176.<br> | |||
Afterwards, it was granted the Duscur region as its feudal estate. | |||
</blockquote> | |||
|} | |||
====Traveler's Journal, Issue 1==== | |||
{|class="mw-collapsible mw-collapsed" | |||
| | |||
|- | |||
| | |||
<blockquote> | |||
A record consisting largely of the world outside of Fódlan.<br> | |||
The author's identity is unknown, but they have clearly<br> | |||
experienced these places firsthand. | |||
Almyra<br> | |||
A great kingdom to the east of Fódlan. Its territory borders that of the<br> | |||
Leicester Alliance, with the precipitous mountain range known as<br> | |||
Fódlan's Throat acting as the dividing line. Its people maintain a strong<br> | |||
legacy of horsemanship and relish in the thrill of battle. This vast<br> | |||
kingdom is rich in fertile prairies, deserts, and mountain ranges. | |||
Albinea<br> | |||
A continent to the northwest of Fódlan. Its frigid climate is home to<br> | |||
numerous rare and valuable species of flora and fauna. However,<br> | |||
the human population there is extremely small due to the intense cold<br> | |||
and the frozen earth, which is unsuitable for growing grains or other<br> | |||
food crops. | |||
Morfis<br> | |||
Morfis is the name of a metropolis of magic to the southeast of Fódlan,<br> | |||
as well as the boundless desert that surrounds it. In the distant past, it was<br> | |||
called the City of Illusion. Thanks to an intricate web of trading routes,<br> | |||
rumors of its profound and mysterious magic continue to spread. | |||
Dagda<br> | |||
A continent to the southwest of Fódlan. Due to its extreme distance from<br> | |||
Fódlan, rumors of this relatively unknown world abound. Some claim<br> | |||
it's a tropical rain forest, while others insist it's merely a giant, frozen<br> | |||
plateau. In truth, this vast continent stretches far into the north and south<br> | |||
and supports a wide variety of terrain and climates. | |||
</blockquote> | |||
|} | |||
====Traveler's Journal, Issue 2==== | |||
{|class="mw-collapsible mw-collapsed" | |||
| | |||
|- | |||
| | |||
<blockquote> | |||
A record consisting largely of the world outside of Fódlan.<br> | |||
The author's identity is unknown, but they have clearly<br> | |||
experienced these places firsthand. | |||
Brigid<br> | |||
An archipelago nested between Fódlan and Dagda. It is a land of plenty<br> | |||
that is often heralded as the perfect union of the gentle sea and nature's<br> | |||
bounty. Both Fódlan and Dagda have long vied to claim this territory<br> | |||
as their own. | |||
Sreng<br> | |||
Sreng was once the name of an enormous peninsula to the north of<br> | |||
Fódlan. Today, only the northern half has kept the moniker, while the<br> | |||
southern half now falls under the dominion of the Holy Kingdom of<br> | |||
Faerghus. Several warlike clans call this great wasteland their home.<br> | |||
Certain areas of this region are comprised of rocky desert. | |||
Duscur<br> | |||
A peninsula to the north of Fódlan and the west of Sreng. The people<br> | |||
who once inhabited this area were decimated, and it now falls under the<br> | |||
dominion of the Holy Kingdom of Faerghus. The land boasts nothing<br> | |||
noteworthy to make it a desirable travel destination, but rumors of<br> | |||
valuable minerals waiting to be unearthed abound. | |||
Oghma Mountains<br> | |||
An enormous mountain range somewhat south of central Fódlan.<br> | |||
To the west, it forms the border between the Empire and the Kingdom,<br> | |||
surrounding Garreg Mach and cutting across Empire territory. It is home<br> | |||
to many animals and plants that cannot be found elsewhere, as well as a<br> | |||
plethora of valuable mineral deposits. | |||
</blockquote> | |||
|} | |||
===amiibo Gazebo=== | |||
[[File:Ss fe16 amiibo gazebo.jpg|thumb|The amiibo Gazebo at the monastery.]] | |||
The '''amiibo Gazebo''' allows the player to utilize their [[amiibo]]. Scanning any amiibo once will cause a variety of items to spawn around the gazebo, which refresh every week. Scanning any ''Fire Emblem'' character amiibo will unlock an exclusive music track to play during auxiliary battles, detailed below. Additionally, this will unlock a unique area, the [[Holy Tomb]], which can be accessed during New Game +. Rarer items will spawn there, also refreshing every week. If spoken to Sothis (or after Chapter 10, the opposing Byleth), Byleth will be granted the [[Sothis Shield]], a team-wide [[Ward]] ability that can be used once per battle. | |||
{| class="basic" style="padding: 3px; border-spacing: 4px; border-width: 2px" | |||
! style="border-top-left-radius: 10px" | Character | |||
! style="border-top-right-radius: 10px" | Song | |||
|- | |||
| [[Marth]] | |||
| The Time to Act | |||
|- | |||
| [[Tiki]] | |||
| The World Tree | |||
|- | |||
| [[Alm]] | |||
| March to Deliverance | |||
|- | |||
| [[Celica]] | |||
| With Mila's Divine Protection | |||
|- | |||
| [[Roy]] | |||
| Beneath a New Light (Roy's Courage) | |||
|- | |||
| [[Ike]] | |||
| Eternal Bond | |||
|- | |||
| [[Chrom]] | |||
| Destiny (Ablaze) | |||
|- | |||
| [[Robin]] | |||
| Id (Purpose) | |||
|- | |||
| [[Lucina]] | |||
| Conquest (Ablaze) | |||
|- | |||
| [[Corrin]] (male) | |||
| Alight (Storm) | |||
|- | |||
| style="border-bottom-left-radius: 10px" | [[Corrin]] (female) | |||
| style="border-bottom-right-radius: 10px" | A Dark Fall (Fire) | |||
|} | |||
===Abyss=== | |||
{{main|Abyss}} | |||
The Abyss has been introduced as a part of the fourth and final wave of the [[Downloadable content in Fire Emblem: Three Houses|Expansion Pass]]. It can be accessed after [[The Fourth House|Chapter 1]] of the Cindered Shadows side story has been completed. To access Abyss, the player has to talk to the Shifty Merchant who is found next to Byleth's Personal Quarters. The player can alternatively use Fast Travel to access Abyss. Abyss is a seperate area from rest of the monastery, and during the main story, allows the player to access additional features such ass the [[Abyss#Wayseer|Wayseer]] or the [[Abyss#Scrap Heap|Scrap Heap]]. To return to the monastery, the player can either use Fast Travel or go to the south western corridor in Abyss. | |||
The facilities of Abyss do not consume the player's activity points, but many of them use their [[renown]] as a resource. Most of them additionally need to be unlocked by spending renown at the [[Abyss#Influencer|Influencer]]. | |||
In the Cindered Shadows side story, Abyss takes the monastery's place as the primary hub for the campaign. During the side story, the marketplace can be accessed from the Abyss, allowing the player to purchase [[weapon]]s, [[item]]s, and [[battalion]]s, and to use the [[forge]]. During the main story, all of these facilities are unavailable. | |||
===Holy Tomb=== | |||
The Holy Tomb was the place where [[Sothis]] rested after using up her power to restore [[Fódlan]]. After [[Byleth]] was granted Sothis's power, [[Rhea]] attempted to perform a ritual by letting them sit on Sothis's throne. During this ceremony, the [[Flame Emperor]] attacked and was ultimately revealed to be [[Edelgard]]. | |||
The coffins at the Holy Tomb house various crest stones. They are guarded by [[Altered Golem]]s and Phantoms. This defence mechanism is disabled during the ceremony during [[Throne of Knowledge|Chapter 11]], but is re-enabled when Byleth and their army attempt to recover the [[Seiros Shield]] which [[Rhea]] hid in the Holy Tomb before the battle of Garreg Mach during all non-Crimson Flower routes. | |||
Emblem Byleth's [[paralogue]] in {{FE17}}, [[The Instructor]], is modelled after [[Throne of Knowledge|Chapter 11]] of {{title|Three Houses}}, and therefore takes place at the holy tomb. The coffins where the crest stones are stored are replaced by Crystals that the player can protect for additional rewards. | |||
===Holy Mausoleum=== | |||
The holy tomb is said to be the resting place of [[Saint Seiros]]. The [[Sword of the Creator]] was stored in her coffin until the Western Church invaded the monastery and the Sword of the Creator was entrusted to [[Byleth]]. The Holy Tomb is also where [[Aelfric]] attempted to perform the Rite of Rising to revive [[Sitri]]. | |||
==Other appearances== | |||
==={{FE17}}=== | |||
{{main|The Instructor}} | |||
The Holy Mausoleum appears as the location for Emblem Byleth's paralogue. The map is based on the map for Chapter 11 in {{title|Three Houses}}, with the coffins where the Crest Stones were stored being replaced by crystals that the enemies are trying to destroy. Emblem Byleth appears as the boss of this chapter. | |||
The monastery and the Officer's Academy are also mentioned in some of the bond conversations for Emblems Byleth, Edelgard, Dimitri, and Claude. | |||
===''Fire Emblem Warriors: Three Hopes''=== | |||
As ''Three Hopes'' takes place in the same universe as ''Three Houses'', Garreg Mach Monastery is relevant to its plot. Like in Three Houses, the game's main character, Shez, is taken to the monastery and asked to join a class. However, due to the plot's structure, the Base Camp fills in the monastery's role as the game's central hub. However, Garreg Mach Monastery appears as both a location during certain cutscenes and as the battlefield for numerous story missions. | |||
The following story missions take place in Garreg Mach Monastery: | |||
* [[The Struggle Commences]] (Chapter 4 {{Scarlet Blaze}}) | |||
* [[A Path Forward]] (Final Chapter {{Scarlet Blaze}}) | |||
* [[The End of Tragedy]] (Final Chapter {{Azure Gleam}}) | |||
* [[A Symbol of the Past]] (Chapter 14 {{Golden Wildfire}}) | |||
All of these missions take place at the outskirts of the monastery, but the endgame chapters of the Scarlet Blaze and Azure Gleam routes also include a section within the monastery. This section consists of the main hall and the cathedral, though all desks and benches are removed to make room for the battle. | |||
==={{SSBU}}=== | |||
{{SmashWiki|Garreg Mach Monastery}} | |||
Garreg Mach Monastery appears as a stage in {{SSBU}}, released alongside Byleth on January 28th, 2020. The stage cycles through locations; transitions between locations have a mystical blue platform that sends the fighters upward, showing a view of the landscape, before plummeting back into the next area. Each location features different characters in the background; the locations and characters are, in the order in which the stage cycles: | |||
#The marketplace, featuring Dimitri, Dedue, [[Ingrid]], and the [[Gatekeeper]]. | |||
#The reception hall, featuring Edelgard, [[Dorothea]], and [[Petra]]. | |||
#The bridge, featuring Claude, Hilda, and [[Lorenz (Three Houses)|Lorenz]]. | |||
#The cathedral, featuring Rhea, Seteth, and Flayn. | |||
==Etymology and other languages== | |||
{{Names | |||
|eng-name=Garreg Mach Monastery | |||
|jpn-name={{h|ガルグ=マク大修道院|Garugu Maku dai Shūdō-in}} | |||
|jpn-mean=Officially romanized as '''Garreg Mach Monastery'''. The version of the world map appearing in E3 2018 materials instead romanized the location's name as '''Garg Mac'''. | |||
|span-name=Monasterio de Garreg Mach | |||
|span-mean=Garreg Mach Monastery | |||
|fren-name=Monastère de Garreg Mach | |||
|fren-mean=Garreg Mach Monastery | |||
|ger-name=Kloster von Garreg Mach | |||
|ger-mean=Garreg Mach Monastery | |||
|ital-name=Monastero del Garreg Mach | |||
|ital-mean=Garreg Mach Monastery | |||
|dut-name=Garreg Mach-klooster | |||
|dut-mean=Garreg Mach monastery; used in {{SSBU}}, as ''Fire Emblem: Three Houses'' has not been released in Dutch. | |||
|por-name=Monastério Garreg Mach | |||
|por-mean=Garreg Mach monastery; used in ''Heroes''.<ref>{{cite|{{lang|pt|Dorothea Arnault, às ordens. Sou membro das Águias negras no monastério Garreg Mach.}}|{{FEH unit|Dorothea|Solar Songstress}} when she is summoned (Portuguese)|Heroes}}</ref> | |||
|rus-name={{h|Монастырь Гаррег Мах|Monastyr' Garreg Makh}} | |||
|rus-mean=Garreg Mach monastery; used in ''Super Smash Bros. Ultimate'', as ''Fire Emblem: Three Houses'' has not been released in Russian. | |||
|kor-name={{h|가르그 마크 대수도원|Gareugeu Makeu Daesudowon}} | |||
|kor-mean=Garg Mac Monstery | |||
|ch-simp-name={{h|加尔古·玛库大修道院|Jiāěrgǔ · Mǎkù Dàxiūdàoyuàn}} | |||
|ch-simp-mean=Garg Mac Monastery | |||
|ch-trad-name={{h|加爾古‧瑪庫大修道院|Jiāěrgǔ ‧ Mǎkù Dàxiūdàoyuàn}} | |||
|ch-trad-mean=Garg Mac Monastery | |||
}} | |||
==Gallery== | |||
<gallery> | |||
FETH Garreg Mach Monastery.jpg|Artwork of the Monastery. | |||
FETH limited edition box artwork.png|Artwork of the Monastery from the ''Three Houses'' Limited Edition. | |||
FETH church.jpg|Artwork of the interior cathedral. | |||
</gallery> | |||
{{refbar}} | |||
==See also== | |||
{{div col}} | |||
* [[Abyss]] | |||
* [[Base]] | |||
*[[Base Camp]] | |||
* [[Barracks]] | |||
* [[Castle]] | * [[Castle]] | ||
* [[Everyone's Conditions]] | * [[Everyone's Conditions]] | ||
* [[My Castle]] | * [[My Castle]] | ||
* [[ | * [[Base Camp]] | ||
* [[Somniel]] | * [[Somniel]] | ||
{{div col end}} | {{div col end}} | ||
| Line 4,583: | Line 5,479: | ||
{{NavMech}} | {{NavMech}} | ||
{{Nav16}} | {{Nav16}} | ||
{{NavWA2}} | |||
[[Category:Locations in Fire Emblem: Three Houses]] | [[Category:Locations in Fire Emblem: Three Houses]] | ||
[[Category:Locations in Fire Emblem Warriors: Three Hopes]] | |||
[[Category:Fire Emblem: Three Houses]] | [[Category:Fire Emblem: Three Houses]] | ||
[[Category:Fire Emblem Warriors: Three Hopes]] | |||
Revision as of 13:22, 12 May 2024
| ||||
|

The Garreg Mach Monastery (pronounced /ˌgɛɹɛg ˈmɑk/[key], Japanese: ガルグ=マク大修道院 Garreg Mach Monastery) is a large structure situated in the mountain range at the center of Fódlan. It houses a cathedral dedicated to the Church of Seiros and facilities for the Officers Academy. At the Officers Academy there are three houses, the Black Eagles, Blue Lions, and Golden Deer. Students from the Adrestian Empire, the Holy Kingdom of Faerghus, and the Leicester Alliance attend the academy. It also acts as the hub for Fire Emblem: Three Houses.
History
Prior to the games' events
Garreg Mach Monastery was established on the 25th of Ethereal Moon in the year 185. In celebration of the monastery's completion, Saint Seiros held a ritual in an attempt to resurrect Sothis. This ritual would be known as the "Rite of Rising", and would involve the Four Apostles filling their blood—and thus their crests—into the Chalice of Beginnings. The ritual failed, and the four apostles left the monastery.
The monastery would then become the base of the Central Church and Fódlan's primary religious institution. Politically, it is neutral territory in the center of Fódlan. Somewhere around 980, following an invasion by the forces of Almyra, the officer's academy would be founded at Garreg Mach Monastery in an effort to train Fódlan's youth to resist future invasions.
Fire Emblem: Three Houses
Academy Phase
In the year 1180, when Three Houses takes place, it is the residence of archbishop Rhea. Byleth and Jeralt are brought to the monastery after they are found by Alois and Byleth is offered a teaching position at the officer's academy. During Chapter 4, the monastery is raided by soldiers of the Western Church, who Byleth and their class are encountered by at the Holy Mausoleum. After the battle, their leader finds the Sword of the Creator in the coffin dedicated to Saint Seiros. After his defeat, Byleth is given the sword.
Two months later, during Chapter 6, Flayn is kidnapped. While searching for her, Byleth and their class find a hidden passage in Jeritza's room that reveals an underground room complex. There, they find the Death Knight as well as Flayn and Monica. They manage to drive off the Death Knight, but due to those events, Seteth considers leaving the monastery as he no longer thinks it is safe for him and his sister to stay there. Flayn and Byleth convince him that the knights and professors at the monastery are the safest environment for the two, and Flayn joins Byleth's class. For a short time, life at the monastery returns to normal, with the traditional Battle of the Eagle and Lion and the White Heron Cup alongside as well as a big ball being held as usual.
During an attack by Demonic Beasts on the monastery, Monica kills Jeralt from behind. When giving chase to his murderer, Byleth is seperated from their class as Solon sends them off to Zahras. To escape, Sothis grants Byleth her power, changing their hair and eye colour and returning the true power of the Sword of the Creator in the process. Because of this, Rhea wishes for Byleth to sit on Sothis's throne at the Holy Mausoleum to receive a revelation from the goddess.
As they try to hold ceremony, Rhea, Byleth, and their class are attacked by the imperial army led by the Flame Emperor and Metodey who attempt to steal as many Crest Stones as possible from the Holy Mausoleum. Their attempt fails, but during the battle (or if the Black Eagles were chosen, before the battle), the Flame Emperor's identity is revealed to be Edelgard. As her identity is no longer a secret, she now openly declares war on the Church of Seiros and leads an attack on the monastery in the following month. Her attack succeeds, and the monastery is taken over by Adrestia.
Silver Snow
Five years later, the Black Eagles students meet at the monastery due to a promise they made to Byleth. Byleth, who only just awakened after five years of unconsciousness, runs into Edelgard first. Edelgard attempts to persuade Byleth to join her cause once again, but they refuse. They briefly fight each other before Edelgard leaves to return to the Empire. Seteth, who returned to the monastery along with the Knights of Seiros after they failed to find Rhea, finds Byleth at the monastery. Together, they decide to fight back against the bandits who have been using the monastery as a hideout. During the battle, the remaining Black Eagles students – with the exception of Hubert – also arrive and assist them in driving back the bandits.
Led by Randolph, the imperial army attempts to take back the monastery, but when their attempt fails and Randolph dies, they are forced to give up the monastery. In the following months, the monastery becomes the newly founded Resistance army's base of operations and the students make an attempt to do some repair work at the monastery.
After the war with the Empire has ended and those who slither in the dark are defeated, Rhea can no longer control her anger and transforms into the Immaculate One. The monastery becomes the battlefield for the fight against her and the cardinals of the Church of Seiros who have accepted blood from Rhea. After she is defeated, she lands at the cathedral and transforms back into her human form.
Azure Moon
Like the Black Eagles in their route, the Blue Lions students meet at the monastery due to a promise they made to Byleth. Byleth, who only just awakened after five years of unconsciousness, meets Dimitri at the monastery. Dimitri, now possessed by his hatred, immediately decides to hunt down the Bandits who have used the mastery as a hideout. Byleth accompanies him. During the battle, the remaining Blue Lions students – with the exception of Dedue – also arrive and assist them in driving back the bandits.
Led by Randolph, the imperial army attempts to take back the monastery, but when their attempt fails and Randolph is killed by Byleth, they are forced to give up the monastery. In the following months, the monastery becomes the Kingdom army's new base of operations and the students make an attempt to do some repair work at the monastery.
Verdant Wind
Like the other two houses, the Golden Deer students meet at the monastery due to a promise they made to Byleth. Byleth, who only just awakened after five years of unconsciousness, meets Claude at the monastery. Claude then decides to pass the time by hunting down the bandits who have been using the monastery as a hideout for the past five years. During the following battle, the remaining Golden Deer students arrive at the monastery and help Claude and Byleth to defeat Pallardó and his men. After the battle, the Knights of Seiros also arrive at the monastery after searching for the missing Archbishop Rhea for the past five years. Together, the Alliance army and the Knights of Seiros decide to resist against the monastery under the banner of a new resistance army, and choose to use the monastery as their base of operations due to it being neutral ground while Leicester is split between those who support the Empire and those who want to resist against it.
Led by Randolph, the imperial army attempts to take back the monastery, but when their attempt fails and Randolph dies, they are forced to give up the monastery. In the following months, the monastery remains the Resistance army's base of operations and the students make an attempt to do some repair work at the monastery.
Crimson Flower
Unlike in the other routes, in the Crimson Flower route, the Imperial army does not abandon Garreg Mach Monastery. Instead, Edelgard and her former classmates – who are now united under the banner of the Black Eagle Strike Force – are at the monastery when Byleth reappears after going missing during the initial attack on the monastery five years prior. Following Byleth's reappearance, Adrestia makes progress towards Leicester, but while they are busy with subduing the Alliance, the Church of Seiros – who have fled to Faerghus – is preparing an attack on the monastery. Byleth, Edelgard, and their army return to the monastery in time, but they now have to defend it against a force led by Seteth. In the following battle, depending on player actions, Seteth and Flayn are either killed or forced to retreat and go into hiding. While Byleth and their army are fighting Seteth's forces, the rest of the Imperial army is defending the monastery against a force led by Rhea and Catherine. This force is also driven back, but notable commanders, including Randolph and Ladislava, fall in battle. The monastery remains in the possession of the Imperial army for the remainder of the route.
Cindered Shadows
In the Cindered Shadows side story, it is revealed that a secret underground city exists below the monastery. This city, known as Abyss, is a refuge for those who have been shunned on the surface and is also home to an unofficial fourth house, known as the Ashen Wolves house. Byleth and their students decide to help the Ashen Wolves to defend against those who seek to destroy Abyss, and end up finding the Chalice of Beginnings hidden beneath the monastery. After they escape from its guardians, they find that Aelfric—the cardinal who has been responsible for Abyss—has been abducted. Byleth, the Ashen Wolves, and the remaining students attempt to rescue him, but after they defeat the bandits, Yuri steals the chalice from Byleth. Aelfric then reveals that he wishes to obtain the chalice as well as the blood of the Four Apostles to perform a ritual. He attempts to perform the ritual at the Holy Tomb, but it fails and he transforms into an Umbral Beast. Byleth and their students end up fighting the Umbral Beast at the cathedral, and after they succeed in taking it down, the Ashen Wolves house is officially disbanded by Rhea. However, she decides to keep Abyss as a refuge for those in need.
Fire Emblem Warriors: Three Hopes
Similar to Three Houses, in Fire Emblem Warriors: Three Hopes, Shez, the game's protagonist, is taken to the monastery after they assisted Edelgard, Dimitri and Claude to defend themselves against Kostas and his bandits. Shez is then allowed to join one of the three houses as a student, with Jeritza becoming their new professor. However, due to the ongoing conflicts in all three nations of Fódlan, Rhea decides to close the Officer's Academy, allowing the students to return to their homes.
Scarlet Blaze
Two years later, Edelgard declares war on the Church of Seiros. The first step in this war is an attack on the monastery. The attack succeeds, and Rhea, Seteth, Flayn, and the Knights of Seiros are forced to abandon the monastery and escape to the Faerghus. Garreg Mach Monastery then becomes the new residence for Count Varley, the bishop of the newly restored Southern Church. The monastery remains in the posession of the Imperial army for the rest of the war, and is sometimes used as a base for its military forces. However, the Central Church launches multiple attempts to retake the monastery. During the final chapter, the monastery is besieged by both the Central Church's forces and those who slither in the dark and the Imperial army has to fight against both armies at once to maintain their control over the monastery. It is possible for Count Varley to die during this battle, but if this happens, Hubert simply installs a new bishop in his place. At the end of the battle, Shez, Edelgard and their allies fight against both Rhea and Thales, and, at the end of this battle, claim victory over both. Rhea and Thales die as the bridge that connects the Cathedral to the rest of the monastery collapses beneath them. After this battle, the monastery remains under control of Adrestia.
Azure Gleam
Edelgard declares war on the Church of Seiros and attacks the monastery, forcing the Central Church to abandon it and escape to the Faerghus. Adrestia then installs the bishop of the southern church, Count Varley, in Garreg Mach Monastery. The monastery remains in possession of Adrestia for most of the war until the Kingdom, the Church of Seiros, and Leicester join forces against the Empire. In their final mission, they manage to kill Count Varley and Thales—who has seized control over the Empire after Edelgard's defeat at Arianrhod—and take back the monastery.
Golden Wildfire
Due to houses Gloucester and Phlegethon's support, Adrestia marches toward Garreg Mach Monastery and seizes of it. After taking the monastery, they continue their conquest into Leicester. The monastery remains in possession of Adrestia. After the Alliance and the Empire form a pact, the Faerghus and the Central Church attempt to take back the monastery. The Alliance forces aid Edelgard and her forces to defend against the attackers, forcing both Dimitri and Rhea to retreat. Dimitri retreats to Fhirdiad, while Rhea attempts to make a last attempt to defeat the Alliance army at Tailtean Plains. The monastery remains under the control of Adrestia.
Map

|
Mechanics
In Three Houses, Garreg Mach Monastery acts as the game's hub. It can be explored freely, similar to later locations like the Base Camp from Three Hopes or the Somniel from Fire Emblem Engage. As game's structure is built around the monastery, it features many different mechanics.
Lessons
- Main article:
Lesson
Lessons take place on most Mondays. They allow the player to instruct their units in various different skills, including weapons, movement types, and authority. During Part I, lessons take place in the respective class's classroom, but during Part II, they will instead take place in the Cardinal's Room on the first floor of the monastery.
Exams
On Byleth's free days or on a mission day, they can send their unit to take a class exam. If a unit passes that exam, they will unlock a new class. Each unit can only take one exam per day, regardless of whether they succeeded or not.
Calendar
- Main article:
Calendar
The Calendar dictates life at the monastery. On certain days, special events – such as a character's birthday take place. On most Mondays, Byleth will be able to teach their students. On most Sundays, Byleth will have a free day and the player will be presented four choices:
- Explore
- Fight
- Seminar
- Rest
Choosing "Fight" will allow the player to attempt auxiliary battles and paralogues, while "Rest" will slightly restore all students' motivation as well as 5 points of durability on the Sword of the Creator. The Mechanics of "Explore" and "Seminar" are covered on this page.
Exploring
Choosing the "Explore" option on a free day will allow the player to freely explore the monastery. Not all parts of the monastery are available to the player initially, but at the start of Part II, the player will be able to visit all areas in a single exploration session. Exploring allows the player to take quests, do Faculty Training or use one of the monastery's many facilities that are covered below.
Additionally, if Byleth has any support conversations available, they may run into that unit at the monastery. If they do so, they are given the ability to watch the conversation immediately. If the player chooses "No", they will not be able to watch that conversation during that exploration session, but the conversation can be watched like normal on any future date. The locations where a unit will request to have a support conversation are marked on the map with a blue speech bubble.
If Byleth has no Activity Points remaining and waits for ten minutes, the skybox will turn orange, representing a change of time. This does not have an impact on gameplay, and time will not progress any further.
Activity Points
Most activities at the monastery will consume Activity points. The player will start out each exploration session with their current maximum amount of Activity points, with no way to increase the amount mid-exploration. The amount of activity points the player has is determined by Byleth's professor level. If Byleth's professor level increases during an exploration session, their maximum activity points will increase, however, they will not gain any additional activity points for the current session.
The number of available activity points with each professor level is as listed below:
| Available activity points | |
|---|---|
| Professor level | Activity points |
| E | 1 |
| E+ | 2 |
| D | 3 |
| D+ | 4 |
| C | 5 |
| C+ | 6 |
| B | 7 |
| B+ | 8 |
| A | 9 |
| A+ | 10 |
The following faculties require activity points:
- Faculty Training/Peer Training
- Choir Practice
- Share a Meal
- Cooking Together
- Tournaments
Bulletin Board
Bulletin Boards are found at different places at the monastery. They will inform the player about ongoing events or about new monastery features such as whether the Western and Eastern Merchants are unlocked. They also inform the player about available quests at the monastery.
Interacting with units
If the player explores the monastery, they can find other units at the monastery. In addition to generic characters, in Part I, they will be able to talk to the students from all houses and to most of the Knights of Seiros, depending on chapter. During Part II, they will be limited to units from their own house as well as Anna. When interacting with characters, their dialogue will change between chapters, but not based on individual week days (with some exceptions such as the White Heron Cup. After this, they will be presented the following options (note that depending on the character, their recruitment status, and the player's game progress, not all options will be displayed at all times):
Gifts
- Main article:
Gift
The player can give certain items to other characters to increase support between that unit and Byleth. Each unit likes and dislikes specific gifts. If a unit especially likes a specific type of gift, the gained support points are doubled, while disliked gifts do not grant any support points. Gifts can be obtained from the travelling Merchants, from the Greenhouse, from certain quests, or from blue spots at the monastery. Notably, the Owl Feather is liked by every character in the game. The player cannot make gifts to units who are not recruitable into their army (e.g. they cannot make gifts to Edelgard unless they chose the Black Eagle House). However, although Rhea is not recruitable during any part of the game, the player can make gifts to her during Part I of any route.
Lost items
- Main article:
Lost items
Lost items are unlocked by completing the Lost? Found! quest. Starting from Chapter 3, each month, certain items will appear at certain spots at the monastery. The player can return them to their owner to increase the owner's support with Byleth as well as to raise their motivation if they are in Byleth's class. The player can offer any Lost item to any unit, and presenting a Lost item to the wrong character does not remove the item from the storehouse or reduce support with that character.
Lost items may be picked up and returned at any point during the game after their initial spawn, though to return an item during Part II, its owner needs to be recruited into the player's army. If the Black Eagles were chosen, Hilda's Lost items cannot be returned to her until Chapter 12 and can only be returned if Byleth has sided with the Church of Seiros. Her Lost items will spawn during the previous chapters, but cannot be returned until this point – or at all if the player has chosen to side with Edelgard.
By completing the Roster Retrieval DLC quest, the player will be shown the affiliation of the unit an item belongs to, making it easier to find out which item belongs to whom.
When the game initially released, lost items stopped spawning at the start of Part II, though all of Jeritza's lost items as well as a lost item belonging to Anna that appear during Part II were later added through updates.
Quests
- Main article:
List of quests in Fire Emblem: Three Houses
Sometimes, NPCs at the monastery will make specific requests. Usually, quests include obtaining an item and giving it to a certain unit. Depending on the quest, the player will be rewarded with items, gold, or renown. The completion of certain quests is also required to unlock some monastery facilities.
Tea Time
- Main article:
Tea Party
After completing the Tea for Two quest from Chapter 4 onward, the player can invite any unit from their house-or any unit they have achieved a C-level support with-to a tea party during exploration sessions in exchange for one Activity point. However, there is a chance that a character will reject the invitation, and the player may only attempt to invite a character to a tea party once per exploration session. Additionally, from this point onward, they will be granted the option to invite a character for tea time on their birthday.
At the start of each tea party, the player is prompted to select a tea from their inventory. They may serve any tea, but every character has their own favourites and will react positively if their favourite tea is served. Then, during the tea party, the player will be prompted to select one of three possible conversation topics they will be offered. Out of these, each character has one or more they like, and will react positively if they enjoy the conversation topic. The player can repeat this up to three times, but if they choose bad conversation topics, the tea party may also end early. If the player has chosen good conversation topics three times in a row, they will be asked a question by the character they have invited. If they choose an answer that character likes, they will be granted the opportunity to watch that character while drinking tea. While viewing a character, they may also comment on their own appearance. The player may also make gifts to that unit at this point.
Completing a tea party will increase Byleth's support with chosen character, and has a chance to increase both participants' charm stat by up to 2 points if the player has chosen good responses.
Recruiting Characters
While exploring the monastery, it is possible to recruit characters from other houses as well as faculty members into Byleth's class. Not every character can be recruited at all times, as certain characters are restricted by route or only become available after a certain chapter. To recruit a character, Byleth has to ask them to join their house and fulfill that character's recruitment requirements:
- Students from other houses require Byleth to be proficient in a specific skill level and meet a certain threshold in a specific stat.
- Faculty members require Byleth to meet a specific level threshold. They also require the player to have advanced enough in the story to recruit them.
- Anna can be recruited at any point in the game if the player owns the expansion pass.
- The Ashen Wolves can be recruited after the player has completed a certain chapter of the Cindered Shadows side story.
Note that certain characters are unavailable on some routes (e.g. Edelgard cannot be recruited into the Blue Lion house). Additionally, with the exception of Anna, characters can only be recruited at the monastery during Part I of the game.
Professor level
- Main article:
Professor level
Professor level is a mechanic at the monastery that determines the amount of gold the player gets at the start of each month, the amount of Activity points they get per free day, how often they can teach their students, and more. Professor experience is gained by using various monastery activities, such as Fishing or the Greenhouse.
Faculty at the Garreg Mach Monastery
Seminars and Faculty Training
Seminars are unlocked in Chapter 2 as an option for free days. Opting to participate in a seminar allows three to six recruited characters to receive training in two specific skills from a member of the church faculty. The six units that participate in the seminar are selected automatically based on their skill goals, and Byleth is always one of the units if they are not hosting the seminar. Every character who attends a seminar receives 50 motivation.
Faculty Training becomes available in Chapter 3 after clearing the quest Learning from the Best as an option when exploring the Monastery. Undertaking Faculty Training allows Byleth to receive training in a select skill from any member of the church faculty; which skills are available depend on who is providing the training. A character can only provide faculty training once per free day. Byleth receives 20 points towards the selected skill, an additional 10 if they possess a boon in that skill, and an additional 2 if the relevant bonus from the saint statues has been unlocked. Receiving Faculty Training consumes one activity point.
Seminars and Faculty Training are unavailable in Chapter 12 if Byleth sided with Edelgard in Chapter 11.
In Part II, Faculty Training changes to the name "Advanced Drills", and a unit must have been recruited in order to host seminars or Advanced Drills; additionally, students become able to host seminars and Advanced Drills. Students function identically to faculty for seminars, but to drill Byleth in a skill, the student must have a higher level in that skill than Byleth.
Faculty
| Faculty | Faculty Training / Advanced Drills | Seminar | Notes |
|---|---|---|---|
 Byleth |
— | Begin a seminar on group tactics and Jeralt's mercenary fighting style. |
— |
 Seteth |
Begin a seminar on an ancient Fódlan fighting style utilizing lance skills. |
Unavailable during Chapter 6. | |
 Hanneman |
Begin a seminar on both reason and bow skills from an esteemed professor of the monastery and the leading Crest scholar in Fódlan. |
— | |
 Manuela |
Begin a seminar on both faith and sword skills from a beloved professor of the monastery and former songstress. |
Unavailable during Chapter 6. | |
 Gilbert |
Begin a seminar on a fighting style developed by the Knights of Seiros that utilizes lance and axe skills. |
Available from Chapter 5 onwards. Unavailable in Chapter 10. | |
 Alois |
Begin a seminar on a fighting style developed by the Knights of Seiros that utilizes axes and gauntlets. |
Unavailable in Chapter 10. | |
 Catherine |
Begin a seminar on a fighting style in which practitioners dominate their opponent using improvised sword and melee techniques. |
Unavailable in Chapter 10. | |
 Shamir |
Begin a seminar on fighting styles designed for special situations, such as firing a bow from a long distance or battling in the dark. |
Unavailable in Chapter 10. | |
 Jeralt |
— | Available until Chapter 9. | |
 Rhea |
— | Available only during Part I. | |
 Jeritza |
Begin a seminar on sword and lance techniques that are considered the best throughout the Empire. No talking permitted. |
Unavailable for seminars in Part I. Only available before Chapter 6 and during Part II. | |
 Anna |
Begin a seminar on sword and bow skills learned through unavoidable confrontations in the life of a business entrepeneur. |
Available only through paid DLC. |
Students
| Faculty | Advanced Drills | Seminar | Notes |
|---|---|---|---|
 Edelgard |
Begin a seminar on fighting styles utilizing Heavy Armor units' axes, which the Imperial army is known for. |
— | |
 Dimitri |
Begin a seminar on a fighting style utilizing lance skills and group tactics, which was developed by the Kingdom knights. |
Available from Chapter 18 onwards. | |
 Claude |
Begin a seminar on utilizing archery for surprise attacks and raids, an approach cultivated in the Alliance territories. |
— | |
 Hubert |
Begin a seminar on a fighting style that gradually weakens your enemy using bows or magic. |
— | |
 Ferdinand |
Begin a seminar on a fighting style using sword and lance skills that all nobles should be adept in. |
— | |
 Linhardt |
Begin a seminar on the effects of Crests on one's magic skills, as discovered from personal and independent research. |
— | |
 Caspar |
Begin a seminar on how to win arguments and gain the upper hand in one-on-one combat, or how to give it your all on the battlefield. |
— | |
 Bernadetta |
Begin a seminar on a fighting style that takes advantage of a weapon's range, with a strong emphasis on personal safety. |
Bernadetta's seminar is only available on the Crimson Flower route. Advanced Drills are available on any route. | |
 Dorothea |
Begin a seminar on a fighting style focusing on moving one's sword with the grace of a dancer and casting magic with the poise of a diva. |
— | |
 Petra |
Begin a seminar on the daring and resolute sword and axe fighting styles developed on the Brigid archipelago. |
— | |
 Dedue |
Begin a seminar on a fighting style in which one can protect their assignment using nothing but their body, an axe, and an iron will. |
— | |
 Felix |
Begin a seminar on a self-taught fighting style that combines sword and hand-to-hand skills. |
— | |
 Ashe |
Begin a seminar on a fighting style that makes use of close range weapons including the mini bow or axe. |
— | |
 Sylvain |
Begin a seminar on fighting style that incorporates flashy techniques and evocative poses and always draws attention. |
— | |
 Mercedes |
Begin a seminar on connecting with other people and helping them explore how using magic might best suit them personally. |
— | |
 Annette |
Begin a seminar that is designed to help with magic and axe skills simply using the power of suggestion. |
— | |
 Ingrid |
Begin a seminar on a fighting style that will have one standing up to enemies as equals, no matter how big or brutish they may be. |
— | |
 Lorenz |
Begin a seminar on a fighting style that incorporates and exemplifies the grace, decorum, and strength of nobility. |
— | |
 Raphael |
Begin a seminar on a fighting style that focuses on dominating the enemy with pure, strong, well-fed muscle. |
— | |
 Ignatz |
Begin a seminar focusing on honing combat form through repeated motions, as outlined in the assigned textbooks. |
— | |
 Lysithea |
Begin a seminar worthy of a genius that will have participants reconsidering everything they ever thought they knew about magic. |
— | |
 Marianne |
Begin a seminar on the use of magic as a healing tool and swords as a means of defense. |
— | |
 Hilda |
Begin a seminar on a free-form fighting style that encourages participants to swing lances and axes around any way they please. |
— | |
 Leonie |
Begin a seminar on a fighting style that combines bow skills with Jeralt's personal lance technique. |
— | |
 Flayn |
Begin a seminar on a fighting style that utilizes lances and white magic while chatting and discovering the folklore of Saint Cethleann. |
— | |
 Cyril |
Begin a seminar on a fighting style developed over many years of training that utilizes axes and bows. |
— | |
 Yuri |
Begin a seminar on authority gained from experience leading thieves and using white magic to administer aid on the battlefield. |
Available only through paid DLC. | |
 Balthus |
Begin a seminar on a fighting style born from countless duels and the raw strength needed to wear heavy armor. |
Available only through paid DLC. | |
 Constance |
Begin a seminar on the art of airborne magical combat, a skill passed down through the generations within House Nuvelle. |
Available only through paid DLC. | |
 Hapi |
Begin a seminar on magic born from life experiences and animal husbandry enriched through the love of wild animals. |
Available only through paid DLC. |
Facilities
Cathedral
Choir Practice
At the cathedral, the player can choose up to two of their units to participate in choir practice with. Doing so will consume an activity point, but will also increase both Byleth's and the students' faith level as well as Byleth's authority level. On certain days, such as Saint Cichol Day, the player will also be asked if they want to participate in choir practice. Doing so does not consume any resources, but the player will also be unable to choose which students they will participate in choir practice with.
Counselor
- Main article:
Garreg Mach Monastery/Counselor
Byleth can give advice to students that place anonymous notes in the advice box. They will be shown a page displaying a silhouette of the character who asked the question alongside a brief description of their problem. They will then be asked to pick one of three possible answers. After doing so, the character who asked the question will be revealed and, if the player picked the correct option, their support points with that student will increase.
Saint Statues
- Main article:
Saint Statues
Upon completing the Tending to the Saints quest from Chapter 5 onwards, the player is granted the ability to spend their renown in exchange for specific rewards at the Saint Statues. To do so, they will need to speak to the Saint Statue artisan who is found next to the statues. Each statue has its own set of rewards, though the player needs to buy cheaper rewards to be allowed to purchase more expensive ones. The player can offer up to 10,000 renown to each of the Saint Statues. The rewards carry over through New Game + and do not need to be repurchased.
| Rewards from the Saint Statues | ||||
|---|---|---|---|---|
| Rewards | Renown cost | |||
| Cethleann statue | Cichol statue | Macuil statue | Indech statue | |
| Lance +1 | Axe +1 | Sword +1 | Bow +1 | 200 |
| Faith +1 | Authority +1 | Reason +1 | Brawling +1 | 500 |
| Experience +5% | Experience +5% | Experience +5% | Experience +5% | 1,000 |
| Class Mastery gain +1 | Flying +2 | Riding +2 | Heavy Armor +2 | 2,000 |
| Divine Pulse charge +1 | Divine Pulse charge +1 | Divine Pulse charge +1 | Divine Pulse charge +1 | 3,000 |
| Lance +2 | Axe +2 | Sword +2 | Bow +2 | 4,000 |
| Faith +2 | Authority +2 | Reason +2 | Brawling +2 | 5,000 |
| Experience +10% | Experience +10% | Experience +10% | Experience +10% | 7,500 |
| Luck and charm cap +5 | Strength and speed cap +5 | Magic and dexterity cap +5 | Defense and resistance cap +5 | 10,000 |
Dining Hall
Byleth can invite two additional characters to have meals together. If possible, this increases the units' support with each other. Additionally, if the units are in the player's army, they will gain some motivation. Each free day, there is one daily special that can be used once. Unlike other meals, it does not consume ingredients from the player's inventory. However, when this is used, the support gain is halved. Either way, Share A Meal consumes an activity point.
Additionally, during certain weekends, the effects of a specific category of meals will be boosted. The following table shows which categories are boosted by which event. Which meals belong to which category can be seen in the list of dishes below:
| Dining Hall Events | |
|---|---|
| Event | Boosted Category |
| Sweet-Tooth Week | Sweets |
| Hunting Festival | Meat |
| Harvest Festival | Vegetables |
| Fish Bounty Festival | Fish |
| Spice Festival | Spicy |
| Bitter Eats | Bitter |
If a unit likes a meal, the support point gain is increased. Additionally, the student will gain more motivation. The following table shows how much motivation a student gains for liked, neutral, and disliked meals:
Normal Weekends Events
| Meal Preference | Motivation gained |
|---|---|
| Liked | 4 |
| Neutral | 3 |
| Disliked | 1 |
List of dishes
| List of dishes | |||||
|---|---|---|---|---|---|
| Dish | Description | Ingredients | Liked by | Disliked by | Category |
| Saghert and Cream | A baked confection coated with Noa fruit cream and a currant reduction, often enjoyed as a dessert at family gatherings. | Peach Currant (×1) Noa Fruit (×1) |
Edelgard • Dimitri • Ferdinand • Linhardt • Bernadetta • Dorothea • Ashe • Mercedes • Annette • Lorenz • Ignatz • Lysithea • Marianne • Hilda • Flayn • Alois • Jeritza • Yuri • Constance | Claude • Hubert • Petra • Felix • Leonie • Seteth • Manuela • Gilbert • Catherine • Shamir | Sweets |
| Sweet Bun Trio | Traditional pastries from Faerghus, known for their subtle sweetness. The dough is made with eggs and sugar. | Albinean Berries (×1) Noa Fruit (×1) |
Edelgard • Dimitri • Ferdinand • Linhardt • Caspar • Bernadetta • Ashe • Sylvain • Mercedes • Annette • Ingrid • Ignatz • Lysithea • Marianne • Hilda • Flayn • Alois • Jeritza • Yuri • Constance | Claude • Hubert • Petra • Felix • Leonie • Manuela • Shamir | Sweets |
| Pheasant Roast with Berry Sauce | Well-roasted Fódlan pheasant drizzled with a berry reduction sauce. | Poultry (×1) Albinean Berries (×1) |
Claude • Ferdinand • Linhardt • Ashe • Sylvain • Mercedes • Annette • Ingrid • Raphael • Lysithea • Flayn • Alois • Shamir • Cyril • Jeritza • Anna • Yuri • Balthus • Constance • Hapi | Hubert • Petra • Hanneman • Catherine | Sweets |
| Peach Sorbet | A sorbet made with thin slices of magically frozen peach, dusted with bean flour. | Peach Currant (×1) Chickpeas (×1) |
Edelgard • Linhardt • Bernadetta • Dorothea • Ashe • Mercedes • Annette • Lysithea • Marianne • Hilda • Flayn • Hanneman • Alois • Shamir • Jeritza • Anna • Yuri • Constance | Dimitri • Hubert • Petra • Felix • Leonie • Seteth • Manuela • Gilbert • Catherine • Balthus | Sweets |
| Beast Meat Teppanyaki | A dish that tastes like the wilderness. Thick slices of meat covered with Noa fruit and grilled on a hotplate. | Wild Game (×1) Noa Fruit (×1) |
Claude • Caspar • Petra • Felix • Ingrid • Raphael • Leonie • Manuela • Gilbert • Catherine • Shamir • Cyril • Anna • Balthus • Hapi | Edelgard • Hubert • Linhardt • Bernadetta • Sylvain • Mercedes • Annette • Lorenz • Marianne • Hanneman • Jeritza | Meat |
| Pickled Rabbit Skewers | Hunks of rabbit meat are pickled in bacchus, skewered, and roasted over an open flame to create this flavorful dish. | Wild Game (×1) Carrot (×1) |
Claude • Caspar • Petra • Felix • Ingrid • Raphael • Lysithea • Manuela • Gilbert • Catherine • Shamir • Cyril • Anna • Yuri • Balthus • Hapi | Edelgard • Hubert • Linhardt • Bernadetta • Mercedes • Annette • Lorenz • Marianne • Hanneman • Jeritza • Constance | Meat |
| Daphnel Stew | Minced poultry and onions boiled with salt. The simple recipe lets high-quality ingredients speak for themselves. | Poultry (×1) Onion (×1) |
Claude • Ferdinand • Linhardt • Caspar • Petra • Dedue • Felix • Ingrid • Lorenz • Raphael • Leonie • Seteth • Manuela • Shamir • Cyril • Yuri • Balthus • Hapi | Hubert • Mercedes • Anna | Meat |
| Gronder Meat Skewers | Fatty hunks of Gronder fox cooked slowly on skewers. The meat is magically aged for a full flavor. | Wild Game (×1) Onion (×1) |
Claude • Caspar • Petra • Felix • Ingrid • Raphael • Leonie • Manuela • Gilbert • Catherine • Shamir • Cyril • Jeritza • Balthus • Hapi | Edelgard • Hubert • Linhardt • Bernadetta • Mercedes • Lorenz • Marianne • Hanneman | Meat |
| Derdriu-Style Fried Pheasant | Pheasant meat is pounded flat and fried. Can be served as a sort of sandwich, with cheese between two strips of meat. | Poultry (×1) Carrot (×1) |
Claude • Caspar • Bernadetta • Felix • Ingrid • Raphael • Lysithea • Hilda • Leonie • Seteth • Hanneman • Manuela • Gilbert • Catherine • Cyril • Anna • Balthus • Hapi | Hubert • Petra • Ashe • Shamir | Meat |
| Vegetable Pasta Salad | Pasta with a blend of fresh vegetables from various regions of Fódlan. This popular dish sells out almost instantly. | Cabbage (×1) Onion (×1) Carrot (×1) |
Edelgard • Ferdinand • Caspar • Bernadetta • Dorothea • Ashe • Mercedes • Annette • Ingrid • Ignatz • Marianne • Seteth • Hanneman • Gilbert • Shamir • Cyril • Anna • Constance | Hubert • Felix • Raphael • Lysithea • Jeritza • Balthus | Vegetables |
| Onion Gratin Soup | Onions stewed with white trout and baked with a layer of cheese on top. Will warm you up from the inside out. | White Trout (×1) Onion (×1) |
Edelgard • Dimitri • Claude • Ferdinand • Linhardt • Dorothea • Dedue • Mercedes • Lorenz • Marianne • Leonie • Flayn • Alois • Catherine • Jeritza • Yuri • Hapi | Caspar • Petra • Lysithea • Manuela • Shamir • Cyril • Constance | Vegetables |
| Country-Style Red Turnip Plate | A balanced meal including red turnip and verona stew, red turnip salad, and sautéed red turnip with garlic. | Verona (×1) Turnip (×1) |
Claude • Caspar • Bernadetta • Petra • Raphael • Hilda • Flayn • Gilbert • Catherine • Shamir • Yuri • Hapi | Felix • Lysithea • Manuela • Anna • Balthus | Vegetables |
| Vegetable Stir-Fry | A dish of dried tomatoes, cabbage, chickpeas, and other vegetables, stir-fried with eggs. Nutritious and very filling. | Tomato (×1) Chickpeas (×1) Cabbage (×1) |
Edelgard • Claude • Ferdinand • Caspar • Bernadetta • Dorothea • Petra • Dedue • Annette • Ignatz • Marianne • Leonie • Manuela • Gilbert • Shamir • Cyril • Yuri • Hapi | Linhardt • Felix • Raphael • Lysithea • Flayn • Hanneman • Alois • Jeritza • Anna • Balthus | Vegetables |
| Grilled Herring | Herring caught off the coast of Albinea, shredded and grilled in an earthenware pot with sliced turnips. | Albinean Herring (×1) Turnip (×1) |
Ferdinand • Petra • Dedue • Mercedes • Annette • Ingrid • Leonie • Seteth • Flayn • Gilbert • Alois • Catherine • Jeritza • Yuri | Hubert • Linhardt • Caspar • Dorothea • Lysithea • Shamir • Anna | Fish |
| Fish and Bean Soup | A soup made by simmering white trout and chickpeas. A simple yet wholesome dish. | White Trout (×1) Chickpeas (×1) |
Edelgard • Linhardt • Dedue • Ashe • Sylvain • Mercedes • Annette • Lorenz • Raphael • Ignatz • Marianne • Hilda • Flayn • Manuela • Alois • Cyril • Jeritza • Yuri • Hapi | Hubert • Caspar • Dorothea • Petra • Felix • Lysithea | Fish |
| Fruit and Herring Tart | A baked tart with stewed herring and Noa fruit mixed into the batter. Popular in Enbarr, the Imperial Capital. | Albinean Herring (×1) Noa Fruit (×1) |
Ferdinand • Bernadetta • Dedue • Sylvain • Mercedes • Annette • Ingrid • Lorenz • Ignatz • Marianne • Leonie • Seteth • Flayn • Alois • Catherine • Constance | Caspar • Dorothea • Lysithea • Shamir • Anna • Hapi | Fish |
| Grilled Herring | Herring caught off the coast of Albinea, shredded and grilled in an earthenware pot with sliced turnips. | Albinean Herring (×1) Turnip (×1) |
Ferdinand • Petra • Dedue • Mercedes • Annette • Ingrid • Leonie • Seteth • Flayn • Gilbert • Alois • Catherine • Jeritza • Yuri | Hubert • Linhardt • Caspar • Dorothea • Lysithea • Shamir • Anna | Fish |
| Fisherman's Bounty | Freshly-caught fish are cut into chunks and stewed together to make this hearty dish. | White Trout (×1) Teutates Loach (×1) |
Ferdinand • Petra • Dedue • Ingrid • Raphael • Ignatz • Marianne • Hilda • Leonie • Flayn • Manuela • Gilbert • Alois • Catherine • Jeritza • Yuri • Balthus • Hapi | Hubert • Linhardt • Dorothea • Sylvain • Lorenz • Hanneman | Fish |
| Fish Sandwich | A simple dish. Airmid pike is pickled in vinegar and served with cabbage between two slices of bread. | Airmid Pike (×1) Cabbage (×1) |
Edelgard • Ferdinand • Petra • Dedue • Ashe • Sylvain • Ingrid • Raphael • Leonie • Seteth • Flayn • Manuela • Gilbert • Alois • Catherine • Yuri • Hapi | Caspar • Bernadetta • Dorothea • Mercedes • Lysithea • Hanneman • Jeritza • Anna • Balthus | Fish |
| Two-Fish Saute | Two types of fish are cut into strips and sautéed in butter. This lavish meal hails from Enbarr, the Imperial Capital. | Caledonian Gar (×1) Albinean Herring (×1) |
Hubert • Bernadetta • Dedue • Felix • Sylvain • Mercedes • Annette • Lorenz • Ignatz • Lysithea • Marianne • Hilda • Leonie • Flayn • Hanneman • Manuela • Alois • Catherine • Cyril • Jeritza • Yuri • Constance | Caspar • Petra • Shamir • Hapi | Fish |
| Bourgeois Pike | A gourmet fish dish with Airmid pike, vegetables, and a sprinkle of expensive spices. Popular among nobles. | Airmid Pike (×1) Carrot (×1) |
Claude • Ferdinand • Bernadetta • Dedue • Lorenz • Ignatz • Marianne • Leonie • Seteth • Flayn • Hanneman • Manuela • Alois • Catherine • Anna • Constance | Caspar • Lysithea • Shamir • Yuri • Hapi | Fish |
| Sauteed Jerky | Jerky aged in the monastery and sautéed for a delightfully salty flavor. A perfect snack to go with your favorite drink. | Poultry (×1) Chickpeas (×1) |
Dimitri • Claude • Hubert • Caspar • Petra • Dedue • Felix • Raphael • Manuela • Shamir • Cyril • Anna • Yuri • Balthus • Hapi | Linhardt • Bernadetta • Mercedes • Lysithea • Flayn • Alois • Jeritza • Constance | Spicy |
| Spicy Fish and Turnip Stew | Spicy stew made with Teutates loach and turnips. The monastery's unique recipe features spices from Dagda. | Teutates Loach (×1) Turnip (×1) |
Hubert • Petra • Dedue • Felix • Ashe • Sylvain • Annette • Ingrid • Leonie • Seteth • Manuela • Gilbert • Anna • Balthus • Hapi | Linhardt • Caspar • Bernadetta • Dorothea • Mercedes • Lorenz • Ignatz • Lysithea • Hanneman • Alois • Jeritza • Yuri • Constance | Spicy |
| Sweet and Salty Whitefish Sauté | Whitefish is coated in spices and sautéed with dried tomatoes to bring out an addictive salty-sweet flavor. | Teutates Loach (×1) Tomato (×1) |
Hubert • Dedue • Felix • Ashe • Sylvain • Annette • Ingrid • Leonie • Seteth • Manuela • Gilbert • Anna • Balthus • Hapi | Linhardt • Caspar • Bernadetta • Dorothea • Petra • Mercedes • Lorenz • Lysithea • Hanneman • Jeritza | Spicy |
| Super-Spicy Fish Dango | A light snack, popular in the Empire. Small, spicy balls of fried dough packed with white trout and dried tomato. | White Trout (×1) Tomato (×1) |
Hubert • Petra • Dedue • Felix • Sylvain • Ingrid • Ignatz • Marianne • Leonie • Seteth • Hanneman • Manuela • Gilbert • Catherine • Shamir • Balthus • Hapi | Caspar • Bernadetta • Mercedes • Lysithea • Flayn • Alois • Jeritza • Yuri | Spicy |
| Sautéed Pheasant and Eggs | Thin slices of bird meat and shredded cabbage, mixed with scrambled eggs and sautéed with spices. Invention of a certain noble. | Poultry (×1) Cabbage (×1) |
Edelgard • Claude • Hubert • Ferdinand • Caspar • Felix • Sylvain • Raphael • Ignatz • Marianne • Seteth • Manuela • Gilbert • Shamir • Cyril • Anna • Constance • Hapi | Linhardt • Bernadetta • Mercedes • Lorenz • Lysithea • Flayn • Alois • Jeritza • Yuri | Spicy |
| Garreg Mach Meat Pie | A crispy-brown pie packed with tomatoes, cheese, and tender chunks of meat. | Wild Game (×1) Tomato (×1) |
Claude • Hubert • Linhardt • Caspar • Dorothea • Felix • Sylvain • Lorenz • Raphael • Ignatz • Hanneman • Manuela • Gilbert • Catherine • Balthus | Edelgard • Ferdinand • Petra • Dedue • Mercedes • Lysithea • Hilda • Flayn • Shamir | Bitter |
| Cheesy Verona Stew | A rich dish consisting of verona and sautéed Teutates loach. These ingredients are boiled and served with two kinds of melted cheese. | Teutates Loach (×1) Verona (×1) |
Dimitri • Claude • Hubert • Bernadetta • Petra • Sylvain • Raphael • Marianne • Hilda • Leonie • Seteth • Flayn • Hanneman • Gilbert • Catherine • Balthus | Ferdinand • Caspar • Ashe • Lysithea • Manuela • Shamir • Cyril • Constance | Bitter |
| Pickled Seafood and Vegetables | A Dagdan dish of raw fish and turnips pickled in a vinegar-based seasoning liquid. Rarely eaten in Fódlan. | Caledonian Gar (×1) Turnip (×1) |
Hubert • Petra • Dedue • Annette • Raphael • Leonie • Seteth • Flayn • Hanneman • Gilbert • Alois • Catherine • Anna • Hapi | Ferdinand • Caspar • Ingrid • Ignatz • Lysithea • Hilda • Manuela • Cyril • Balthus | Bitter |
| Gautier Cheese Gratin | A gratin of bird meat topped with heaps of Gautier cheese, which is famous for its low fat content. It has a unique flavor. | Poultry (×1) Noa Fruit (×1) |
Dimitri • Claude • Hubert • Linhardt • Dorothea • Felix • Raphael • Hilda • Hanneman • Catherine • Balthus | Edelgard • Ferdinand • Caspar • Petra • Dedue • Ashe • Mercedes • Annette • Ignatz • Marianne • Flayn • Manuela • Shamir • Anna • Yuri • Constance | Bitter |
| Cabbage and Herring Stew | Cabbage and Albinean herring stewed whole. The fish guts lend this hearty dish a superbly bitter kick. | Albinean Herring (×1) Cabbage (×1) |
Claude • Hubert • Lorenz • Ignatz • Marianne • Leonie • Flayn • Hanneman • Manuela • Gilbert • Catherine • Jeritza • Balthus • Hapi | Ferdinand • Caspar • Ingrid • Lysithea • Hilda • Cyril • Constance | Bitter |
| Small Fish Skewers | Made by grilling skewered Airmid gobies. With a muddy flavor and dry texture, this dish is beloved by few. | Airmid Gobies (×3) | Jeritza • Hapi | Hubert • Linhardt • Caspar • Dorothea • Petra • Felix • Sylvain • Ingrid • Lorenz • Lysithea • Leonie • Hanneman • Manuela • Catherine • Shamir • Cyril | — |
| Fried Crayfish | Fried and breaded Caledonian crayfish. Looks much tastier than it actually is. | Caledonian Crayfish (×3) | Jeritza • Anna • Hapi | Claude • Hubert • Linhardt • Caspar • Dorothea • Petra • Felix • Ashe • Sylvain • Raphael • Lysithea • Seteth • Manuela • Gilbert • Catherine • Shamir • Cyril • Balthus | — |
Dining Hall Events
Occasionally, there will be special events at the dining hall which will be marked on the calendar. On these days, specific units specified in the event description will receive increased bonuses. For these events, the shared meal is set, and the player will not have to provide their own ingredients. The following table lists all events at the Dining Hall:
| Dining Hall Events | |||||
|---|---|---|---|---|---|
| Event | Served Meal | Description | Characters receiving a boost | ||
| Faculty & Knight Mixer | Spicy Fish and Turnip Stew | A special menu of mature flavors for professors and knights. Effects are enhanced when dining with professors and knights. | Professors and knights: Hanneman • Manuela • Jeritza • Alois • Catherine • Shamir • Gilbert | ||
| Bonding Bites | Saghert and Cream | A special menu to bring professors and students together. Effects are enhanced when dining with students from your own house. | Units from Byleth's house | ||
| Sweet-Tooth Week | Peach Sorbet | During this joyous week, dine on scrumptious sweets imported from all across Fodlan. Effects are enhanced for those who love sweets. | Edelgard • Linhardt • Bernadetta • Dorothea • Ashe • Mercedes • Annette • Lysithea • Marianne • Hilda • Flayn • Hanneman • Alois • Shamir • Jeritza • Anna • Yuri • Constance | ||
| Fish Bounty Festival | Fish Sandwich | A festival in the dining hall with plenty of fresh fish for all to enjoy. Effects are enhanced when dining a fish enthusiast. | Edelgard • Ferdinand • Petra • Dedue • Ashe • Sylvain • Ingrid • Raphael • Leonie • Seteth • Flayn • Manuela • Gilbert • Alois • Catherine • Yuri • Hapi | ||
| Hunting Festival | Derdriu-Style Fried Pheasant | A festival in the dining hall featuring meats from practically every region. Effects are enhanced when dining with a meat enthusiast. | Claude • Caspar • Bernadetta • Felix • Ingrid • Raphael • Lysithea • Hilda • Leonie • Seteth • Hanneman • Manuela • Gilbert • Catherine • Cyril • Anna • Balthus • Hapi | ||
| Head Chef Challenge | Random | A dish created for the head chef's challenge, using unknown ingredients. Luck will decide whether it's delicious or disastrous. | Units who like the meal | ||
Cooking Together
Cooking Together is unlocked after completing the Creative Cuisines quest, available from Chapter 2. It allows the player to choose one other unit to cook a meal together. In Part I, that character does not have to be recruited into the player's army, though they have to be at the monastery at that time (e.g. Catherine will not be available during Chapter 10). In Part II, the character has to be recruited into the player's army. They will then be prompted to choose a dish to cook. Cooking Together consumes one activity point and can only be done once per free day.
Cooking Together will increase Byleth's support points with the other student, and will also provide a small stat boost for the rest of the chapter (including auxiliary battles), with the stat boost being determined by the chosen dish. The stat boosts can stack with each other. The player will also need to provide the ingredients themself. Ingredients can be obtained through monastery quests, auxiliary battles, gardening or fishing.
Some characters are better at cooking than others. Wether a character is good at cooking or not is shown through two arrows that either point up or down when selecting them. If the character Byleth is cooking with is good at cooking, the support points gained from cooking are doubled. If they are bad at cooking, the support points gained are halved. The stat gains from cooking are not affected by cooking prowess.
| Characters by cooking prowess | |||
|---|---|---|---|
| Good | Neutral | Bad | |
| Bernadetta • Dedue • Ashe • Mercedes • Manuela • Gilbert • Yuri • Anna | Edelgard • Dimitri • Claude • Hubert • Linhardt • Dorothea • Petra • Felix • Sylvain • Ingrid • Annette • Hilda • Lorenz • Ignatz • Lysithea • Marianne • Leonie • Seteth • Alois • Catherine • Shamir • Cyril • Balthus | Caspar • Raphael • Flayn • Hanneman • Constance • Hapi | |
List of dishes
| List of dishes | |||
|---|---|---|---|
| Dish | Ingredients | Effect | |
| King of Beasts Steak | Duscur Bear (×1) | HP +3 | |
| Invincible Grill | Oghma Wolverine (×1) | Str +1 | |
| Hero Salad | Angelica (×1) | Mag +1 | |
| Queen Fish Sauté | Queen Loach (×1) | Dex +2 | |
| Swift Fish Gratin | Bullhead (×1) | Spd +1 | |
| Blessed Jelly | Morfis Plum | Lck +2 | |
| Immortality Stew | Teutates Pike (×1) | Def +1 | |
| Nirvana Cake | Boa Fruit (×1) | Res +1 | |
| Charming Soup | Nordslat (×1) | Cha +2 | |
| Sacred Beast Roast | Albinean Moose (×1) Magdred Kirsch (×1) |
HP +1 Str +1 | |
| Deified Fish | Goddess Messenger (×1) Magdred Kirsch (×1) |
Dex +1 Spd +1 Def +1 | |
| Treasured Fruit Nectar | Zanado Treasure Fruit (×1) Magdred Kirsch (×1) |
Mag +1 Res +1 | |
| The Best of Fódlan | Albinean Moose (×1) Goddess Messenger (×1) Zanado Treasure Fruit (×1) |
HP +1 Str +1 Mag +1 Spd +1 Dex +1 Lck +1 Def +1 Res +1 Cha +1 | |
Dormitory
The dormitory is devided in two seperate floors. The dormitory does not house any faculty, but will allow the player to visit the individual students' rooms. Notably, Bernadetta's room will be locked for most of the game, only being open for specific chapters. Although Seteth claims that the second floor is reserved for the nobles, some nobles—such as Bernadetta or Lysithea have their room in the first floor. The northernmost room of the first floor is Byleth's room.
Byleth's Room
Every free day starts in Byleth's room.
Journal
Byleth's journal is available at their room. It grants the player access to a variety of features, though most of them are only available through New Game +.
Unit Appearance
The Unit Appearance submenu is the only one that is available to the player on a non-New Game + playthrough. It allows them to change the appearance of their units both at the monastery and on the battlefield. As of version 1.2.0, it can also be accessed by pressing the L button on the activity selection screen.
As part of the Expansion Pass, new costumes were added to the game. However, most of them are only available to Byleth and their students. Flayn and Cyril are treated as students for the purposes of choosing their outfits.
At the monastery, the following outfits are available:
| Monastery Outfits in Fire Emblem: Three Houses | ||||||||||||||
|---|---|---|---|---|---|---|---|---|---|---|---|---|---|---|
| Outfit | Unit Restrictions | Unlock Requirement | Notes | |||||||||||
| War Attire | Byleth • Seteth • Flayn • Hanneman • Manuela • Alois • Catherine • Shamir • Gilbert • Anna | Unlocked by default. | Default outfit. | |||||||||||
| Academy Attire | All students, excluding Flayn | Unlocked by default. | Default outfit for Part I. | |||||||||||
| War Attire | All students, excluding Flayn | Automatically at the start of Part II. | Default outfit for Part II. Available by default in New Game +. Dimitri will use his design without an eyepatch (as seen on the Crimson Flower route) during Part I if this outfit is chosen. | |||||||||||
| Alternate Hair Styles | Edelgard • Dimitri • Claude | Available only through New Game +. | Available only for the Part II outfits. | |||||||||||
| Academy Attire | Byleth | Included in Wave 1 of the Expansion Pass. Requires at least version 1.0.1. |
Outfit changes based on Byleth's gender. Available both with and without a cape. | |||||||||||
| House Loungewear | Byleth, all students | Included in Wave 2 of the Expansion Pass. Requires at least version 1.0.2. |
The outfit design is based on the route the player has chosen. Silver Snow and Crimson Flower use the same design. Different outfits are available for Parts I and II. | |||||||||||
| Glasses Set | Byleth | Included in Wave 2 of the Expansion Pass. Requires at least version 1.0.2. |
— | |||||||||||
| Summer Wear | Byleth, all students | Included in Wave 3 of the Expansion Pass. Requires at least version 1.1.0. |
Outfit changes based on unit's gender. Different outfits are available for Parts I and II. | |||||||||||
| Evening Wear | Byleth, all students | Included in Wave 3 of the Expansion Pass. Requires at least version 1.1.0. |
Outfit changes based on unit's gender. Different outfits are available for Parts I and II. | |||||||||||
| Servant Outfit | Byleth, all students | Included in Wave 3 of the Expansion Pass. Requires at least version 1.1.0. |
Outfit changes based on unit's gender. Available in both a "Classic" and a "Custom" variation. Classic uses a black color scheme, while Custom uses a color scheme based on the unit. Different outfits are available for Parts I and II. | |||||||||||
| Sothis Regalia | Byleth | Part of the Expansion Pass. Added in an update on December 19th, 2019. |
— | |||||||||||
| Dancer Attire | Byleth | Included in Wave 4 of the Expansion Pass. Requires at least version 1.2.0. |
— | |||||||||||
| Tricky Merchant | Anna | Included in Wave 4 of the Expansion Pass. Requires at least version 1.2.0. |
— | |||||||||||
In battle, the player can choose between two options: They may either use the unit's battle outfit – using an outfit based on the unit's class – or their monastery outfit, using whatever outfit they chose for that unit at the monastery. Mounted units do not allow the player to use the unit's monastery outfits.
The Commoner and Noble classes will always use a unit's monastery outfit.
New Game + features
- See also:
New Game + § Fire Emblem: Three Houses

Through New Game +, the following options become available to the player:
- Professor Level
- This option allows the player to instantly raise Byleth's professor level by spending renown. It can be increased up until the highest professor level that was achieved on the same New Game + file. Each level costs 500 renown to obtain, with the total price being determined by the difference between Byleth's current professor level and the level the player is purchasing.
- Support Levels
- This option allows to player to instantly increase Byleth's support levels with other units by spending renown. Since recruitment requirements vary based on support level, this allows the player to recruit units from other houses much faster. Each support level costs 400 renown to purchase ("+" supports do not cost extra). Support ranks can only be increased up until the highest rank that was achieved on the same New Game + file, though it is possible to obtain S supports that haven't been unlocked yet due to an oversight.
- Notably, this is the only way to obtain multiple S support levels on one playthrough, and also the only way to make use of the benefits of an S support in battle as otherwise, S supports are only obtained after the final battle. However, it is only possible to buy S support levels with characters that can S support the current version of Byleth (e.g. male Byleth cannot buy an S support with Dimitri).
- Support levels between other units cannot be bought in this way.
- Skill Levels
- This option allows the player to instantly increase the skill ranks of any unit in their current army by spending renown. It can be increased up until the highest skill level that was achieved on the same New Game + file. Each level costs 500 renown to obtain, with the total price being determined by the difference between the unit's current skill level and the level the player is purchasing.
- Class Abilities
- This option allows the player to purchase class abilities that were unlocked on a previous playthrough using the same New Game + file. The player can buy these abilities regardless of whether they would be able to certify for the corresponding class, so even if a unit's level or skill level is not sufficient, this option can grant them those classes' mastery abilities. The corresponding class will be marked as mastered.
- Notably, this allows the player to transfer gender-exclusive skills such as Quick Riposte to a Byleth whose gender would otherwise prohibit them from obtaining those skills.
- Crest Items
- This option allows the player to purchase crest items that allow them to use crest abilities a unit would not be able to use otherwise. However, the crest abilities are weaker than even a minor crest, with the exclusive combat arts from Heroes' Relics now costing 5 durability instead of 4 for a minor crest or 3 for a major one. Additionally, the crest's trigger rate is reduced, with the amount being dependent on the specific crest. A unit who bears the corresponding crest can also use the crest items to increase the odds of their crests activating during combat.
- Depending on the route the player has finished last using that same New Game + file, certain crest items will be stored in their convoy automatically and do not have to be purchased again. The following table lists the crest items and which routes they are available on:
| Crest items | |||||
|---|---|---|---|---|---|
| Crest item | Corresponding Crest | Starting availability | |||
| Ernest | ✓ | ✓ | ✓ | ✓ | |
| Macuil | ✓ | ✓ | ✓ | ✓ | |
| Seiros | ✓ | ✓ | ✗ | ✗ | |
| Dominic | ✗ | ✗ | ✓ | ✗ | |
| Fraldarius | ✗ | ✗ | ✓ | ✗ | |
| Noa | ✓ | ✓ | ✓ | ✓ | |
| Cethleann | ✓ | ✓ | ✗ | ✗ | |
| Daphnel | ✗ | ✗ | ✓ | ✗ | |
| Blaiddyd | ✗ | ✗ | ✓ | ✗ | |
| Gloucester | ✗ | ✗ | ✗ | ✓ | |
| Goneril | ✓ | ✗ | ✗ | ✓ | |
| Cichol | ✓ | ✓ | ✗ | ✗ | |
| Aubin | ✓ | ✓ | ✓ | ✓ | |
| Gautier | ✗ | ✗ | ✓ | ✗ | |
| Indech | ✗ | ✓ | ✗ | ✗ | |
| The Beast | ✗ | ✗ | ✗ | ✓ | |
| Charon | ✓ | ✗ | ✗ | ✓ | |
| Timotheos | ✓ | ✓ | ✓ | ✓ | |
| Riegan | ✗ | ✗ | ✗ | ✓ | |
| Chevalier | ✓ | ✓ | ✓ | ✓ | |
| Lamine | ✓ | ✗ | ✓ | ✗ | |
Bed
The following DLC items can be picked up at Byleth's bed:
- Sacred Items Set
- If the player has purchased the Season Pass, they will have access to the following items. They can be picked up at any time, though they can only be picked up once per playthrough (New Game + counts as a new playthrough) and only as a set.
| Sacred Items Set | ||||||||||||||
|---|---|---|---|---|---|---|---|---|---|---|---|---|---|---|
| Icon | Item | Effect | ||||||||||||
| Sacred Floral Robe | Permanently increases maximum HP by 7. | |||||||||||||
| Sacred Snowmelt Drop | Permanently increases strength by 3. | |||||||||||||
| Sacred Moonstone | Permanently increases speed by 3. | |||||||||||||
| Sacred Galewind Shoes | Permanently increases movement by 2. | |||||||||||||
- Cindered Shadows Reward
- Additionally, the Cindered Shadows Reward can be obtained by completing Chapter 7 of the Cindered Shadows side story. Like the Sacred Items set, it can only be obtained only once, at any point in a playthrough. It can be collected separately from the Sacred Items Set, though like the Sacred Items Set, the contents are not obtainable separately.
| Cindered Shadows Reward | ||||||||||||||
|---|---|---|---|---|---|---|---|---|---|---|---|---|---|---|
| Icon | Item | Effect | ||||||||||||
| Chalice of Beginnings | Negates all Bonus damage against the bearer. Grants Counterattack to the bearer. | |||||||||||||
| — | 10,000 renown | Increases renown by 10,000 points. | ||||||||||||
Fishing Spot
At the Fishing Spot, the player can use their bait to fish. The Fishing Spot becomes available upon completing the Fresh Catch quest in Chapter 1 or by reaching Part II.
Unlike most other monastery activities, fishing does not consume any activity points. However, fishing requires bait, which can be found randomly around the monastery, through quests, or at the Eastern Merchant at the marketplace. By using baits of higher quality, the player can catch rarer fish.
| Bait | Rating | Notes |
|---|---|---|
| Insect Larva | ★ | Cost: 10 G |
| Pond Snail | ★★ | Cost: 20 G |
| Earthworm | ★★★ | Cost: 30 G |
| Blowfly | ★★★★ | Cost: 40 G |
| Herring Bait | ★★★★★ | Cost: 50 G |
| Tournament Bait | ★★★ | Exclusively used during the fishing tournament. |
| Flayn's Bait | ★ | Exclusively used during the Fresh Catch quest. |
After selecting a bait, the player will have to wait for a fish to bite. If a fish bites, the player will be prompted to press the A button to pull the fish. At the same time, a silhouette will be displayed. The colour of this silhouette corresponds to the rarity of the catch. If the player fails to press the A button within a certain time limit, the fish will slip away. Two times per bait, they will be given another chance with another fish. The rarity of this fish is independent from the previous ones, and therefore can be higher, lower, or the same.
On certain weekends, special events will occur. These events will be marked on the calendar. During certain fishing events, the rarity of certain fish will change.
| Event | Small Fish Shadow (Blue) |
Large Fish Shadow (Cyan) |
Giant Fish Shadow (Red) |
Glimmering Fish Shadow (Yellow) |
Sparkling Fish Shadow (Rainbow) |
|---|---|---|---|---|---|
| Normal Sunday | 40% | 30% | 25% | 5% | — |
| Fish of Mystery | 45% | 35% | 10% | 5% | 5% |
| Golden Fish | 40% | 30% | 20% | 10% | — |
| Lots of Large Fish | 15% | 40% | 40% | 5% | — |
If the player presses the A button, Byleth will attempt to pull the fish in. To do so, the player must complete a minigame where they have to press the A button at the correct time in a rhytm-style minigame. In this minigame, circles will appear and the player has to press the button when the circle fits exactly within a specific area. If the player manages to press the button at the right time, they will be given a rating of "Excellent!".
With each button press, both Byleth's and the fish's stamina – which is displayed at the bottom of the screen – will decrease. An Excellent rating will both decrease the stamina cost for Byleth and increase the stamina cost for the fish. If the fish's stamina runs out before Byleth's, the minigame is won and the fish will be caught, rewarding the player with a fish and some professor experience. If Byleth's stamina runs out before the fish's, the bait will be lost and Byleth will be rewarded a smaller amount of professor experience. Byleth's stamina increases with their professor level.
The reward for fishing depends on three factors:
- The bait used
- The fish silhouette
- Wether the player receives a "perfect" or not
Possible Rewards
The rewards the player obtains are based on both the fish silhouette they caught and the bait they used. Each bait and silhouette combination has its own set of three possible rewards, with the reward the player obtains being determined randomly. Better rewards can be obtained by using bait of higher quality and by obtaining a Perfect rating.[1]
| Bait | Reward 1 | Reward 2 | Reward 3 |
|---|---|---|---|
| Insect Larva | Queen Loach | Teutates Loach | Bullhead |
| Pond Snail | Queen Loach | Teutates Loach | Bullhead |
| Earthworm | Queen Loach | Teutates Loach | Bullhead |
| Blowfly | Queen Loach | Teutates Loach | Bullhead |
| Herring Bait | Queen Loach | Teutates Loach | Bullhead |
| Tournament Bait | Large Fódlan Carp | Huge Fódlan Carp | Teutates Herring |
| Flayn's Bait | Carassius | Carassius | Carassius |
| Bait | Reward 1 | Reward 2 | Reward 3 |
|---|---|---|---|
| Insect Larva | Silverfish | Golden Fish | Golden Fish |
| Pond Snail | Silverfish | Golden Fish | Platinum Fish |
| Earthworm | Silverfish | Golden Fish | Platinum Fish |
| Blowfly | Silverfish | Golden Fish | Platinum Fish |
| Herring Bait | Silverfish | Golden Fish | Platinum Fish |
| Tournament Bait | Teutates Herring | Teutates Herring | Teutates Herring |
| Flayn's Bait | Carassius | Carassius | Carassius |
| Bait | Reward 1 | Reward 2 | Reward 3 |
|---|---|---|---|
| Insect Larva | Fódlandy | Fódlandy | Fódlandy |
| Pond Snail | Fódlandy | Fódlandy | Fódlandy |
| Earthworm | Fódlandy | Fódlandy | Fódlandy |
| Blowfly | Fódlandy | Fódlandy | Fódlandy |
| Herring Bait | Fódlandy | Fódlandy | Fódlandy |
| Tournament Bait | Teutates Herring | Teutates Herring | Teutates Herring |
| Flayn's Bait | Carassius | Carassius | Carassius |
Odds of obtaining Rewards
Grades are mostly determined by the quality rating of the bait used. For a Perfect rating in the fishing minigame, the final grade is increased by 2.
| Bait grade | Reward 1 | Reward 2 | Reward 3 |
|---|---|---|---|
| 1 | 100% | 0% | 0% |
| 2 | 50% | 30% | 20% |
| 3 | 18% | 50% | 32% |
| 4 | 20% | 30% | 50% |
| 5 | 0% | 0% | 100% |
| 6 | 0% | 0% | 100% |
| 7 | 0% | 0% | 100% |
| Bait grade | Reward 1 | Reward 2 | Reward 3 |
|---|---|---|---|
| 1 | 100% | 0% | 0% |
| 2 | 60% | 40% | 0% |
| 3 | 20% | 53% | 27% |
| 4 | 27% | 40% | 33% |
| 5 | 0% | 30% | 70% |
| 6 | 23% | 17% | 60% |
| 7 | 0% | 0% | 100% |
| Bait grade | Reward 1 | Reward 2 | Reward 3 |
|---|---|---|---|
| 1 | 100% | 0% | 0% |
| 2 | 60% | 40% | 0% |
| 3 | 28% | 60% | 12% |
| 4 | 20% | 40% | 40% |
| 5 | 12% | 16% | 72% |
| 6 | 20% | 28% | 52% |
| 7 | 0% | 0% | 100% |
| Bait grade | Reward 1 | Reward 2 | Reward 3 |
|---|---|---|---|
| 1 | 100% | 0% | 0% |
| 2 | 60% | 40% | 0% |
| 3 | 20% | 80% | 0% |
| 4 | 0% | 80% | 20% |
| 5 | 0% | 60% | 40% |
| 6 | 0% | 40% | 60% |
| 7 | 0% | 0% | 100% |
Note that, as the Strange Fish Shadow and Sparkling Fish Shadow grant the same item regardless of reward, the actual result will not change based on grade; however, the following odds are listed within the game's files:
| Bait grade | Reward 1 | Reward 2 | Reward 3 |
|---|---|---|---|
| 1 | 100% | 0% | 0% |
| 2 | 80% | 20% | 0% |
| 3 | 60% | 40% | 0% |
| 4 | 40% | 60% | 0% |
| 5 | 20% | 80% | 0% |
| 6 | 20% | 30% | 50% |
| 7 | 0% | 0% | 100% |
| Bait grade | Reward 1 | Reward 2 | Reward 3 |
|---|---|---|---|
| 1 | 100% | 0% | 0% |
| 2 | 80% | 20% | 0% |
| 3 | 60% | 40% | 0% |
| 4 | 40% | 60% | 0% |
| 5 | 20% | 80% | 0% |
| 6 | 20% | 30% | 50% |
| 7 | 0% | 0% | 100% |
Greenhouse
The greenhouse allows the player to plant their seed-type items in one exploration session and then obtain new items the next time they explore the monastery. This can include stat boosters, gifts, and new seeds. Using the greenhouse does not consume activity points, but the greenhouse can only be used once per free day.
The player can only plant a limited amount of seeds per free day, with the specific amount being determined by their professor level:
| Available seeds | |
|---|---|
| Professor level | Available seeds |
| E, E+ | 1 |
| D, D+ | 2 |
| C, C+ | 3 |
| B, B+ | 4 |
| A, A+ | 5 |
They may also choose to cultivate their seeds by spending some gold in exchange for better rewards. The available cultivation methods increase based on Byleth's professor level. More expensive cultivation methods may yield better rewards.
| Available seeds | ||
|---|---|---|
| Professor level | Cultivation Method | Price |
| E | Infuse with magic | Free |
| E+ | Airmid water | 300G |
| D | Prune | 500G |
| C | Scatter Bonemeal | 1,000G |
| B | Caledonian soil | 1,500G |
| A | Pegasus Blessings | 2,000G |
The game will display a predicted quality of the yield by displaying one to three stalks, with more stalks meaning better quality. Predicted yield does not affect the amount of the rewards, but it does affect the types of items the player will be rewarded with. The game also assigns each yield a quality that can be either "good" or "bad", though this is not shown to the player.
The resulting items are determined by the quality of the yield and the seeds used. The following table lists the possible items for each sead and quality combination:
Possible Yields
One stalk Two stalks Three stalks
Additionally, certain seeds have a chance of yielding a stat booster. Unlike regular yields which are determined when the player harvests their seeds, wether the player obtains a stat booster is determined upon planting the seeds and will not change if the player starts the harvesting day again.
| Possible stat boosters | ||
|---|---|---|
| Stat booster | Effect | Seeds |
| Fruit of Life | HP +1 | Western Fódlan Seeds • Blue Flower Seeds |
| Rocky Burdock | Str +1 | Mixed Herb Seeds • Angelica Seeds • Purple Flower Seeds |
| Premium Magic Herbs | Mag +1 | Southern Fódlan Seeds • Yellow Flower Seeds |
| Ailell Pomegranate | Dex +1 | Morfis-Plum Seeds • Morfis Seeds • Green Flower Seeds |
| Speed Carrot | Spd +1 | Nordsalat Seeds • Pale-Blue Flower Seeds |
| Miracle Bean | Lck +1 | Boa-Fruit Seeds • Mixed Fruit Seeds |
| Ambrosia | Def +1 | Root Vegetable Seeds • Eastern Fódlan Seeds |
| White Verona | Res +1 | Vegetable Seeds • Red Flower Seeds |
| Golden Apple | Cha +1 | Northern Fódlan Seeds • Albinean Seeds • White Flower Seeds |
Calculations
The items the player receives from gardening are determined as follows:[2]
Each seed has a hidden rank stat that is seperate from its displayed grade:
| Ranks by seed | |
|---|---|
| Seed | Rank |
| Mixed Herb Seeds | 27 |
| Western Fódlan Seeds | 9 |
| Root Vegetable Seeds | 49 |
| Vegetable Seeds | 33 |
| Northern Fódlan Seeds | 53 |
| Morfis-Plum Seeds | 18 |
| Southern Fódlan Seeds | 37 |
| Morfis Seeds | 23 |
| Nordsalat Seeds | 3 |
| Boa-Fruit Seeds | 31 |
| Albinean Seeds | 20 |
| Eastern Fódlan Seeds | 42 |
| Angelica Seeds | 34 |
| Mixed Fruit Seeds | 44 |
| Red Flower Seeds | 24 |
| White Flower Seeds | 5 |
| Blue Flower Seeds | 38 |
| Purple Flower Seeds | 16 |
| Yellow Flower Seeds | 55 |
| Green Flower Seeds | 10 |
| Pale-Blue Flower Seeds | 1 |
Additionally, as mentioned before, each yield has a chance to be a "good" or a "bad" yield. The odds of getting a good or bad yield are based on the displayed Yield Level. The odds of receiving a higher quality yield are determined by a hidden score value that is calculated as follows:
A+B+C
- A = (12 − [combined Rank of all seeds % 12]) × 5
- B = (Combined Grade of all seeds / 5) × 4 (rounded down)
- C = (Cultivation Tier + 4 ) × 2
- The cultivation tier increases by 1 per price tier, with "Infuse with magic" having a value of 1.
Finally, the odds of receiving a certain type of yield are determined as follows:
| Dining Hall Events | |||
|---|---|---|---|
| Score | Displayed Yield | Quality Ratio | Stat Booster coefficient |
| 0–20 | 1 | 7:3 | 1 |
| 21–40 | 1 | 2:8 | 3 |
| 41–60 | 2 | 7:3 | 5 |
| 61–80 | 2 | 4:6 | 10 |
| 81–90 | 3 | 8:2 | 15 |
| 91–100 | 3 | 3:7 | 20 |
- "Quality Ratio" refers to the ratio of lower-quality items to higher-quality ones.
The odds of obtaining a stat booster are calculated as follows:
Chance = Stat-booster co-efficient + ([Grade − 1 ] of specific seed × 5) + (number of all seeds × 6) + (cultivation Tier × 5)
Training Grounds
From Chapter 4 onwards, the player can participate in monthly tournaments at the monastery. There, they can choose any unit from their current roster—with the exception of Byleth—to participate in a tournament in exchange for one activity point. They will be put up against a series of five opponents whose level and fighting prowess increase with each level. The enemies the player encounters mostly consist of generic units, but during Part I, they can also include unrecruited units from other houses.
After each round, the player is given the opportunity to quit or to heal their unit for 30 HP. However, they can only heal their unit up to two times per attempt. During combat, units will use their normal combat stats and current equipment, and can miss or land critical hits like in normal battles. Additionally, battles at the Training Grounds are always treated as though the player had initiated the combat, and therefore skills like Darting Blow or Duelist's Blow are active. Units will not have any battalions equipped at the Training Grounds, removing any potential stat gains from battalions and activating skills such as Felix's Lone Wolf.
Each month, a different tournament will be held at the monastery. Each tournament focuses on a different weapon type, and only that weapon type can be used at the training grounds. Playable units will always use the most basic weapons of that weapon type. For most weapons, this means they will use the training weapon associated with that weapon type (e.g. a Training Sword or a Training Axe), while for magic, it means a unit will use their lowest-ranked spell (e.g. Constance will use Fire while Annette will use Wind). As spells need to be learned by raising a unit's skill levels, units who have not yet learned any spells yet cannot participate. Similarly, units need to be in a class that can use magic to participate in magic tournaments. Likewise, units in classes that cannot use gauntlets cannot participate in Brawling tournaments. Classes that can only use Gauntlets while dismounted—such as Paladin—cannot be used, as mounted units cannot dismount at the Training Grounds. As they do not learn any Black Magic spells, Lysithea, Hubert, and Hapi cannot participate in the Black Magic tournaments, however, as the Mage class grants the Fire ability, changing into it will allow them to partake.
The player will earn more gold the further their unit has made it. Additionally, winning a tournament for the first time (if multiple months have the same tournament, each month counts as a separate tournament) will grant the player a special reward – usually a promotion item or a forged weapon of the type that was used during the tournament. They can repeat tournaments as long as their Activity points allow for it, but the reward can only be obtained once. Repeated tournaments will simply reward the player with additional gold.
List of tournaments
| Chapter | Name | Weapon | Reward |
|---|---|---|---|
| Chapter 4 | Beginner Sword Tournament | 300G | |
| Chapter 5 | House vs. House Lance Tournament | 300G | |
| Chapter 6 | Intermediate Axe Tournament | 500G | |
| Chapter 7 | House vs. House Sword Tournament | 500G | |
| Chapter 8 | Intermediate Brawling Tournament | 750G | |
| Chapter 9 | Intermediate Black Magic Tournament | 750G | |
| Chapter 10 | House vs. House Bow Tournament | 1,000G | |
| Chapter 11 | House vs. House Magic Tournament | 1,000G | |
| Chapter 12 |
Intermediate Lance Tournament | 1,000G |
| Chapter | Name | Weapon | Reward |
|---|---|---|---|
| Chapter 14 | Advanced Sword Tournament | 1,250G | |
| Chapter 15 | Advanced Lance Tournament | 1,250G | |
| Chapter 16 | Advanced Bow Tournament | 1,250G | |
| Chapter 17 | Black Magic Tournament | 1,500G | |
| Chapter 18 | Advanced Axe Tournament | 1,500G | |
| Chapter 20 | Advanced Brawling Tournament | 1,500G | |
| Chapter 21 | Ultimate Sword Tournament | 2,000G |
| Chapter | Name | Weapon | Reward |
|---|---|---|---|
| Chapter 14 | Advanced Sword Tournament | 1,250G | |
| Chapter 15 | Advanced Lance Tournament | 1,250G | |
| Chapter 16 | Advanced Bow Tournament | 1,250G | |
| Chapter 17 | Black Magic Tournament | 1,500G | |
| Chapter 18 | Advanced Axe Tournament | 1,500G | |
| Chapter 19 | Advanced Brawling Tournament | 1,500G | |
| Chapter 20 | Ultimate Sword Tournament | 2,000G | |
| Chapter 21 | Ultimate Sword Tournament | 2,000G |
| Chapter | Name | Weapon | Reward |
|---|---|---|---|
| Chapter 14 | Advanced Sword Tournament | 1,250G | |
| Chapter 15 | Advanced Lance Tournament | 1,250G | |
| Chapter 16 | Advanced Bow Tournament | 1,250G | |
| Chapter 17 | Advanced Axe Tournament | 1,500G | |
| Chapter 18 | Advanced Brawling Tournament | 1,500G | |
| Chapter 19 | Ultimate Sword Tournament | 2,000G | |
| Chapter 21 | Ultimate Sword Tournament | 2,000G | |
| Chapter 22 | Ultimate Sword Tournament | 2,000G |
| Chapter | Name | Weapon | Reward |
|---|---|---|---|
| Chapter 13 | Advanced Sword Tournament | 1,250G | |
| Chapter 14 | Advanced Lance Tournament | 1,250G | |
| Chapter 15 | Advanced Bow Tournament | 1,250G | |
| Chapter 16 | Advanced Axe Tournament | 1,500G | |
| Chapter 17 | Ultimate Sword Tournament | 1,500G |
Additionally, the following tournament is available from Chapter 8 until Chapter 12 as part of a quest. Uniquely, it allows and requires the player to deploy Byleth against a series of five especially strong opponents. While this quest is active, the player may switch between the quest tournament and the regular monthly tournaments by pressing the ZL or ZR buttons.
Uniquely, the units the player faces during this tournament do not adhere to any weapon type restrictions. Instead, they will use weapons depending on their class (e.g. Armored Knights will use axes). The enemy composition during this tournament changes based on Byleth's gender. In addition to the tournament reward, the player will obtain the rewards from the quest.
| Quest | Name | Weapon | Reward |
|---|---|---|---|
| A Question of Conduct | Proper Conduct | 1,150G |
Sauna
If the player has purchased the Expansion Pass and is using version 1.1.0 or higher, they will be given the Sauna Time quest from Chapter 5 onwards. Completing this quest grants them the ability to use the sauna at the monastery. The sauna is also unlocked automatically at the start of Part II if this quest has not been completed.
To use the Sauna, the player will need to talk to the NPC responsible for it, who is found in front of the Sauna, between Byleth's Personal Quarters and the Training Grounds. They will be asked to select one unit from their class. Each unit can only be invited to the sauna once per in-game month, though the player may invite other units to the sauna during that same month. Using the sauna consumes one Activity point.
At the sauna, the player is given five action points. These action points are independent from their activity points, and do not increase with Professor level. Additionally, both Byleth and the character they invited will have their own gauge that displays how refreshed they are. They will be given three different options:
- Increase Steam
- Stay Longer
- Leave
The first two options will consume one action point, while leaving ends the sauna session immediately. The "Increase Steam" option warms up both characters by a large amount, while the "Stay Longer" option warms up both units by a smaller amount. As the room gets warmer, both units' refreshment gauge will increase. The length of this gauge is random. However, both units have a certain point (marked through a black line on the gauge) where they will overheat. If a unit overheats, the gauge will turn from green to red, and the sauna session will be forcibly ended.
After the sauna session ends, either because the player ran out of action points, because a character has overheated, or because the player chose to leave, Byleth will gain support points with the other character, and will gain more skill experience based on how refreshed they are for the rest of the month. After the sauna, Byleth will make a brief comment on the visit.
Marketplace
The marketplace hosts multiple shops, some of which are unlocked or expand their stock as the story progresses. The Marketplace first becomes accessible in Chapter 1, featuring only the Armory and Item Shop. Each shop's supplies are renewed each month for every item not listed as "limited".
Armory
- Main article:
Armory
The Armory is available from Chapter 2 (or Chapter 1 in New Game +) when the Marketplace first becomes accessible.
Chapter 1 Chapter 8 Chapter 12 ![]() /14
/14 ![]()
![]()
![]()
| Name | Stock | Price | |
|---|---|---|---|
| Iron Sword | ∞ | 520 | |
| Steel Sword | 3 | 910 | |
| Training Sword | ∞ | 260 | |
| Iron Lance | ∞ | 560 | |
| Steel Lance | 3 | 910 | |
| Training Lance | ∞ | 280 | |
| Javelin | 3 | 700 | |
| Iron Axe | ∞ | 600 | |
| Steel Axe | 3 | 980 | |
| Training Axe | ∞ | 300 | |
| Hand Axe | 3 | 750 | |
| Mace | ∞ | 720 | |
| Iron Bow | ∞ | 560 | |
| Steel Bow | 3 | 910 | |
| Training Bow | ∞ | 350 | |
| Mini Bow | ∞ | 680 | |
| Iron Gauntlets | ∞ | 480 | |
| Steel Gauntlets | 3 | 640 | |
| Training Gauntlets | ∞ | 240 |
Item Shop
- Main article:
Item shop
The Item Shop is available from Chapter 2 (or Chapter 1 in New Game +) when the Marketplace first becomes accessible.
Chapter 1 Chapter 8 Chapter 12 ![]() /14
/14 ![]()
![]()
![]()
| Name | Stock | Price | |
|---|---|---|---|
| Leather Shield | ∞ | 500 | |
| Iron Shield | 3 | 1,000 | |
| Vulnerary | ∞ | 300 | |
| Beginner Seal | ∞ | 500 | |
| Intermediate Seal | 3 | 1,000 | |
| Torch | ∞ | 600 | |
| Pure Water | 5 | 600 | |
| Door Key | ∞ | 300 | |
| Chest Key | ∞ | 300 |
Battalion Guild
The Battalion Guild is unlocked at the start of Chapter 3. The battalions available for hire differ depending on the house chosen at the start of the game. If the player is on the version of Chapter 12 leading into the Crimson Flower route, all battalions affiliated with the Church of Seiros will be removed from the roster.
Black Eagles ![]()
![]() Blue Lions
Blue Lions ![]() Golden Deer
Golden Deer ![]()
Chapter 3 Chapter 8 Chapter 12 ![]() Chapter 14
Chapter 14 ![]()
| Name | Gambit | Level | Price | ||
|---|---|---|---|---|---|
| Church of Seiros Soldiers | Disturbance | E | 1,000 | ||
| Seiros Mercenaries | Onslaught | E | 1,200 | ||
| Seiros Holy Monks | Stride | E | 1,200 | ||
| Seiros Sacred Monks | Resonant White Magic | E | 1,200 | ||
| Seiros Magic Corps | Group Flames | D | 1,200 | ||
| Seiros Pegasus Co. | Assembly | D | 1,200 | ||
| Knights of Seiros | Blaze | C | 1,500 | ||
| Empire Infantry | Lure | E | 1,000 | ||
| Empire Warriors | Random Shot | E | 1,000 | ||
| Empire Brawlers | Disturbance | E | 1,200 | ||
| Empire Magic Corps | Group Flames | D | 1,200 | ||
| Empire Archers | Fusillade | D | 1,200 | ||
| Empire Knights | Blaze | C | 1,500 |
Blacksmith
- Main article:
Forge
The Blacksmith can be unlocked in Chapter 5 by clearing the Forge the Way quest, and can be used to forge and repair weapons. Forging or repairing a weapon requires ores, and forging a weapon requires a certain professor level depending on what the weapon is being forged into.
Travelling Merchants and Anna's Shop
Up to three merchants can appear in the marketplace, each of whom sell items for use around the Monastery, as can Anna, who will sell various rare items and equipment. The Southern Merchant and Eastern Merchant can be unlocked in Chapter 5 by clearing the Clearing the Way quest. Anna's Shop can be unlocked in Chapter 15 of every route by clearing the The Secret Shop quest. The Dark Merchant can be unlocked in Chapter 16 of every route by clearing the Taking Care of Business quest.
Southern Merchant ![]() Eastern Merchant
Eastern Merchant ![]() Anna's Shop
Anna's Shop ![]() Dark Merchant
Dark Merchant ![]()
| Name | Stock | Price | |
|---|---|---|---|
| Poultry | ∞ | 250 | |
| Wild Game | ∞ | 500 | |
| Mixed Herb Seeds | ∞ | 50 | |
| Root Vegetable Seeds | ∞ | 50 | |
| Vegetable Seeds | ∞ | 50 | |
| Western Fódlan Seeds | ∞ | 50 | |
| Eastern Fódlan Seeds | ∞ | 100 | |
| Southern Fódlan Seeds | ∞ | 100 | |
| Northern Fódlan Seeds | ∞ | 100 | |
| Red Flower Seeds | ∞ | 300 | |
| White Flower Seeds | ∞ | 300 | |
| Blue Flower Seeds | ∞ | 300 | |
| Purple Flower Seeds | ∞ | 300 | |
| Yellow Flower Seeds | ∞ | 300 | |
| Green Flower Seeds | ∞ | 300 | |
| Pale-Blue Flower Seeds | ∞ | 300 | |
| Floral Adornment | 1 | 100 | |
| Tasty Baked Treat | 1 | 100 | |
| Smoked Meat | 1 | 100 | |
| Watering Can | 1 | 300 | |
| Dapper Handkerchief | 1 | 300 | |
| Armored Bear Stuffy | 1 | 500 | |
| Riding Boots | 1 | 500 | |
| Legends of Chivalry | 1 | 500 | |
| Goddess Statuette | 1 | 500 | |
| Ceremonial Sword | 1 | 1,000 | |
| Coffee Beans | 1 | 1,000 |
Other notable locations
Library
The Library contains ten accessible books and historical texts detailing the lore of Fódlan and the lands surrounding it, all of which have been approved by the Church of Seiros.
The Book of Seiros, Part I
|
The Book of Seiros, Part II
|
The History of Fódlan, Part I
|
The History of Fódlan, Part II
|
Register of Empire Nobles, Part I
|
Register of Empire Nobles, Part II
|
Register of Alliance Nobles
|
Register of Kingdom Nobles
|
Traveler's Journal, Issue 1
|
Traveler's Journal, Issue 2
|
amiibo Gazebo

The amiibo Gazebo allows the player to utilize their amiibo. Scanning any amiibo once will cause a variety of items to spawn around the gazebo, which refresh every week. Scanning any Fire Emblem character amiibo will unlock an exclusive music track to play during auxiliary battles, detailed below. Additionally, this will unlock a unique area, the Holy Tomb, which can be accessed during New Game +. Rarer items will spawn there, also refreshing every week. If spoken to Sothis (or after Chapter 10, the opposing Byleth), Byleth will be granted the Sothis Shield, a team-wide Ward ability that can be used once per battle.
| Character | Song |
|---|---|
| Marth | The Time to Act |
| Tiki | The World Tree |
| Alm | March to Deliverance |
| Celica | With Mila's Divine Protection |
| Roy | Beneath a New Light (Roy's Courage) |
| Ike | Eternal Bond |
| Chrom | Destiny (Ablaze) |
| Robin | Id (Purpose) |
| Lucina | Conquest (Ablaze) |
| Corrin (male) | Alight (Storm) |
| Corrin (female) | A Dark Fall (Fire) |
Abyss
- Main article:
Abyss
The Abyss has been introduced as a part of the fourth and final wave of the Expansion Pass. It can be accessed after Chapter 1 of the Cindered Shadows side story has been completed. To access Abyss, the player has to talk to the Shifty Merchant who is found next to Byleth's Personal Quarters. The player can alternatively use Fast Travel to access Abyss. Abyss is a seperate area from rest of the monastery, and during the main story, allows the player to access additional features such ass the Wayseer or the Scrap Heap. To return to the monastery, the player can either use Fast Travel or go to the south western corridor in Abyss.
The facilities of Abyss do not consume the player's activity points, but many of them use their renown as a resource. Most of them additionally need to be unlocked by spending renown at the Influencer.
In the Cindered Shadows side story, Abyss takes the monastery's place as the primary hub for the campaign. During the side story, the marketplace can be accessed from the Abyss, allowing the player to purchase weapons, items, and battalions, and to use the forge. During the main story, all of these facilities are unavailable.
Holy Tomb
The Holy Tomb was the place where Sothis rested after using up her power to restore Fódlan. After Byleth was granted Sothis's power, Rhea attempted to perform a ritual by letting them sit on Sothis's throne. During this ceremony, the Flame Emperor attacked and was ultimately revealed to be Edelgard.
The coffins at the Holy Tomb house various crest stones. They are guarded by Altered Golems and Phantoms. This defence mechanism is disabled during the ceremony during Chapter 11, but is re-enabled when Byleth and their army attempt to recover the Seiros Shield which Rhea hid in the Holy Tomb before the battle of Garreg Mach during all non-Crimson Flower routes.
Emblem Byleth's paralogue in Fire Emblem Engage, The Instructor, is modelled after Chapter 11 of Three Houses, and therefore takes place at the holy tomb. The coffins where the crest stones are stored are replaced by Crystals that the player can protect for additional rewards.
Holy Mausoleum
The holy tomb is said to be the resting place of Saint Seiros. The Sword of the Creator was stored in her coffin until the Western Church invaded the monastery and the Sword of the Creator was entrusted to Byleth. The Holy Tomb is also where Aelfric attempted to perform the Rite of Rising to revive Sitri.
Other appearances
Fire Emblem Engage
- Main article:
The Instructor
The Holy Mausoleum appears as the location for Emblem Byleth's paralogue. The map is based on the map for Chapter 11 in Three Houses, with the coffins where the Crest Stones were stored being replaced by crystals that the enemies are trying to destroy. Emblem Byleth appears as the boss of this chapter.
The monastery and the Officer's Academy are also mentioned in some of the bond conversations for Emblems Byleth, Edelgard, Dimitri, and Claude.
Fire Emblem Warriors: Three Hopes
As Three Hopes takes place in the same universe as Three Houses, Garreg Mach Monastery is relevant to its plot. Like in Three Houses, the game's main character, Shez, is taken to the monastery and asked to join a class. However, due to the plot's structure, the Base Camp fills in the monastery's role as the game's central hub. However, Garreg Mach Monastery appears as both a location during certain cutscenes and as the battlefield for numerous story missions.
The following story missions take place in Garreg Mach Monastery:
- The Struggle Commences (Chapter 4
 )
) - A Path Forward (Final Chapter )
- The End of Tragedy (Final Chapter
 )
) - A Symbol of the Past (Chapter 14
 )
)
All of these missions take place at the outskirts of the monastery, but the endgame chapters of the Scarlet Blaze and Azure Gleam routes also include a section within the monastery. This section consists of the main hall and the cathedral, though all desks and benches are removed to make room for the battle.
Super Smash Bros. Ultimate
| This article or section is a short summary of Garreg Mach Monastery. SmashWiki features a more in-depth article. |
Garreg Mach Monastery appears as a stage in Super Smash Bros. Ultimate, released alongside Byleth on January 28th, 2020. The stage cycles through locations; transitions between locations have a mystical blue platform that sends the fighters upward, showing a view of the landscape, before plummeting back into the next area. Each location features different characters in the background; the locations and characters are, in the order in which the stage cycles:
- The marketplace, featuring Dimitri, Dedue, Ingrid, and the Gatekeeper.
- The reception hall, featuring Edelgard, Dorothea, and Petra.
- The bridge, featuring Claude, Hilda, and Lorenz.
- The cathedral, featuring Rhea, Seteth, and Flayn.
Etymology and other languages
| Names, etymology, and in other regions | ||
|---|---|---|
| Language | Name | Definition, etymology, and notes |
| English |
Garreg Mach Monastery |
-- |
| Japanese |
ガルグ=マク大修道院 |
Officially romanized as Garreg Mach Monastery. The version of the world map appearing in E3 2018 materials instead romanized the location's name as Garg Mac. |
| Spanish |
Monasterio de Garreg Mach |
Garreg Mach Monastery |
| French |
Monastère de Garreg Mach |
Garreg Mach Monastery |
| German |
Kloster von Garreg Mach |
Garreg Mach Monastery |
| Italian |
Monastero del Garreg Mach |
Garreg Mach Monastery |
| Dutch |
Garreg Mach-klooster |
Garreg Mach monastery; used in Super Smash Bros. Ultimate, as Fire Emblem: Three Houses has not been released in Dutch. |
| Portuguese |
Monastério Garreg Mach |
Garreg Mach monastery; used in Heroes.[3] |
| Russian |
Монастырь Гаррег Мах |
Garreg Mach monastery; used in Super Smash Bros. Ultimate, as Fire Emblem: Three Houses has not been released in Russian. |
| Korean |
가르그 마크 대수도원 |
Garg Mac Monstery |
| Simplified Chinese |
加尔古·玛库大修道院 |
Garg Mac Monastery |
| Traditional Chinese |
加爾古‧瑪庫大修道院 |
Garg Mac Monastery |
Gallery

Artwork of the Monastery.
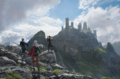
Artwork of the Monastery from the Three Houses Limited Edition.

Artwork of the interior cathedral.


References
- ↑ Fishing, Serenes Forest, Retrieved: May 9, 2024
- ↑ Greenhouse, Serenes Forest, Retrieved: May 1, 2024
- ↑ "Dorothea Arnault, às ordens. Sou membro das Águias negras no monastério Garreg Mach." — Dorothea: Solar Songstress when she is summoned (Portuguese), Fire Emblem Heroes
See also
| Fire Emblem: Three Houses | |||||||||||||||||||||||||||||||||||||||||||||||||||||||||||||||||||||
|---|---|---|---|---|---|---|---|---|---|---|---|---|---|---|---|---|---|---|---|---|---|---|---|---|---|---|---|---|---|---|---|---|---|---|---|---|---|---|---|---|---|---|---|---|---|---|---|---|---|---|---|---|---|---|---|---|---|---|---|---|---|---|---|---|---|---|---|---|---|
| |||||||||||||||||||||||||||||||||||||||||||||||||||||||||||||||||||||
| Fire Emblem Warriors: Three Hopes | ||||||||||||||||||||||||||||||||||||||
|---|---|---|---|---|---|---|---|---|---|---|---|---|---|---|---|---|---|---|---|---|---|---|---|---|---|---|---|---|---|---|---|---|---|---|---|---|---|---|
| ||||||||||||||||||||||||||||||||||||||