| Site News |
|---|
| Warning: This wiki contains spoilers. Read at your own risk! Social media: If you would like, please join our Discord server, and/or follow us on Twitter (X) or Tumblr! |
Base Camp
| ||||
|

The Base Camp is a location and game mechanic in Fire Emblem Warriors: Three Hopes. Similar to Garreg Mach Monastery from Fire Emblem: Three Houses, it acts as a hub world throughout the story, and houses various facilities that can be used to make playable characters stronger. It also allows players to interact with the various units, and allows them to find documents that expand upon certain plot elements of the game.
Gameplay
The Base Camp can be navigated freely. Gameplay in the base camp mostly consists of visiting characters and specific spots to complete various tasks or to trigger a conversation or minigame. Pressing the B button will toggle a running state, increasing Shez's movement speed. Additionally, by pressing the R button, the player can choose to fast travel to any facility, unit, or location in the camp. Unlike Garreg Mach Monastery, visiting the Base Camp will not consume any resources. Instead, the base camp can be visited between battles as much as the player wants, with resources such as Activity Points and Training Points carrying over between exploration sessions during the same chapter.
For using the camp's facilities, there are two different resources: Activity Points, which are used for Expeditions, Cooking, and Volunteering, and Training Points, which are exclusively used at the Training Grounds. Both resources are completely independent from each other, and can only be refilled at specific survey spots on the world map or by starting a new chapter. If activity or training points run out, the associated activities will become unavailable.
Occasionally, the player is also tasked to visit certain facilities before proceeding in the story. If this is the case, the task is displayed on the left side of the screen, and the relevant areas are marked on the map. If the player has any remaining tasks in the base camp, the War Map – and therefore progressing in the story – will temporarily become unavailable.
In Part II, the player is additionally asked to pick one of three different battle suggestions that will temporarily enhance their army's performance in different ways.
Availability
The Base Camp is unavailable during the following chapters:
- Chapter 0
- Chapter 1
- Chapter 2 Replaced by a temporary Base Camp
- Scarlet Blaze Chapter 3 Replaced by a temporary Base Camp
- Azure Gleam Chapter 3 Replaced by a temporary Base Camp
- Golden Wildfire Chapter 3 Replaced by a temporary Base Camp
- Chapter 15
- Chapter 16 Replaced by Zahras
Temporary Base Camp

In the prologue, the main base camp area is not visited. Instead, in some chapters, it is replaced by a different, smaller area where the player can interact with their units and certain NPCs, but no facilities or other activities are available.
In Chapter 1, the camp houses all students from the three main houses except for Bernadetta along with Alois, Hanneman, and Manuela. The player is first tasked to talk to the three house leaders who will give them information on the various units from their respective house, including both character and gameplay information. Then, the player may choose to talk to Alois again, ending the exploration session and proceeding the story.
In Chapter 3, the base camp only houses only houses some of the respective house's students alongside certain relevant characters (such as Jeritza for the Black Eagles). The player is tasked by their house leader to talk to the other students, and then return to the house leader. Like in the previous chapter, returning to the house leader will end the exploration session and proceed the story.
Zahras

In Chapter 16, the Base Camp is replaced by a much smaller area that is part of Zahras. In this chapter, the player is initially tasked to talk to each of the house leaders. Talking to the house leaders not associated with the current route will trigger a conversation between the house leaders the player has not talked to (e.g. if the player is playing the Azure Gleam route and is talking to Edelgard, a conversation between Dimitri and Claude is triggered). These conversations are considered support conversations in the support gallery, but do not actually increase the house leaders' support level with each other.
Additionally, the player can interact with the orb in the centre of the area. There, they can access all facilities available to them in the regular base camp through a menu. If they have talked to the house leaders, they are also given the option to proceed the story at the same orb.
Layout

|
The base camp is laid out around the Command Centre, a castle-like structure in the middle of the camp that houses the Strategist, the Record Keeper, and the Facility Master along with the Rewards Master. Around the command centre, there are multiple buildings and areas that house the different facilities in the base camp. Shez's personal quarters are in the north west of the camp. At the beginning of each chapter, this is where the player will start out. The kitchen and the Chore Master can be found to its south. Further to the south, in the south west of the base camp, the training grounds can be found. To the east of the command centre, the Marketplace and the battalion guild can be found, and the Blacksmith, Armoury, and Tactics Instructor are located in the south east of the camp. The other areas of the Base camp mainly serve an aesthetic purpose, though in some chapters, characters can be found there. Each character's location will change depending on the chapter and route.
The layout of the camp itself will not change depending on the route, though certain buildings and objects will have different colours depending on the chosen route, and the respective nation's coat of arms will be displayed on certain banners.
Facilities
To use facilities, the player needs to talk to a generic NPC unit that is assigned the corresponding facility. Not all facilities are unlocked immediately. Instead, some facilities need to be unlocked by progressing in the story. Unlocked facilities do not carry over through New Game +.
Personal Quarters

Shez's personal quarters is where the player initially starts each chapter. Players may interact with Shez's Journal, allowing them to access the following three options:
Appearance
The appearance submenu allows the player to customise the appearance of each of their units indivdually. The player can change how their units appear both in the base camp and in battle. However, enemy units will not be affected by the Appearance menu, even if that unit's appearance was changed as a playable character. Additionally, the appearance of Rhea, Sothis, and Arval cannot be changed.
For the camp section, all student characters can be switched to their Academy designs. This also applies to the Ashen Wolves, whose academy designs are otherwise unseen in Warriors: Three Hopes. Additionally, Dorothea's academy design can be set to not include her hat, and Jeritza can be set to wear his mask. All other units will not have alternate appearances available for the Base Camp.
For the battle section, the player can choose between three options:
- Standard: Units will use their class's outfits, but may use custom outfits in specific classes. Used by default.
- Unique: Units will use their base camp designs in battle. Unavailable for some units in some classes (such as characters wearing skirts in classes where players may otherwise look beneath their skirts). Unavailable for all mounted classes.
- Base on class: Units will always use their class's outfits, even if a unique outfit would be available.
Documents
- Main article:
Documents in Fire Emblem Warriors: Three Hopes
As the player explores the base camp, they will find special documents. Some of the documents were ported over from Three Houses, while other ones were created specifically for Warriors: Three Hopes.
| Document locations in the Base Camp | |||
|---|---|---|---|
| Document | Chapter | Route | Location |
| Imperial Territories of Adrestia: Book One | Chapter 4 | Found on the altar in the church. | |
| Report on Abyss | Chapter 4 | Found at the marketplace. | |
| Empire Nobles I | Chapter 4 | Found in the Command Centre. | |
| Empire Nobles II | Chapter 5 | Found in the medical tent. | |
| Traveller's Journal I | Chapter 5 | Found outside of the building next to Shez's personal quarters. | |
| Traveller's Journal II | Chapter 6 | Found outside of the building next to Shez's personal quarters. | |
| History of Fódlan I | Chapter 6 | Found on a desk near the Tactics Instructor. | |
| History of Fódlan II | Chapter 7 | Found in the back of the Tactics Instructor's building. | |
| Imperial Territories of Adrestia: Book Two | Chapter 8 | Found in the kitchen. | |
| Dagdar War Journal Excerpt | Chapter 10 | Found outside of the kitchen. | |
| Bundle of Illustrations | Chapter 11 | Found in the medical tent. | |
| Book of Seiros I | Chapter 13 | Found in the medical tent. | |
| Piece of an Old Note | Chapter 14 | Found in the Command Centre. | |
| Exquisite Old Letter | Chapter 3 | Found towards the south of the area, behind Dedue. | |
| Kingdom Nobles | Chapter 4 | Found in the Command Centre. | |
| Royal Territories of Faerghus: Book One | Chapter 4 | Found in church building. | |
| Letter from an Abyss Resident | Chapter 4 | Found at the marketplace. | |
| Traveller's Journal I | Chapter 6 | Found in front of the building next to Shez's personal quarters. | |
| Royal Territories of Faerghus: Book Two | Chapter 8 | Found in the kitchen. | |
| Military History of Partholon | Chapter 10 | Found in front of the kitchen. | |
| The Death of King Klaus | Chapter 11 | Found in the medical tent. | |
| Old Letter | Chapter 13 | Found in the Command Centre. | |
| Book of Seiros II | Chapter 14 | Found in the medical tent. | |
| Allied Territories of Leicester: Book One | Chapter 4 | Found in the church building. | |
| Letter from the Abysskeeper | Chapter 4 | Found on the marketplace. | |
| Alliance Nobles | Chapter 4 | Found in the Command Centre. | |
| Allied Territories of Leicester: Book Two | Chapter 8 | Found in the kitchen. | |
| Commander's Journal | Chapter 9 | Found in front of the kitchen. | |
| Torn Pages of a Story | Chapter 11 | Found in the medical tent. | |
| Book of Seiros V | Chapter 13 | Found in the medical tent. | |
| Old Letter Addressed to the Bishop | Chapter 14 | Found in the Command Centre. | |
Spend Renown
In the spend renown section, the player can use their renown points to purchase items. This section is only partially available without New Game +, as only the Items section is available. On New Game +, the Characters and Equipment sections become available, and an extra item is added to the Items section.
Characters
The following units can be purchased upon completion of at least one route:
| Purchasable units | ||||
|---|---|---|---|---|
| Portrait | Unit | Class | Equipment | Renown cost |

|
Rhea | Saint | 60 | |

|
Sothis | Gremory | 60 | |
The following unit can only be purchased upon completion of at least one route with Byleth recruited:
| Purchasable units | ||||
|---|---|---|---|---|
| Portrait | Unit | Class | Equipment | Renown cost |

|
Arval | Dark Bishop (if Shez is male) or Gremory (if Shez is female) | 60 | |
Equipment
The following equipment becomes available after finishing at least one route:
| Purchasable equipment | ||||
|---|---|---|---|---|
| Icon | Item | Type | Stock | Renown cost |
| Sublime Creator Sword | Sword | 1 | 15 | |
| Dark Creator Sword | Sword | 1 | 15 | |
| Athame | Sword | 1 | 15 | |
| Ridill | Sword | 1 | 15 | |
| Asclepius | Staff | 1 | 15 | |
| Experience Gem | Gem | 1 | 15 | |
| Knowledge Gem | Gem | 1 | 15 | |
Additionally, the following items become available depending on the route(s) that have been finished on the same save file:
| Crest items | |||||||
|---|---|---|---|---|---|---|---|
| Icon | Item | Crest | Stock | Renown cost | Route(s) | ||
| Thorn Dragon Sign | Ernest | 1 | 6 | ||||
| Wind Dragon Sign | Macuil | 1 | 6 | ||||
| Sky Dragon Sign | Seiros | 1 | 6 | ||||
| Crusher Dragon Sign | Dominic | 1 | 6 | ||||
| Shield Dragon Sign | Fraldarius | 1 | 6 | ||||
| Bloom Dragon Sign | Noa | 1 | 6 | ||||
| Light Dragon Sign | Cethleann | 1 | 6 | ||||
| Flame Dragon Sign | Daphnel | 1 | 6 | ||||
| Grim Dragon Sign | Blaiddyd | 1 | 6 | ||||
| Craft Dragon Sign | Gloucester | 1 | 6 | ||||
| Kalpa Dragon Sign | Goneril | 1 | 6 | ||||
| Earth Dragon Sign | Cichol | 1 | 6 | ||||
| Ice Dragon Sign | Aubin | 1 | 6 | ||||
| Fissure Dragon Sign | Gautier | 1 | 6 | ||||
| Water Dragon Sign | Indech | 1 | 6 | ||||
| Storm Dragon Sign | The Beast | 1 | 6 | ||||
| Lightning Dragon Sign | Charon | 1 | 6 | ||||
| Dark Dragon Sign | Timotheos | 1 | 6 | ||||
| Star Dragon Sign | Riegan | 1 | 6 | ||||
| Snow Dragon Sign | Chevalier | 1 | 6 | ||||
| Aegis Dragon Sign | Lamine | 1 | 6 | ||||
Items
The following items can be purchased at any time:
| Purchasable items | |||
|---|---|---|---|
| Icon | Item | Stock | Renown cost |
| Fruit of Life | 1 | 3 | |
| Rocky Burdock | 1 | 3 | |
| Premium Magic Herbs | 1 | 3 | |
| Ailell Pomegranate | 1 | 3 | |
| Speed Carrot | 1 | 3 | |
| Miracle Bean | 1 | 3 | |
| Ambrosia | 1 | 3 | |
| White Verona | 1 | 3 | |
| Golden Apple | 1 | 3 | |
| Seraph Robe | 1 | 6 | |
| Energy Drop | 1 | 6 | |
| Spirit Dust | 1 | 6 | |
| Secret Book | 1 | 6 | |
| Speedwing | 1 | 6 | |
| Goddess Icon | 1 | 6 | |
| Giant Shell | 1 | 6 | |
| Talisman | 1 | 6 | |
| Black Pearl | 1 | 6 | |
Additionally, the following item is only available on a New Game + playthrough:
| Purchasable items | |||
|---|---|---|---|
| Icon | Item | Stock | Renown cost |
| Vanguard Whistle | ∞ | 3 | |
Owl

If the player has purchased the game digitally, they will occasionally be visited by an owl that will grant them Owl Feathers if the player interacts with it. There is no similar bonus for physical versions of the game.
Strategist
The strategist is a male paladin located in the command centre. He is available during all chapters where the base camp is visited. Talking to the strategist will open up the chapter's war map and therefore allows them to start battles. The strategist will become temporarily unavailable if there are any unfinished tasks left in the base camp.
War Map

The War Map allows players to select the next battle they want to participate in and can be accessed either by talking to the Strategist or by pressing the ZR button while exploring the base camp. At the start of each chapter, only certain areas adjacent to the base camp on the map are available to them. Each completed battle will "conquer" the respective area, and unlock one or more new battles. The goal on the War Map is to reach the big area marker that marks the chapter's main mission. Smaller battles grant 10 Strategy Resources when they are completed, and usually also unlock survey spots.
Survey Spots are represented by smaller icons on the war map, such as a mountain or a village. They can only be interacted with if the area they are in has been conquered by copmpleting the respective battle. Visiting survey spots will grant the player benefits depending on the survey spot, such as:
- Weapons and accessories
- Battalions
- Permanent stat increases
- A boost of morale
- Support points
- Items
- Strategies
Additionally, some survey spots can trigger additional battles. These battles are not listed at the Records Keeper, and are considered extra quests for the sake of the respective achievements.
Certain survey spots may also have specific requirements such as a certain amount of enemies the player has to defeat within the respective chapter or a side mission that has to be completed in the associated battle. If the requirements have not been met, the player cannot obtain the rewards from the survey spot.
Extra quests may also randomly appear on the war map. If they appear, they can only be accessed if the area they appeared in has already been conquered by completing the associated battle. Additionally, they will only be available for a certain amount of time. This is indicated by a number appearing next to the quest marker that goes down by 1 whenever a battle or extra quest is completed. If this number reaches 0, the extra quest will become unavailable. Extra quests usually consist of short battles, but they often contain rare monsters that drop rare weapons.
Some chapters only consist of the main mission, with no additional battles or survey spots being available.
If the base camp is selected on the map, the player returns to the base camp. If any paralogues are available, they can also be accessed from the base camp on the war map.
After the main mission is completed, the player will advance in the story and previous chapters' war maps along with all survey spots will become unavailable. Because of this, the game will display a warning message if the player selects the chapter's main mission and any available survey spots have not been visited yet.
Record Keeper
The record keeper is a female bishop located in the command centre, to the left of the strategist. She is available from Chapter 5 onward, and will allow the player to replay missions from past chapters. All missions from a specific chapter will become available once that particular chapter has been cleared, even if the specific mission has not yet been cleared. The route split in Scarlet Blaze Chapter 14 is an exception to this, as although both possible main missions are listed as part of the same chapter, each variation is only unlocked once it has been cleared at least once in the regular story, though it is possible to achieve a complete list through New Game +. Paralogues are added to the Record Keeper upon completion. The prologue and Chapter 1 are unavailable through the record keeper.
On a New Game + playthrough, the player will additionally have access to chapters and paralogues from all routes they have completed on that same New Game + file.
Battles at the record keeper follow different rules compared to regular battles:
- All experience, class or combat art masteries, gold, items, etc. will carry over to the main file.
- The player will not receive any clear rewards through the record keeper, though S rank rewards can be obtained.
- The player may use any unit that was ever available to them during their playthrough, even if that unit has died or otherwise become unavailable. The other house leaders' brief playable appearance in Chapter 1 and Chapter 16 is an exception to this rule.
- Using New Game +, the player can use this to use any unit in any chapter at the record keeper.
- Certain chapters and paralogues have deployment restrictions:
- For all paralogues, only Shez can be swapped with another unit. Any other unit that is usually force deployed in the same paralogue will stay force deployed.
- In Chapter 16, the player's army is aided by the other two house leaders. However, the levels, inventories, and classes of the house leaders aside from the house leader for the chosen route cannot be customised, and will not be replaced by customisable versions of the same character through New Game +, even if the corresponding character is available to the player. The customisable versions of the other house leaders cannot be deployed for this chapter.
- Edelgard, Dimitri, and Claude are force deployed in Chapter 16.
- Shez will not be force deployed in any mission, even if they were force deployed in the same chapter in the main story.
- No new characters can be recruited through the record keeper, even if they were persuaded through the corresponding strategies during the battle. Conversely, if a character dies as an enemy or NPC unit, they will not become unavailable to the player.
- For Scarlet Blaze Chapter 10, Azure Gleam Chapter 12, or Golden Wildfire Chapter 10, whether the conditions for the alternative path have been met on replays through the record keeper will not impact the story or future recruitments.
- If playing in Classic mode, player units who fall in battle are permanently lost, even at the record keeper. Although the prologue chapters are exempt from this in the main story, permanent death applies to these battles at the record keeper.
Facility Master
The facility master is a commoner who is located at the command centre, to the right of the Strategist. At the tactics instructor, the player can spend gold and resources to upgrade one of the camp's facilities. When upgraded, the facilities will both change visually and grant the player access to more features.
If an upgrade is available, a notification will show up in the top left corner of the screen. This notification is only visible in the base camp itself as well as on the war map, but it will not disappear until the player either upgrades that facility or runs out of the necessary gold or materials.
List of facility upgrades
For a list of facility upgrades, click below:
Camp Level
Additionally, by upgrading enough facilities, the base camp's Camp Level will increase. A higher camp level grants the player more training and activity points. If the camp level is increased, the additional training and activity points will be treated as though they have already been spent for the current chapter, but will be useable from the next chapter onward.
| Camp Level | |||||||||
|---|---|---|---|---|---|---|---|---|---|
| Rank | Number of upgrades | Activity/Training Points | |||||||
| E | 0–9 | 3 | |||||||
| D | 10–29 | 4 | |||||||
| C | 30–49 | 5 | |||||||
| B | 50–69 | 6 | |||||||
| A | 70–89 | 7 | |||||||
| S | 90–95 | 8 | |||||||
Reward Master
The reward master is a Pegasus Knight to the right of the Records Keeper, Strategist, and Facility Master. When talking to her, the player can view the list of in-game achievements or obtain rewards if they have completed enough achievements.
List of Achievements
Battle Prep Equipment War Map Story Growth Combat
| Achievement | Criteria |
|---|---|
| Training Grounds Developer 1 | Expand the development of the Training Grounds to 25% completion. |
| Training Grounds Developer 2 | Expand the development of the Training Grounds to 50% completion. |
| Training Grounds Developer 3 | Expand the development of the Training Grounds to 75% completion. |
| Training Grounds Developer 4 | Expand the development of the Training Grounds to 100% completion. |
| Blacksmith Developer 1 | Expand the development of the Blacksmith to 25% completion. |
| Blacksmith Developer 2 | Expand the development of the Blacksmith to 50% completion. |
| Blacksmith Developer 3 | Expand the development of the Blacksmith to 75% completion. |
| Blacksmith Developer 4 | Expand the development of the Blacksmith to 100% completion. |
| Recreation Quarter Developer 1 | Expand the development of the Recreation Quarter to 25% completion. |
| Recreation Quarter Developer 2 | Expand the development of the Recreation Quarter to 50% completion. |
| Recreation Quarter Developer 3 | Expand the development of the Recreation Quarter to 75% completion. |
| Recreation Quarter Developer 4 | Expand the development of the Recreation Quarter to 100% completion. |
| Marketplace Developer 1 | Expand the development of the Marketplace to 25% completion. |
| Marketplace Developer 2 | Expand the development of the Marketplace to 50% completion. |
| Marketplace Developer 3 | Expand the development of the Marketplace to 75% completion. |
| Marketplace Developer 4 | Expand the development of the Marketplace to 100% completion. |
| Tactics Academy Developer 1 | Expand the development of the Tactics Academy to 25% completion. |
| Tactics Academy Developer 2 | Expand the development of the Tactics Academy to 50% completion. |
| Tactics Academy Developer 3 | Expand the development of the Tactics Academy to 75% completion. |
| Tactics Academy Developer 4 | Expand the development of the Tactics Academy to 100% completion. |
| Supply Depot Developer 1 | Expand the development of the Supply Depot to 25% completion. |
| Supply Depot Developer 2 | Expand the development of the Supply Depot to 50% completion. |
| Supply Depot Developer 3 | Expand the development of the Supply Depot to 75% completion. |
| Supply Depot Developer 4 | Expand the development of the Supply Depot to 100% completion. |
| Battalion Guild Developer 1 | Expand the development of the Battalion Guild to 25% completion. |
| Battalion Guild Developer 2 | Expand the development of the Battalion Guild to 50% completion. |
| Battalion Guild Developer 3 | Expand the development of the Battalion Guild to 75% completion. |
| Battalion Guild Developer 4 | Expand the development of the Battalion Guild to 100% completion. |
| Facility Champion | Expand the development of all facilities to 100% completion. |
| Shopaholic 1 | Spend a total of 1,000 Gold. |
| Shopaholic 2 | Spend a total of 5,000 Gold. |
| Shopaholic 3 | Spend a total of 10,000 Gold. |
| Shopaholic 4 | Spend a total of 100,000 Gold. |
| Shopaholic 5 | Spend a total of 300,000 Gold. |
| Shopaholic 6 | Spend a total of 500,000 Gold. |
| Tactics Academy Patron 1 | Purchase upgrades from the Tactics Academy once. |
| Tactics Academy Patron 2 | Purchase upgrades from the Tactics Academy 50 times. |
| Tactics Academy Patron 3 | Purchase upgrades from the Tactics Academy 100 times. |
| Tactics Academy Patron 4 | Purchase upgrades from the Tactics Academy 250 times. |
| Tactics Academy Patron 5 | Purchase upgrades from the Tactics Academy 500 times. |
| Culinary Commander 1 | Cook once at the Kitchen Master. |
| Culinary Commander 2 | Cook 10 times at the Kitchen Master. |
| Culinary Commander 3 | Cook 25 times at the Kitchen Master. |
| Culinary Commander 4 | Cook 50 times at the Kitchen Master. |
| Culinary Commander 5 | Cook 75 times at the Kitchen Master. |
| Culinary Commander 6 | Cook 100 times at the Kitchen Master. |
| Culinary Dabbler 1 | Learn 10 different recipes. |
| Culinary Dabbler 2 | Learn 15 different recipes. |
| Culinary Dabbler 3 | Learn 20 different recipes. |
| Culinary Dabbler 4 | Learn 30 different recipes. |
| Culinary Dabbler 5 | Learn all 32 recipes. |
| Diligent Trainee 1 | Spend Training Points at the training grounds once. |
| Diligent Trainee 2 | Spend Training Points at the training grounds 10 times. |
| Diligent Trainee 3 | Spend Training Points at the training grounds 25 times. |
| Diligent Trainee 4 | Spend Training Points at the training grounds 50 times. |
| Diligent Trainee 5 | Spend Training Points at the training grounds 75 times. |
| Diligent Trainee 6 | Spend Training Points at the training grounds 100 times. |
| Sightseer 1 | Spend Activity Points on Expeditions once. |
| Sightseer 2 | Spend Activity Points on Expeditions 10 times. |
| Sightseer 3 | Spend Activity Points on Expeditions 25 times. |
| Sightseer 4 | Spend Activity Points on Expeditions 50 times. |
| Sightseer 5 | Spend Activity Points on Expeditions 75 times. |
| Sightseer 6 | Spend Activity Points on Expeditions 100 times. |
| Smooth Talker 1 | Get a perfect score on a Expedition once. |
| Smooth Talker 2 | Get a perfect score on a Expedition 10 times. |
| Smooth Talker 3 | Get a perfect score on a Expedition 25 times. |
| Smooth Talker 4 | Get a perfect score on a Expedition 50 times. |
| Smooth Talker 5 | Get a perfect score on a Expedition 75 times. |
| Smooth Talker 6 | Get a perfect score on a Expedition 100 times. |
| Unselfish Volunteer 1 | Volunteer Activity Points away to the Chore Master once. |
| Unselfish Volunteer 2 | Volunteer Activity Points away to the Chore Master 10 times. |
| Unselfish Volunteer 3 | Volunteer Activity Points away to the Chore Master 25 times. |
| Unselfish Volunteer 4 | Volunteer Activity Points away to the Chore Master 50 times. |
| Unselfish Volunteer 5 | Volunteer Activity Points away to the Chore Master 75 times. |
| Unselfish Volunteer 6 | Volunteer Activity Points away to the Chore Master 100 times. |
| Battalion Boss 1 | Hire a Battalion. |
| Battalion Boss 2 | Hire 10 different Battalions. |
| Battalion Boss 3 | Hire 25 different Battalions. |
| Battalion Boss 4 | Hire 50 different Battalions. |
| Battalion Boss 5 | Hire 80 different Battalions. |
| Battalion Boss 6 | Hire 120 different Battalions. |
| Moodmaker 1 | Achieve morale level 1 for the first time. |
| Moodmaker 2 | Achieve morale level 2 for the first time. |
| Expert Moodmaker 1 | Reach max moral with a unit once. |
| Expert Moodmaker 2 | Reach max moral with a unit 5 times. |
| Expert Moodmaker 3 | Reach max moral with a unit 10 times. |
| Expert Moodmaker 4 | Reach max moral with a unit 30 times. |
| Expert Moodmaker 5 | Reach max moral with a unit 50 times. |
| Expert Moodmaker 6 | Reach max moral with a unit 100 times. |
| Generous Soul 1 | Gave a gift to a unit once. |
| Generous Soul 2 | Gave a gift to a unit 10 times. |
| Generous Soul 3 | Gave a gift to a unit 50 times. |
| Generous Soul 4 | Gave a gift to a unit 150 times. |
| Generous Soul 5 | Gave a gift to a unit 300 times. |
| C-Rank Friend 1 | Reach support level C 5 times with different unit pairs. |
| C-Rank Friend 2 | Reach support level C 10 times with different unit pairs. |
| C-Rank Friend 3 | Reach support level C 20 times with different unit pairs. |
| B-Rank Friend 1 | Reach support level B 5 times with different unit pairs. |
| B-Rank Friend 2 | Reach support level B 10 times with different unit pairs. |
| B-Rank Friend 3 | Reach support level B 20 times with different unit pairs. |
| A-Rank Friend 1 | Reach support level A once with any unit pair. |
| A-Rank Friend 2 | Reach support level A 3 times with different unit pairs. |
| A-Rank Friend 3 | Reach support level A 5 times with different unit pairs. |
| A Very Special Friend | Receive a special gift from any ally unit after giving away the Merc Whistle for the first time. |
List of Rewards
| Rewards | |||||||||
|---|---|---|---|---|---|---|---|---|---|
| Icon | Item | Amount | Requirement | ||||||
| Intermediate Seal | 1 | 3 Achievements completed | |||||||
| Fruit of Life | 1 | 10 Achievements completed | |||||||
| Intermediate Seal | 1 | 20 Achievements completed | |||||||
| Rocky Burdock | 1 | 30 Achievements completed | |||||||
| Smithing Stones | 20 | 40 Achievements completed | |||||||
| Premium Magic Herbs | 1 | 50 Achievements completed | |||||||
| Bullion | 1 | 60 Achievements completed | |||||||
| Ailell Pomegranate | 1 | 70 Achievements completed | |||||||
| Advanced Seal | 1 | 80 Achievements completed | |||||||
| Speed Carrot | 1 | 90 Achievements completed | |||||||
| Secret Transport Force | 1 | 100 Achievements completed | |||||||
| Miracle Bean | 1 | 110 Achievements completed | |||||||
| Advanced Seal | 1 | 120 Achievements completed | |||||||
| Ambrosia | 1 | 130 Achievements completed | |||||||
| Large Bullion | 1 | 140 Achievements completed | |||||||
| Owl Feathers | 3 | 150 Achievements completed | |||||||
| White Verona | 1 | 160 Achievements completed | |||||||
| Master Seal | 1 | 170 Achievements completed | |||||||
| Golden Apple | 1 | 180 Achievements completed | |||||||
| Owl Feathers | 3 | 190 Achievements completed | |||||||
| Wootz Steel | 50 | 200 Achievements completed | |||||||
| Seraph Robe | 1 | 210 Achievements completed | |||||||
| Essar Research Group | 1 | 220 Achievements completed | |||||||
| Energy Drop | 1 | 230 Achievements completed | |||||||
| Master Seal | 1 | 240 Achievements completed | |||||||
| Extra Large Bullion | 1 | 250 Achievements completed | |||||||
| Spirit Dust | 1 | 260 Achievements completed | |||||||
| Owl Feather | 3 | 270 Achievements completed | |||||||
| Secret Book | 1 | 280 Achievements completed | |||||||
| Extra Large Bullion | 1 | 290 Achievements completed | |||||||
| Agarthium | 75 | 300 Achievements completed | |||||||
| Speedwing | 1 | 310 Achievements completed | |||||||
| Platepiercer Fencers | 1 | 320 Achievements completed | |||||||
| Mountslayer Sorcery Co. | 1 | 330 Achievements completed | |||||||
| Wingrender Snipers | 1 | 340 Achievements completed | |||||||
| Independent Mercenaries | 1 | 350 Achievements completed | |||||||
| Goddess Icon | 1 | 360 Achievements completed | |||||||
| Owl Feather | 3 | 370 Achievements completed | |||||||
| Giant Shell | 1 | 380 Achievements completed | |||||||
| Mythril | 100 | 390 Achievements completed | |||||||
| Retinue of the Goddess | 1 | 400 Achievements completed | |||||||
| Talisman | 1 | 410 Achievements completed | |||||||
| Black Pearl | 1 | 420 Achievements completed | |||||||
| Umbral Steel | 150 | 430 Achievements completed | |||||||
| Einherjar | 1 | 440 Achievements completed | |||||||
| Chalice of Beginnings | 1 | 450 Achievements completed | |||||||
Training Instructor

The rewards master is a Grappler who can be found in the south western area of the base camp. Talking to him will grant the player access to various features that allow them to either raise a unit's level or help them with mastering their class.
Train
The Train feature allows the player to spend Training Points in exchange for class experience. Initially, the player has access to three training slots, though upgrades allow them to get up to five additional slots for a total of eight. Each slot can be filled with up to two units. To be selected, all units need to be in the player's currently active roster (excluding units who have fallen on Classic Mode or are only available through New Game + as well as non-Gatekeeper bonus units.
The player is then given a choice wether they want to do a single training session or a series of training sessions. A single training session will play a short clip of the characters in one of the slots training together. A series of training sessions will skip this sequence, and will last until either a unit has achieved full class mastery or the player's training points have run out.
The amount of class experience gained is calculated as follows:
- The base amount of class experience gained is 60. The amount gained can be increased through facility upgrades for a maximum of 72 base class experience, though facility upgrades are split between the classes' primary weapon types. For the Fighter class, the class is affected by all three weapon types' bonuses, though the bonuses do not stack if multiple upgrades have been purchased.
- A partner bonus will be awarded if the training partner's weapon rank in the weapon the unit trains in is equal or higher than the unit's. Additionally, if a unit's partner has a higher weapon rank than the unit themself, they will be granted an additional +2 class experience per rank, with "+" weapon ranks counting as a full rank.
- A unit is granted 10 additional points of class experience if they train in one of their preferred classes. Preferred classes are marked by a blue arrow on the class selection screen.
- Battle suggestions may increase the amount of class experience gained, though the amount it increases by varies.
Additionally, the units in each slot are randomly given a rating. The rating applies a multiplier to the total amount of class experience gained. The ratings and multipliers are as follows:
| Ratings | |
|---|---|
| Rating | Multiplier |
| Nice | ×1 |
| Great | ×1.5 |
| Perfect | ×2 |
Additionally, if applicable, units will gain support points with their training partners.
Level Up/Reset
The Level Up/Reset feature allows players to increase or lower a unit's level. To level up, the player needs to pay a certain amount of gold, with the exact amount depending on the level the unit is raised to (with higher levels having a higher gold cost) and the amount of experience the unit needs until their next level up. Facility upgrades allow the player to drop the price of level ups by up to 20%. Units cannot be raised past the highest level a unit in the player's army has achieved. If that unit's level is reset, and no other unit has achieved the same level, the highest level a unit can be raised to is lowered.
A unit can also be reset back to Level 1, even if they initially joined at a higher level. Doing so will decrease their stats accordingly, though stats gained through other means (such as stat boosters or survey spots) are kept. Resetting a unit's level will not grant the player any immediate benefits such as gold, though it can be used to reroll level ups.
Acquire Class
The "Acquire Class" feature is Three Hopes's version of class change. If a unit has mastered a prerequisite class, they will be able to use a seal item to class change into a class of a higher tier. A unit only needs to have achieved mastery of one prerequisite class to advance to a higher-tier class. Changing classes will also raise their weapon rank, and increase their authority level to the highest weapon rank they have achieved (excluding "+" weapon ranks).
| Class change options in Three Hopes | |||||||||
|---|---|---|---|---|---|---|---|---|---|
| Base class | Intermediate class | Advanced class | Master class | ||||||
(Shez only) |
(Shez only) | ||||||||
(Byleth only) |
(Byleth only) | ||||||||
(Rhea only) | |||||||||
(Dimitri only) |
(Dimitri only) | ||||||||
(Jeritza only) | |||||||||
(Edelgard only) |
(Edelgard only) | ||||||||
(Claude only) |
(Claude only) | ||||||||
Mock Battle
The "Mock Battle" feature will take the player into a battle where they can choose two of their units and face off against Level 1 opponents. The enemies will cycle between the four beginner classes, with the order being as follows:
Enemy Fighters will always wield axes. Player units will not gain experience points by defeating enemies at the training grounds and although damage numbers are displayed, player units will never take damage by any means, be it through enemy attacks or because of a weapon such as the Devil Sword. The player can freely swap their deployed units out through the pause menu.
Training Instructor upgrades
| Training Instructor upgrades | ||||
|---|---|---|---|---|
| Upgrade | Effect | Gold cost | Materials | Requirements |
| Install a Training Dummy | Increase training slots to 4. | 500 | Crude Building Material (×10) | — |
| Install Another Training Dummy | Increase training slots to 5. | 1,000 | Basic Building Material (×10) Recruit Training Gear (×10) |
Install a Training Dummy |
| Install Yet Another Training Dummy | Increase training slots to 6. | 1,500 | Quality Building Material (×10) Veteran Training Gear (×10) |
Install Another Training Dummy |
| Install the Final Training Dummy | Increase training slots to 7. | 2,000 | Lavish Building Material (×10) Elite Training Gear (×10) |
Install Yet Another Training Dummy |
| Install the Actual Final Training Dummy | Increase training slots to 8. | 2,000 | Lavish Building Material (×10) Elite Training Gear (×10) |
Install the Final Training Dummy |
| Advanced Class Certification Exam | Allows units to obtain Advanced-tier classes. | 1,500 | Quality Building Material (×10) Veteran Training Gear (×10) |
Install a Training Dummy |
| Master Class Certification Exam | Allows units to obtain Master-tier classes. | 2,000 | Lavish Building Material (×10) Elite Training Gear (×10) |
Advanced Class Certification Exam |
| Procure Better Training Weapons | Slightly reduces leveling up costs. | 1,000 | Basic Building Material (×10) Recruit Training Gear (×10) |
Install a Training Dummy |
| Procure Finer Training Equipment | Modestly reduces leveling up costs. | 1,500 | Quality Building Material (×10) Veteran Training Gear (×10) |
Procure Better Training Weapons |
| Tutor Training Personnel | Greatly reduces leveling up costs. | 2,000 | Lavish Building Material (×10) Elite Training Gear (×10) |
Procure Finer Training Equipment |
| Order Training Swords | Slightly increases Class EXP gain for sword classes while spending Training Points. | 1,000 | Basic Building Material (×10) Recruit Training Gear (×10) |
Procure Better Training Weapons |
| Special-Order Training Swords | Greatly increases Class EXP gain for sword classes while spending Training Points. | 1,500 | Quality Building Material (×10) Veteran Training Gear (×10) |
Order Training Swords |
| Order Training Lances | Slightly increases Class EXP gain for lance classes while spending Training Points. | 1,000 | Basic Building Material (×10) Recruit Training Gear (×10) |
Procure Better Training Weapons |
| Special-Order Training Lances | Greatly increases Class EXP gain for lance classes while spending Training Points. | 1,500 | Quality Building Material (×10) Veteran Training Gear (×10) |
Order Training Lances |
| Order Training Axes | Slightly increases Class EXP gain for axe classes while spending Training Points. | 1,000 | Basic Building Material (×10) Recruit Training Gear (×10) |
Procure Better Training Weapons |
| Special-Order Training Axes | Greatly increases Class EXP gain for axe classes while spending Training Points. | 1,500 | Quality Building Material (×10) Veteran Training Gear (×10) |
Order Training Axes |
| Order Training Bows | Slightly increases Class EXP gain for bow classes while spending Training Points. | 1,000 | Basic Building Material (×10) Recruit Training Gear (×10) |
Procure Better Training Weapons |
| Special-Order Training Bows | Greatly increases Class EXP gain for bow classes while spending Training Points. | 1,500 | Quality Building Material (×10) Veteran Training Gear (×10) |
Order Training Bows |
| Order Training Gauntlets | Slightly increases Class EXP gain for brawling classes while spending Training Points. | 1,000 | Basic Building Material (×10) Recruit Training Gear (×10) |
Procure Better Training Weapons |
| Special-Order Training Gauntlets | Greatly increases Class EXP gain for brawling classes while spending Training Points. | 1,500 | Quality Building Material (×10) Veteran Training Gear (×10) |
Order Training Gauntlets |
| Order Training Tomes | Slightly increases Class EXP gain for tome classes while spending Training Points. | 1,000 | Basic Building Material (×10) Recruit Training Gear (×10) |
Procure Better Training Weapons |
| Special-Order Training Tomes | Greatly increases Class EXP gain for tome classes while spending Training Points. | 1,500 | Quality Building Material (×10) Veteran Training Gear (×10) |
Order Training Tomes |
Tactics Instructor

The rewards master is a Noble who can be found in the southern area of the base camp after Chapter 5 has been completed on any route. When interacting with him, the player can choose to spend gold in exchange to upgrades to a unit, such as an additional Warrior Gauge, or an improvement to their personal abilities. Tactics only become available once the respective facility upgrade has been purchased.
Tactics can be learned either in individual sessions for each unit, or in group sessions. The Tactics Instructor is not limited to the player's current roster, and will allow even for other route's characters as long as they have been unlocked in New Game +.
Tactics Academy upgrades
| Tactics Academy upgrades | ||||
|---|---|---|---|---|
| Upgrade | Effect | Gold cost | Materials | Requirements |
| Research Basic Multi-Opponent Battle Tactics | Allows units to be able to obtain a second Warrior Gauge. | 1,000 | Beginner Combat Manual (×10) | — |
| Research Advanced Multi-Opponent Battle Tactics | Allows units to be able to obtain a third Warrior Gauge. | 2,000 | Lavish Building Material (×10) Advanced Combat Manual (×10) |
Research Basic Multi-Opponent Battle Tactics |
| Discover Hidden Potential | Allows units to increase their stat caps and level cap. | 2,000 | Lavish Building Material (×10) Advanced Combat Manual (×10) |
Research Advanced Multi-Opponent Battle Tactics |
| Research Medical Arts | Allows units to be able to upgrade from Vulneraries to Concoctions. | 1,000 | Basic Building Material (×10) Beginner Combat Manual (×10) |
Research Basic Multi-Opponent Battle Tactics |
| Research Advanced Medical Arts | Allows units to be able to upgrade from Concoctions to Elixirs. | 2,000 | Lavish Building Material (×10) Advanced Combat Manual (×10) |
Research Medical Arts |
| Learn Introductory First Aid | Allows units to be able to use potions more often (increases recovery item uses to 3). | 1,000 | Basic Building Material (×10) Beginner Combat Manual (×10) |
Research Basic Multi-Opponent Battle Tactics |
| Learn Intermediate First Aid | Allows units to be able to use potions more often (increases recovery item uses to 4). | 1,500 | Quality Building Material (×10) Standard Combat Manual (×10) |
Learn Introductory First Aid |
| Learn Advanced First Aid | Allows units to be able to use potions more often (increases recovery item uses to 5). | 1,500 | Lavish Building Material (×10) Advanced Combat Manual (×10) |
Learn Intermediate First Aid |
| Research Practical Combat Basics | Allows units to be able to have 6 Ability slots. | 1,000 | Basic Building Material (×10) Beginner Combat Manual (×10) |
Research Basic Multi-Opponent Battle Tactics |
| Research Intermediate Practical Combat | Allows units to be able to have 8 Ability slots. | 1,500 | Quality Building Material (×10) Standard Combat Manual (×10) |
Research Practical Combat Basics |
| Research Expert Practical Combat | Allows units to be able to have 10 Ability slots. | 2,000 | Lavish Building Material (×10) Advanced Combat Manual(×10) |
Research Intermediate Practical Combat |
| Research Efficient Training | Allows units to raise their Unique Action Ability to Lv 2. | 1,500 | Quality Building Material (×10) Standard Combat Manual (×10) |
Research Practical Combat Basics |
| Research Optimal Training | Allows units to raise their Unique Action Ability to Lv 3. | 2,000 | Lavish Building Material (×10) Advanced Combat Manual (×10) |
Research Efficient Training |
| Research Efficient Enlightenment | Allows units to raise their Unique Support Ability to Lv 2. | 1,500 | Quality Building Material (×10) Standard Combat Manual (×10) |
Research Practical Combat Basics |
| Research Optimal Enlightenment | Allows units to raise their Unique Support Ability to Lv 3. | 2,000 | Lavish Building Material (×10) Advanced Combat Manual (×10) |
Research Efficient Enlightenment |
| Tactical Thinking | Allows units to raise their Unique Tactical Ability to Lv 2. | 1,500 | Quality Building Material (×10) Standard Combat Manual (×10) |
Research Practical Combat Basics |
| Advanced Tactical Thinking | Allows units to raise their Unique Tactical Ability to Lv 3. | 2,000 | Lavish Building Material (×10) Advanced Combat Manual (×10) |
Tactical Thinking |
| Research General Crestology | Allows Crest-bearing units to raise their Crest effects to Lv 2. | 1,500 | Quality Building Material (×10) Standard Combat Manual (×10) |
Research Practical Combat Basics |
| Research Advanced Crestology | Allows Crest-bearing units to raise their Crest effects to Lv 3. | 2,000 | Lavish Building Material (×10) Advanced Combat Manual (×10) |
Research General Crestology |
List of Tactics Academy courses
| Tactics Academy courses | |||
|---|---|---|---|
| Upgrade | Effect | Gold cost | Requirements |
| Increase Warrior Gauge 1 | Adds a second Warrior Gauge. | 500 | Research Basic Multi-Opponent Battle Tactics |
| Increase Warrior Gauge 2 | Adds a third Warrior Gauge. | 1,500 | Research Advanced Multi-Opponent Battle Tactics Increase Warrior Gauge 1 |
| Enhance Unique Action Ability 1 | Increases the unit's Unique Action Ability to Level 2. | 1,000 | Research Efficient Training |
| Enhance Unique Action Ability 2 | Increases the unit's Unique Action Ability to Level 3. | 1,500 | Research Optimal Training Enhance Unique Action Ability 1 |
| Enhance Unique Support Ability 1 | Increases the unit's Unique Support Ability to Level 2. | 1,000 | Research Efficient Enlightenment |
| Enhance Unique Support Ability 2 | Increases the unit's Unique Support Ability to Level 3. | 1,500 | Research Optimal Enlightenment Enhance Unique Support Ability 1 |
| Enhance Unique Tactical Ability 1 | Increases the unit's Unique Tactical Ability to Level 2. | 1,000 | Tactical Thinking |
| Enhance Unique Tactical Ability 2 | Increases the unit's Unique Tactical Ability to Level 3. | 1,500 | Advanced Tactical Thinking Enhance Unique Tactical Ability 1 |
| Research New Recovery Items 1 | Allows the unit to use Concoctions in battle. | 500 | Research Medical Arts |
| Research New Recovery Items 2 | Allows the unit to use Elixirs in battle. | 1,500 | Research Advanced Medical Arts Research New Recovery Items 1 |
| Increase Recovery Item Uses 1 | Allows the unit to use recovery items up to 3 times in battle. | 500 | Learn Introductory First Aid |
| Increase Recovery Item Uses 1 | Allows the unit to use recovery items up to 3 times in battle. | 500 | Learn Introductory First Aid |
| Increase Recovery Item Uses 2 | Allows the unit to use recovery items up to 4 times in battle. | 1,000 | Learn Intermediate First Aid Increase Recovery Item Uses 1 |
| Increase Recovery Item Uses 3 | Allows the unit to use recovery items up to 5 times in battle. | 1,500 | Learn Advanced First Aid Increase Recovery Item Uses 2 |
| Increase Ability Slots 1 | Allows the unit to equip up to 6 abilities. | 500 | Research Practical Combat Basics |
| Increase Ability Slots 2 | Allows the unit to equip up to 8 abilities. | 1,000 | Research Intermediate Practical Combat Increase Ability Slots 1 |
| Increase Ability Slots 3 | Allows the unit to equip up to 10 abilities. | 1,500 | Research Expert Practical Combat Increase Ability Slots 2 |
| Raise Crest Level 1 | Increases the trigger rate or effect of a unit's crest.For units with multiple crests, applies to all crests at once. | 1,000 | Research General Crestology |
| Raise Crest Level 2 | Greatly increases the trigger rate or effect of a unit's crest.For units with multiple crests, applies to all crests at once. | 1,500 | Research Advanced Crestology Raise Crest Level 1 |
| Increase Stat Limits | Increases HP cap to 12,000 and all other stats' caps to 120. | 1,500 | Discover Hidden Potential |
Blacksmith
- Main article:
Forge

The Blacksmith is a Brawler who is located in the south east of the base camp after Chapter 4 of any route has been completed. Talking to him will allow the player to forge their weapons.
Weapons can be forged to increase their might and durability, with the gold cost depending on how often the weapon has been forged already. Additionally, a specific amount of ores is required for forging, which the type of ore depending on the weapon. Initially, each weapon has its own limit on how often it can be forged. This limit depends on the weapon's quality, and is not consistent between items of the same type. When a weapon has been forged to its maximum, the player may either reset its level, removing all of its forges but increasing the maximum amount of times it can be forged, or reforge the item.
All items can be reforged into a stronger version of themselves after they have been forged at least ten times, increasing the maximum amount of forges by 5 for each of might and durability (for a total of 10). Additionally, certain weapons can be reforged into stronger weapons (e.g. an Iron Sword can be forged into a Steel Sword. Doing so will reset all forges on the sword.
Each weapon can be forged up to 100 times, with up to 50 increases to each of might and durability.
Blacksmith upgrades
| Blacksmith upgrades | ||||
|---|---|---|---|---|
| Upgrade | Effect | Gold cost | Materials | Requirements |
| Provide Better Smithing Equipment | 10% discount on using Blacksmith | 1,000 | Basic Building Material (×10) Apprentice Smithing Set (×10) |
— |
| Review Smithing Process | 15% discount on using Blacksmith | 1,500 | Quality Building Material (×10) Artisan Smithing Set (×10) |
Provide Better Smithing Equipment |
| Improve Smithing Fuel | 20% discount on using Blacksmith | 2,000 | Lavish Building Material (×10) Master Smithing Set (×10) |
Review Smithing Process |
| Learn Introductory Blacksmithing | Rank D weapons can be repaired | 1,000 | Basic Building Material (×10) Apprentice Smithing Set (×10) |
Provide Better Smithing Equipment |
| Learn Intermediate Blacksmithing | Rank C weapons can be repaired | 1,500 | Quality Building Material (×10) Artisan Smithing Set (×10) |
Learn Introductory Blacksmithing |
| Learn Advanced Blacksmithing | Rank B weapons can be repaired | 2,000 | Lavish Building Material (×10) Master Smithing Set (×10) |
Learn Intermediate Blacksmithing |
| Learn Master Blacksmithing | Rank A weapons can be repaired | 2,000 | Lavish Building Material (×10) Master Smithing Set (×10) |
Learn Advanced Blacksmithing |
| Improve Forge Structure | Rank D weapons can be reforged | 1,500 | Quality Building Material (×10) Artisan Smithing Set (×10) |
Learn Introductory Blacksmithing |
| Improve Forge Materials | Rank C weapons can be reforged | 1,500 | Quality Building Material (×10) Artisan Smithing Set (×10) |
Improve Forge Structure |
| Improve Bellows | Rank B weapons can be reforged | 2,000 | Lavish Building Material (×10) Master Smithing Set (×10) |
Improve Forge Materials |
| Improve Bellows | Rank A weapons can be reforged | 2,000 | Lavish Building Material (×10) Master Smithing Set (×10) |
Improve Bellows |
| Research Crest-Based Smithing Technique | Allows unleashing of hidden attributes of Heroes' Relics and Sacred Weapons | 2,000 | Lavish Building Material (×10) Master Smithing Set (×10) |
Improve Forge Materials |
| Forge Heavier Hammer | +1 additional might per forge from forging. | 1,000 | Basic Building Material (×10) Apprentice Smithing Set (×10) |
Provide Better Smithing Equipment |
| Forge Larger Hammer | +2 additional might from forging. | 1,500 | Quality Building Material (×10) Artisan Smithing Set (×10) |
Forge Heavier Hammer |
| Forge Sturdier Hammer | +3 additional might from forging. | 2,000 | Lavish Building Material (×10) Master Smithing Set (×10) |
Forge Larger Hammer |
| Forge Sturdier Anvil | +1 additional durability from forging. | 1,000 | Basic Building Material (×10) Apprentice Smithing Set (×10) |
Provide Better Smithing Equipment |
| Forge Smoother Anvil | +2 additional durability from Forging. | 1,500 | Quality Building Material (×10) Artisan Smithing Set (×10) |
Forge Sturdier Anvil |
| Forge Higher Quality Anvil | +3 additional durability from forging. | 2,000 | Lavish Building Material (×10) Master Smithing Set (×10) |
Forge Smoother Anvil |
Recreation
The recreation quarter is located south of Shez's personal quarters. The following facilities are part of the recreation quarter:
Kitchen Master
The kitchen master is a commoner who can be found in the Recreation Quarter. The player can choose up to two allies to share a meal with, increasing the support level between the three units. Some pairs have special dialogues between each other when sharing a meal.
Only units who are currently present in the base camp are available for sharing meals. Additionally, only allies who have not been invited since the last completed battle (excluding Record Keeper battles) can be invited. If no allies are available, cooking becomes unavailable.
Each unit has their own set of liked and disliked dishes. Wether a unit likes a dish or not influences the amount of support points gained.
Each dish requires specific ingredients, and has its own benefits for the player. All benefits last for the rest of the current chapter. The player can have up to five different meal effects at once, with stronger effects of the same type overwriting weaker ones.
Initially, not every dish can be cooked. Instead, the player has to unlock receipes from survey spots or facility upgrades.
List of dishes
| List of dishes | |||
|---|---|---|---|
| Dish | Ingredients | Effects | Description |
| Small Fish Skewers | Airmid Goby (×1) | Slightly fills Awakening Gauge at start of battle. | Made by grilling skewered Airmid gobies. With a muddy flavour and dry texture, this dish is beloved by few. |
| Fried Crayfish | Caledonian Crayfish (×2) | Slightly fills Warrior Gauge at start of battle. | Breaded and fried Caledonian crayfish. Looks much tastier than it actually is. |
| Grilled Herring | Albinean Herring (×1) Turnip (×1) |
Awakening Gauge fills slightly faster. | Herring caught off the coast of Albinea, shredded and grilled in an earthenware pot with sliced turnips. |
| Saghert and Cream | Peach Currant (×1) Noa Fruit (×1) |
Warrior Gauge fills slightly faster. | A baked confection coated with Noa fruit crea, and a currant reduction, often enjoyed as a dessert at family gatherings. |
| Cabbage amd Herring Stew | Albinean Herring (×1) Cabbage (×1) |
Weapon durability loss slightly reduced. | Cabbage and Albinean herring stewed whole. The fish guts lend this hearty dish a superbly bitter kick. |
| Peach Sorbet | Peach Currant (×1) Chickpeas (×1) |
Slightly fills Awakening Gauge at start of battle. | Magically frozen peach currants are shaved to create this simple sorbet. Typically dusted with bean flour just before serving. |
| Derdriu Style Fried Pheasant | Poultry (×1) Carrot (×1) |
Slightly fills Awakening Gauge at start of battle. Slightly fills Warrior Gauge at start of battle. |
Pheasant meat is pounded flat and fried. Can be served as a sort of sandwich, with cheese between two strips of meat. |
| Grilled Beast Meat | Wild Game (×1) Noa Fruit (×1) |
Slightly fills Awakening Gauge at start of battle. Awakening Gauge fills slightly faster. |
A dish that tastes like the wilderness. Thick slices of meat covered with Noa fruit and grilled on a hotplate. |
| Sweet and Salty Whitefish Sauté | Teutates Loach (×1) Tomato (×1) |
Slightly fills Awakening Gauge at start of battle. Weapon durability loss slightly reduced. |
Whitefish that has been coated in spices and sautéed with dried tomatoes to bring out an addictive salty-sweet flavour. |
| Fish and Bean Soup | White Trout (×1) Chickpeas (×1) |
Slightly fills Warrior Gauge at start of battle. Awakening Gauge fills slightly faster. |
A soup made by simmering white trout and chickpeas. A simple yet wholesome dish. |
| Onion Gratin Soup | White Trout (×1) Onion (×1) |
Slightly fills Warrior Gauge at start of battle. Warrior Gauge fills slightly faster. |
Onions stewed with white trout and baked with a layer of cheese on top. Will warm you up from the inside out. |
| Super-Spicy Fish Meatballs | White Trout (×1) Tomato (×1) |
Awakening Gauge fills slightly faster. Warrior Gauge fills slightly faster. |
A light snack, popular in the Empire. Small, spicy balls of fried dough packed with white trout and dried tomato. |
| Garreg Mach Meat Pie | Wild Game (×1) Tomato (×1) |
Awakening Gauge fills slightly faster. Weapon durability loss slightly reduced. |
A crispy, golden-brown pie packed with tomatoes, cheese, and tender chunks of meat. |
| Pickled Rabbit Skewers | Wild Game (×1) Carrot (×1) |
Warrior Gauge fills slightly faster. Weapon durability loss slightly reduced. |
Hunks of rabbit meat are pickled in bacchus, skewered, and roasted over an open flame to create this flavourful dish. |
| Spicy Fish and Turnip Stew | Teutates Loach (×1) Turnip (×1) |
Slightly fills Awakening Gauge at start of battle. Warrior Gauge fills slightly faster. |
Spicy stew made with Teutates loach and turnips. This recipe features spices from Dagda. |
| Fisherman's Bounty | White Trout (×1) Teutates Loach (×1) |
Slightly fills Warrior Gauge at start of battle. Weapon durability loss slightly reduced. |
Freshly caught fish are cut into chunks and stewed together to make thius hearty dish. |
| Sautéed Jerky | Poulty (×1) Chickpeas (×1) |
Somewhat fills Warrior Gauge at start of battle. Awakening Gauge fills slightly faster. |
Aged jerky that has been sautéed for a delightfully salty flavour. A perfect snack to go with your favourite drink. |
| Daphnel Stew | Poultry (×1) Onion (×1) |
Somewhat fills Warrior Gauge at start of battle. Warrior Gauge fills slightly faster. |
Minced poultry and onions boiled with salt. The simple recipe lets high-quality ingredients speak for themselves. |
| Sautéed Pheasant and Eggs | Poultry (×1) Cabbage (×1) |
Weapon durability loss somewhat reduced. Slightly fills Warrior Gauge at start of battle. |
Thin slices of bird meat and shredded cabbage, mixed with scrambled eggs and sautéed with spices. Invention of a certain noble. |
| Gautier Cheese Gratin | Poultry (×1) Noa Fruit (×1) |
Awakening Gauge fills somewhat faster. Warrior Gauge fills slightly faster. |
A gratin of bird meat topped with heaps of Gautier cheese, which is famous for its low fat content. It has a unique flavour. |
| Fruit and Herring Tart | Albinean Herring (×1) Noa Fruit (×1) |
Awakening Gauge fills somewhat faster. Weapon durability loss slightly reduced. |
A baked tart with stewed herring and Noa fruit mixed into the batter. Popular in Enbarr, the Imperial Capital. |
| Vegetable Pasta Salad | Cabbage (×1) Onion (×1) Carrot (×1) |
Weapon Gauge fills somewhat faster. Weapon durability loss slightly reduced. |
Pasta with a blend of fresh vegetables from various regions of Fódlan. This popular dish sells out almost instantly. |
| Vegetable Stir-Fry | Tomato (×1) Chickpeas (×1) Cabbage (×1) |
Warrior Gauge fills somewhat faster. Slightly fills Awakening Gauge at start of battle. |
A dish of dried tomatoes, cabbage, chickpeas, and other vegetables, stir-fried with eggs. Nutritious and very filling. |
| Gronder Meat Skewers | Wild Game (×1) Onion (×1) |
Greatly fills Awakening Gauge at start of battle. | Fatty hunks of Gronder fox cooked slowly on skewers. The meat is magically aged for a full flavour. |
| Fish Sandwich | Airmid Pike (×1) Cabbage (×1) |
Greatly fills Warrior Gauge at start of battle. | A simple dish of vinegar-pickled Airmid pike and cabbage served between two slices of bread. |
| Bourgeois Pike | Airmid Pike (×2) Carrot (×1) |
Awakening Gauge fills much faster. | A gourmet fish dish with Airmid pike, vegetables, and a sprinkle of expensive spices. Popular among nobles. |
| Sweet Bun Trio | Albinean Berries (×1) Noa Fruit (×1) |
Warrior Gauge fills much faster. | Traditional pastries from Faerghus, known for their subtle sweetness. The dough is made with eggs and sugar. |
| Country-Style Red Turnip Plate | Verona (×1) Turnip (×1) |
Weapon durability loss greatly reduced. | A balanced meal featuring red turnip and verona stew, red turnip salad, and sautéed red turnip with garlic. |
| Pickled Seafood and Vegetables | Caledonian Gar (×1) Turnip (×1) |
Somewhat fills Warrior Gauge at start of battle. Warrior Gauge fills somewhat faster. |
A Dagdan dish of raw fish and turnips pickled in a vinegar-based seasoning liquid. Rarely eaten in Fódlan. |
| Cheesy Verona Stew | Teutates Loach (×1) Verona (×1) |
Warrior Gauge fills somewhat faster. Weapon durability loss somewhat reduced. |
A rich dish consisting of verona and sautéed Teutates loach. These ingredients are boiled and served with two kinds of melted cheese. |
| Two-Fish Sauté | Caledonian Gar (×1) Albinean Herring (×1) |
Awakening Gauge fills somewhat faster. Warrior Gauge fills somewhat faster. |
Two types of fish are cut into stripes and sautéed in butter. This lavish meal hails from Enbarr, the Imperial Capital. |
| Roast Pheesant with Berry Sauce | Poultry (×1) Albinean Berries (×1) |
Weapon durability loss somewhat reduced. Awakening Gauge fills somewhat faster. |
Well-roasted Fódlan pheasant drizzled with a berry reduction sauce. |
Chore Master
The Chore Master is a Monk located south of the kitchen. At the chore master, the player can choose up to two other units to volunteer with. Doing so will grant the units support points with each other. The amount of support points gained varies depending on the result. Additionally, all units who participate gain one morale level. Additionally, some pairs have special dialogue while volunteering. Some pairs also have a short conversation after volunteering.
Only units who are currently present in the base camp are available for volunteering. Additionally, only allies who have not volunteered since the last completed battle (excluding Record Keeper battles) can be invited. If no allies are available, volunteering becomes unavailable.
The result of the chore is random, though wether the units selected are good at the chosen chore will influence the odds of getting a good result.
| Possible results and rewards | |
|---|---|
| Result | Reward |
| Nice | 1 Renown |
| Great | 2 Renown |
| Perfect | 2 Renown A random flower-type gift |
Recreation upgrades
| Recreation upgrades | ||||
|---|---|---|---|---|
| Upgrade | Effect | Gold cost | Materials | Requirements |
| Buy Basic Cooking Utensils | Slightly expands the number of dishes for cooking. | 500 | Crude Building Material (×10) | — |
| Buy Specialty Cooking Utensils | Expands the number of dishes for cooking. | 1,500 | Quality Building Material (×10) Basic Furnishings (×10) |
Buy Basic Cooking Utensils |
| Buy the Latest Cooking Utensils | Greatly expands the number of dishes for cooking. | 2,000 | Lavish Building Material (×10) Luxurious Furnishings (×10) |
Buy Specialty Cooking Utensils |
| Learn Basic Culinary Arts | Slightly increases the chance of successful cooking. | 500 | Basic Building Material (×10) Humble Furnishings (×10) |
Buy Basic Cooking Utensils |
| Learn Intermediate Culinary Arts | Increases the chance of successful cooking. | 1,500 | Quality Building Material (×10) Basic Furnishings (×10) |
Learn Basic Culinary Arts |
| Learn Advanced Culinary Arts | Greatly increases the chance of successful cooking. | 2,000 | Lavish Building Material (×10) Luxurious Furnishings (×10) |
Learn Intermediate Culinary Arts |
| Learn the Basics of Cleaning | Slightly increases the chance of successful volunteering. | 500 | Basic Building Material (×10) Humble Furnishings (×10) |
Buy Basic Cooking Utensils |
| Learn the Basics of Organising | Increases the chance of successful volunteering. | 1,500 | Quality Building Material (×10) Basic Furnishings (×10) |
Learn the Basics of Cleaning |
| Learn the Basics of Teamwork | Greatly increases the chance of successful volunteering. | 2,000 | Lavish Building Material (×10) Luxurious Furnishings (×10) |
Learn the Basics of Organising |
| Survey Wooded Surroundings | Forest is unlocked for Expeditions. | 1,000 | Basic Building Material (×10) Humble Furnishings (×10) |
Learn the Basics of Cleaning |
| Survey Wet Surroundings | Waterfront is unlocked for Expeditions. | 1,500 | Quality Building Material (×10) Basic Furnishings (×10) |
Survey Wooded Surroundings |
| Survey High-Altitude Surroundings | Mountains is unlocked for Expeditions. | 2,000 | Lavish Building Material (×10) Luxurious Furnishings (×10) |
Survey Wet Surroundings |
Armoury
The armourer is a Commoner who can be found next to the blacksmith. Talking to her will allow the player to buy items and to sell items and accessories.
The following items can be bought at the armourer:
| Armoury | ||||
|---|---|---|---|---|
| Icon | Weapon | Type | Quality | Gold cost |
| Iron Sword | Sword | E | 500 | |
| Steel Sword | Sword | D | 1,000 | |
| Silver Sword | Sword | B | 2,000 | |
| Killing Edge | Sword | C | 1,500 | |
| Iron Lance | Lance | E | 500 | |
| Steel Lance | Lance | D | 1,000 | |
| Silver Lance | Lance | B | 2,000 | |
| Killer Lance | Lance | C | 1,500 | |
| Iron Axe | Axe | E | 500 | |
| Steel Axe | Axe | D | 1,000 | |
| Silver Axe | Axe | B | 2,000 | |
| Killer Axe | Axe | C | 1,500 | |
| Iron Bow | Bow | E | 500 | |
| Steel Bow | Bow | D | 1,000 | |
| Silver Bow | Bow | B | 2,000 | |
| Killer Bow | Bow | C | 1,500 | |
| Iron Gauntlets | Gauntlets | E | 500 | |
| Steel Gauntlets | Gauntlets | D | 1,000 | |
| Silver Gauntlets | Gauntlets | B | 2,000 | |
| Killer Knuckles | Gauntlets | C | 1,500 | |
| Iron Tome | Tome | E | 500 | |
| Steel Tome | Tome | D | 1,000 | |
| Silver Tome | Tome | B | 2,000 | |
| Killer Tome | Tome | C | 1,500 | |
Item Shopkeeper

The Item Shopkeeper is a Commoner who can be found at the Marketplace, next to the Battalion Guild. Interacting with him will allow the player to buy and sell items.
The following items can be bought at the Item Shopkeeper:
| Armoury | ||||
|---|---|---|---|---|
| Icon | Item | Type | Stock | Gold cost |
| Intermediate Seal | Seal | 20 | 600 | |
| Advanced Seal | Seal | 10 | 2,000 | |
| Master Seal | Seal | 3 | 4,500 | |
| Floral Adornment | Gift | 5 | 350 | |
| Fishing Float | Gift | 5 | 350 | |
| Tasty Baked Treat | Gift | 5 | 350 | |
| Gemstone Beads | Gift | 5 | 350 | |
| Smoked Meat | Gift | 5 | 350 | |
| Hunting Dagger | Gift | 5 | 700 | |
| Watering Can | Gift | 5 | 700 | |
| Stylish Hair Clip | Gift | 5 | 700 | |
| Dapper Handkerchief | Gift | 5 | 700 | |
| Armored Bear Stuffy | Gift | 5 | 1,050 | |
| Training Weight | Gift | 5 | 1,050 | |
| Book of Sheet Music | Gift | 5 | 1,050 | |
| Arithmetic Textbook | Gift | 5 | 1,050 | |
| The History of Fódlan | Gift | 5 | 1,050 | |
| Riding Boots | Gift | 5 | 1,050 | |
| Tea Leaves | Gift | 5 | 1,050 | |
| Legends of Chivalry | Gift | 5 | 1,050 | |
| Monarch Studies Book | Gift | 5 | 1,050 | |
| Goddess Statuette | Gift | 5 | 1,050 | |
| Ancient Coin | Gift | 5 | 1,050 | |
| Pitcher Plant | Gift | 5 | 1,050 | |
| Sunflower | Gift | 5 | 1,050 | |
| Violet | Gift | 5 | 1,050 | |
| Lavender | Gift | 5 | 1,050 | |
| Daffodil | Gift | 5 | 1,050 | |
| Rose | Gift | 5 | 1,050 | |
| Forget-me-nots | Gift | 5 | 1,050 | |
| Lily | Gift | 1,050 | ||
| Lily of the Valley | Gift | 5 | 1,050 | |
| Baby's Breath | Gift | 5 | 1,050 | |
| Anemone | Gift | 5 | 1,050 | |
| Carnation | Gift | 5 | 1,050 | |
| Whetstone | Gift | 5 | 1,400 | |
| Book of Crest Designs | Gift | 5 | 1,400 | |
| Blue Cheese | Gift | 5 | 1,400 | |
| Landscape Painting | Gift | 5 | 1,400 | |
| Exotic Spices | Gift | 5 | 1,400 | |
| Ceremonial Sword | Gift | 5 | 1,400 | |
| Board Game | Gift | 5 | 1,400 | |
| Coffee Beans | Gift | 5 | 1,400 | |
| Airmid Goby | Fish | 5 | 140 | |
| Caledonian Crayfish | Fish | 5 | 140 | |
| Albinean Herring | Fish | 5 | 140 | |
| White Trout | Fish | 5 | 560 | |
| Teutates Loach | Fish | 5 | 560 | |
| Caledonian Gar | Fish | 5 | 560 | |
| Wild Game | Meat | 5 | 280 | |
| Poultry | Meat | 5 | 560 | |
| Peach Currant | Fruit | 5 | 140 | |
| Chickpeas | Fruit | 5 | 140 | |
| Cabbage | Fruit | 5 | 140 | |
| Noa Fruit | Fruit | 5 | 280 | |
| Onion | Fruit | 5 | 280 | |
| Carrot | Fruit | 5 | 280 | |
| Turnip | Fruit | 5 | 280 | |
| Tomato | Fruit | 5 | 560 | |
| Verona | Fruit | 5 | 840 | |
| Albinean Berries | Fruit | 5 | 840 | |
Note: In the final chapter, all seals will become available in unlimited quantity.
Marketplace upgrades
| Marketplace upgrades | ||||
|---|---|---|---|---|
| Upgrade | Effect | Gold cost | Materials | Requirements |
| Expand Merchant Network | Adds more gifts to the Item Shopkeeper's wares. | 500 | Crude Building Material (×10) | — |
| Greatly Expand Merchant Network | Adds more gifts to the Item Shopkeeper's wares. | 1,500 | Quality Building Material (×10) Merchant's Licence (×10) |
Expand Merchant Network |
| Drastically Expand Merchant Network | Adds more gifts to the Item Shopkeeper's wares. | 2,000 | Lavish Building Material (×10) Purveyor's Licence (×10) |
Greatly Expand Merchant Network |
| Stockpile Some Goods | Adds more items to the Item Shopkeeper's wares. | 1,500 | Quality Building Material (×10) Merchant's Licence (×10) |
Greatly Expand Merchant Network |
| Stockpile Countless Goods | Adds more items to the Item Shopkeeper's wares. | 2,000 | Lavish Building Material (×10) Purveyor's Licence (×10) |
Stockpile Some Goods |
| Establish Rudimentary Luxuries Distribution | 10% discount when purchasing gifts. | 1,000 | Basic Building Material (×10) Sutler's Licence (×10) |
Expands Merchant Network |
| Establish Mid-Tier Luxuries Distribution | 20% discount when purchasing gifts. | 1,500 | Quality Building Material (×10) Merchant's Licence (×10) |
Establish Rudimentary Luxuries Distribution |
| Establish Highly-Efficient Luxuries Distribution | 30% discount when purchasing gifts. | 2,000 | Lavish Building Material (×10) Purveyor's Licence (×10) |
Establish Mid-Tier Luxuries Distribution |
| Solicit Lower-Grade Weapons Dealer | More weapons can be bought from the Armourer. | 1,000 | Basic Building Material (×10) Sutler's License (×10) |
Expands Merchant Network |
| Solicit Mid-Grade Weapons Dealer | Even more weapons can be bought from the Armourer. | 1,500 | Quality Building Material (×10) Merchant's Licence (×10) |
Solicit Lower-Grade Weapons Dealer |
| Solicit High-Grade Weapons Dealer | Even more weapons can be bought from the Armourer. | 2,000 | Lavish Building Material (×10) Purveyor's License (×10) |
Solicit Mid-Grade Weapons Dealer |
| Refurbish War Chest Cart Wheels | 5% more gold when winning a battle. | 1,000 | Basic Building Material (×10) Sutler's License (×10) |
Solicit Lower-Grade Weapons Dealer |
| Expand War Chest Cart Bed | 15% more gold when winning a battle. | 1,500 | Quality Building Material (×10) Merchant's License (×10) |
Refurbish War Chest Cart Wheels |
| Increase War Chest Cart Horses | 20% more gold when winning a battle. | 2,000 | Lavish Building Material (×10) Purveyor's License (×10) |
Expand War Chest Cart Bed |
| Solicit Lower-Grade Food Supplier | Adds Wild Game, Noa Fruit, Onion, Carrot, and Turnip ingredients | 1,000 | Basic Building Material (×10) Sutler's License (×10) |
Expand Merchant Network |
| Solicit Mid-Grade Food Supplier | Adds White Trout, Teutates Loach, and Poultry ingredients | 1,500 | Quality Building Material (×10) Merchant's License (×10) |
Solicit Lower-Grade Food Supplier |
| Solicit High-Grade Food Supplier | Adds Airmid Pike, Caledonian Gar, Verona, and Albinean Berries ingredients | 2,000 | Lavish Building Material (×10) Purveyor's Licence (×10) |
Solicit Mid-Grade Food Supplier |
| Establish Rudimentary Ingredient Distribution | 10% discount when purchasing foodstuffs. | 1,000 | Basic Building Material (×10) Sutler's Licence (×10) |
Solicit Lower-Grade Food Supplier |
| Establish Mid-Tier Ingredient Distribution | 20% discount when purchasing foodstuffs. | 1,500 | Quality Building Material (×10) Merchant's Licence (×10) |
Establish Rudimentary Ingredient Distribution |
| Establish Highly-Efficient Ingredient Distribution | 30% discount when purchasing foodstuffs. | 2,000 | Lavish Building Material (×10) Purveyor's Licence (×10) |
Establish Mid-Tier Ingredient Distribution |
Anna's Shop
In some chapters, Anna's shop will appear on the war map. From then on, Anna will move with her shop after every battle the player completes. By visiting the survey spot Anna landed on, the player can invite Anna to their base camp. For chapters where no survey spots are available, Anna will be available from the start.
Anna sells a variety of rare items, such as stat boosters, ores, or seals.
| Anna's Shop | |||
|---|---|---|---|
| Icon | Item | Stock | Gold cost |
| Intermediate Seal | 5 | 600 | |
| Advanced Seal | 3 | 2,000 | |
| Master Seal | 1 | 4,500 | |
| Fruit of Life | 1 | 1,500 | |
| Rocky Burdock | 1 | 1,500 | |
| Premium Magic Herbs | 1 | 1,500 | |
| Ailell Pomegranate | 1 | 1,500 | |
| Speed Carrot | 1 | 1,500 | |
| Miracle Bean | 1 | 1,500 | |
| Ambrosia | 1 | 1,500 | |
| White Verona | 1 | 1,500 | |
| Golden Apple | 1 | 1,500 | |
| Seraph Robe | 1 | 3,000 | |
| Energy Drop | 1 | 3,000 | |
| Spirit Dust | 1 | 3,000 | |
| Secret Book | 1 | 3,000 | |
| Speedwing | 1 | 3,000 | |
| Goddess Icon | 1 | 3,000 | |
| Giant Shell | 1 | 3,000 | |
| Talisman | 1 | 3,000 | |
| Black Pearl | 1 | 3,000 | |
| Smithing Stone | 3 | 100 | |
| Venomstone | 3 | 200 | |
| Black-Sand Steel | 3 | 400 | |
| Arcane Crystal | 3 | 400 | |
| Wootz Steel | 3 | 800 | |
| Agarthium | 3 | 800 | |
| Mythril | 3 | 1,200 | |
| Umbral Steel | 3 | 1,200 | |
Note: In the final chapter, all seals will become available in unlimited quantity. Stock for seals and ores will refreash every chapter, stock for stat-boosting items carries over for an entire playthrough, but is reset on New Game +.
Battalion Master

The Battalion Master is a female Archer who can be found to the east of the Control Centre, on the marketplace from Chapter 5 onwards. Interacting with her will allow the player to hire or dismiss battalions.
Scarlet Blaze Azure Gleam Golden Wildfire
| Icon | Battalion | Authority Level | Gold cost |
|---|---|---|---|
| Empire Infantry | E | 350 | |
| Empire Lance Co. | E | 350 | |
| Empire Warriors | E | 350 | |
| Empire Duelists | D | 525 | |
| Empire Cavalry | D | 525 | |
| Empire Armored Co. | D | 525 | |
| Empire Archers | D | 525 | |
| Empire Brawlers | D | 525 | |
| Empire Magic Corps | D | 525 | |
| Empire Veteran Duelists | C | 700 | |
| Empire Knights | C | 700 | |
| Empire Wyvern Co. | C | 700 | |
| Empire Snipers | C | 700 | |
| Empire Pugilists | C | 700 | |
| Empire Magic Users | C | 700 | |
| Empire Physickers | B | 875 | |
| Empire Pegasus Co. | B | 875 | |
| Empire Pavise Co. | B | 875 | |
| Empire Master Archers | B | 875 | |
| Empire Champions | B | 875 | |
| Empire Sages | B | 875 | |
| Empire Physicians | B | 875 | |
| Black Eagles Veteran Duelists | A | 1,050 | |
| Black Eagles Cavalry | A | 1,050 | |
| Black Eagles Wyvern Co. | A | 1,050 | |
| Black Eagles Archers | A | 1,050 | |
| Black Eagles Brawlers | A | 1,050 | |
| Black Eagles Magic Corps | A | 1,050 | |
| Black Eagles Preserves | A | 1,050 |
Battalion Guild upgrades
| Battalion Guild upgrades | ||||
|---|---|---|---|---|
| Upgrade | Effect | Gold cost | Materials | Requirements |
| Hold Simple Qualification Test | Adds authority level D battalions to be hired. | 1,000 | Basic Building Material (×10) Squire's Insignia (×10) |
— |
| Hold Middling Qualification Test | Adds authority level C battalions to be hired. | 1,500 | Quality Building Material (×10) Knight's Insignia (×10) |
Hold Simple Qualification Test |
| Hold Specialized Qualification Test | Adds authority level B battalions to be hired. | 1,500 | Quality Building Material (×10) Knight's Insignia (×10) |
Hold Middling Qualification Test |
| Hold Far-Too-Detailed Qualification Test | Adds authority level A battalions to be hired. | 2,000 | Lavish Building Material (×10) Hero's Insignia (×10) |
Hold Specialized Qualification Test |
| Loan Basic Battalion Equipment | 10% increase to endurance of hired battalions. | 1,000 | Basic Building Material (×10) Squire's Insignia (×10) |
Hold Simple Qualification Test |
| Loan General-Use Battalion Equipment | 20% increase to endurance of hired battalions. | 1,500 | Quality Building Material (×10) Knight's Insignia (×10) |
Loan Basic Battalion Equipment |
| Loan High-Quality Battalion Equipment | 30% increase to endurance of hired battalions. | 2,000 | Lavish Building Material (×10) Hero's Insignia (×10) |
Loan General-Use Battalion Equipment |
| Renovate the Encampment | Increases number of hireable battalions to 130. | 1,000 | Basic Building Material (×10) Squire's Insignia (×10) |
Hold Simple Qualification Test |
| Build Additional Housing | Increases number of hireable battalions to 160. | 1,500 | Quality Building Material (×10) Knight's Insignia (×10) |
Renovate the Encampment |
| Expand the Encampment | Increases number of hireable battalions to 250. | 2,000 | Lavish Building Material (×10) Hero's Insignia (×10) |
Build Additional Housing |
| Conduct Unskilled Negotiations | 10% discount when hiring battalions. | 1,000 | Basic Building Material (×10) Squire's Insignia (×10) |
Hold Simple Qualification Test |
| Conduct Competent Negotiations | 20% discount when hiring battalions. | 1,500 | Quality Building Material (×10) Knight's Insignia (×10) |
Conduct Unskilled Negotiations |
| Conduct Skilled Negotiations | 30% discount when hiring battalions. | 2,000 | Lavish Building Material (×10) Hero's Insignia (×10) |
Conduct Competent Negotiations |
Supply Master

The Supply Master is a female Commoner who can be found south of the Marketplace after Chapter 4 has been completed. Talking to her will allow the player to trade in weapons, accessories, ores, and materials for Smithing Stones, which in turn can be exchanged for ores and materials.
| Supply Master | ||
|---|---|---|
| Icon | Item | Smithing Stone cost |
| Venomstone | 5 | |
| Black-Sand Steel | 6 | |
| Arcane Crystal | 6 | |
| Wootz Steel | 7 | |
| Agarthium | 7 | |
| Mythril | 8 | |
| Umbral Steel | 8 | |
| Crude Building Material | 1 | |
| Basic Building Material | 4 | |
| Quality Building Material | 7 | |
| Lavish Building Material | 10 | |
| Recruit Training Gear | 4 | |
| Veteran Training Gear | 7 | |
| Elite Training Gear | 10 | |
| Beginner Combat Manual | 4 | |
| Standard Combat Manual | 7 | |
| Advanced Combat Manual | 10 | |
| Apprentice Smithing Set | 4 | |
| Artisan Smithing Set | 7 | |
| Master Smithing Set | 10 | |
| Humble Furnishings | 4 | |
| Basic Furnishings | 7 | |
| Luxurious Furnishings | 10 | |
| Sutler's License | 4 | |
| Merchant's License | 7 | |
| Purveyor's License | 10 | |
| Squire's Insignia | 4 | |
| Knight's Insignia | 7 | |
| Hero's Insignia | 10 | |
| Storage Bag | 4 | |
| Storage Chest | 4 | |
| Storage Compartment | 4 | |
If the Form a Supply Squad upgrade has been purchased, the supply master can also collect random ores, materials, and items while the player is doing battles. These items can be obtained by talking to the Supply Master and selecting the first option.
Supply Master upgrades
| Supply Master upgrades | ||||
|---|---|---|---|---|
| Upgrade | Effect | Gold cost | Materials | Requirements |
| Form a Supply Squad | Materials will be periodically collected (3 per battle). | 1,000 | Basic Building Material (×10) Storage Bag (×10) |
— |
| Expand the Supply Squad | Increases the amount of materials that are collected (to 5 per battle). | 1,500 | Quality Building Material (×10) Storage Chest (×10) |
Form a Supply Squad |
| Expand the Supply Squad Further | Further increases the amount of materials that are collected (to 7 per battle). | 2,000 | Lavish Building Material (×10) Storage Compartment (×10) |
Expand the Supply Squad |
| Expand the Supply Line | Adds Black-Sand Steel and Arcane Crystal tradable items. | 1,000 | Basic Building Material (×10) Storage Bag (×10) |
Form a Supply Squad |
| Further Expand the Supply Line | Adds Wootz Steel and Agarthium tradable items. | 1,500 | Quality Building Material (×10) Storage Chest (×10) |
Expand the Supply Line |
| Vastly Expand the Supply Line | Adds Mythril and Umbral Steel tradable items. | 2,000 | Lavish Building Material (×10) Storage Compartment (×10) |
Further Expand the Supply Line |
| Collect Some Surplus Goods | +1 Smithing Stone from base when trading in items. | 1,500 | Quality Building Material (×10) Storage Chest (×10) |
Expand the Supply Line |
| Collect Many Surplus Goods | +2 Smithing Stones from base when trading in items. | 2,000 | Lavish Building Material (×10) Storage Compartment (×10) |
Collect Some Surplus Goods |
| Research Standard Market Prices | −1 Smithing Stone from base when trading for items. | 1,500 | Quality Building Material (×10) Storage Chest (×10) |
Expand the Supply Line |
| Research Nonstandard Market Prices | −2 Smithing Stones from base when trading for items. | 2,000 | Lavish Building Material (×10) Storage Compartment (×10) |
Research Standard Market Price |
Other Activities
Supports
- Main article:
Support
Support Conversations are available through the base camp. Units gain support points with each other by performing various tasks together. If units have enough support points with each other, they will either gain a support rank immediately, or a support conversation will be unlocked. Unlike in the main Fire Emblem games, not every support rank has an associated conversations. Depending on the pair, each support caps out at a C, B, or A level. Every characer can reach at least a C level support with every other unit.
Gifts
Shez can gift their allies specific items to increase their morale and gain some support points. Each character has a specific set of gifts they especially like, but unlike in Fire Emblem: Three Houses, units cannot dislike a gift. If a unit likes a gift, they will gain more morale from a gift, and will gain more support points with Shez.
If a unit is given a gift for the first time, their preference will be saved, and if they especially like a gift, a small heart symbol will appear.
Expeditions
- Main article:
Expedition
From Chapter 6 onward, the player can invite any character they have at least support level C with to an expedition. Doing so will consume an activity point, but increases their support with the chosen ally and may increase their charm stat.
Sometimes, units may also be especially motivated for an expedition. If this is the case, if Shez asks them out for an expedition, they will gain more support points than usual. Only allies Shez has not yet reached an A support with and who are part of the current roster can ask Shez for expeditions. As the Gatekeeper's support level with Shez caps out at a C rank, this event can repeat indefinitely.
If Shez has no remaining activity points, expeditions will become unavailable, and allies will not be motivated for one.
Bonuses
The Bonuses menu can be accessed from the camp menu. From there, two kinds of bonuses can be obtained:
amiibo Presents
Each day, up to five amiibo can be scanned. Doing so will grant the player a randomly selected item. If the scanned amiibo is a Fire Emblem series amiibo, the bonus will be worth more and can include rare weapons such as a Sword of Zoltan.
Sava Data Bonuses
- Main article:
Data transfer § Fire Emblem Warriors: Three Hopes
If the player's Nintendo Switch has save data from Fire Emblem: Three Houses or Warriors, they can obtain some bonus resources by accessing the "Save Data Bonuses" section of the exploration menu. Both games give the same materials, and the player can access the rewards for both games once per save file, effectively doubling the rewards if the player has save data for both games:
| Item | |
|---|---|
| 5,000 G | |
| Smithing Stone ×50 | |
| Owl Feather ×5 |
Save Data Bonuses cannot be collected again, even on a New Game + playthrough.
Etymology and other languages
This section has been marked as a stub. Please help improve the page by adding information.
| Names, etymology, and in other regions | ||
|---|---|---|
| Language | Name | Definition, etymology, and notes |
| English |
Base camp |
-- |
| German |
Basislager |
Base camp |
Gallery
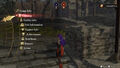
The menu in the base camp in Warriors: Three Hopes.

References
See also
| Fire Emblem Warriors: Three Hopes | ||||||||||||||||||||||||||||||||||||||
|---|---|---|---|---|---|---|---|---|---|---|---|---|---|---|---|---|---|---|---|---|---|---|---|---|---|---|---|---|---|---|---|---|---|---|---|---|---|---|
| ||||||||||||||||||||||||||||||||||||||